Table of Contents
This practical guide walks through how to install AI for Macbook. It organizes the required steps, settings, and checks so you can complete the task with fewer mistakes.
With AI, you can freely create your get works of art, from still images to simple videos. Depending on your abilities, Adobe Illustrator Can maximize its potential. this guide explains how to install AI for MacBook, the first step for you to master this software.
To install Adobe Illustrator, you first need to install the Adobe Creative Cloud toolkit for your device. from the official provider are the steps to download and install AI for your MacBook.
Check the Chip Type and Version of Your Macbook
To download the appropriate version of Adobe Creative Cloud, you need to check the chip information and MacBook version in the following way:
Step 1 : Open Apple Menu > About This Mac .
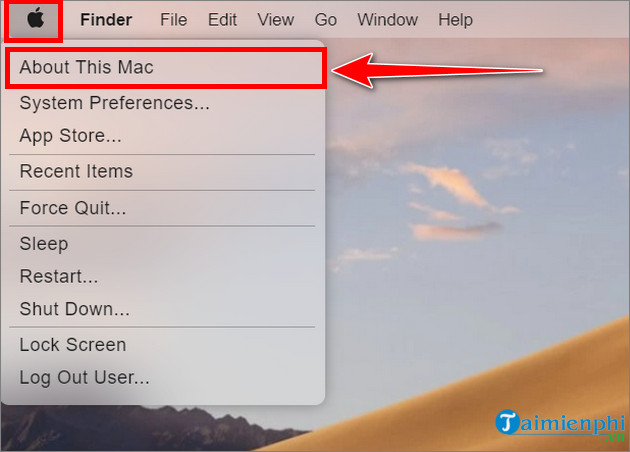
Step 2 : Save the chip information as well as the operating system version.
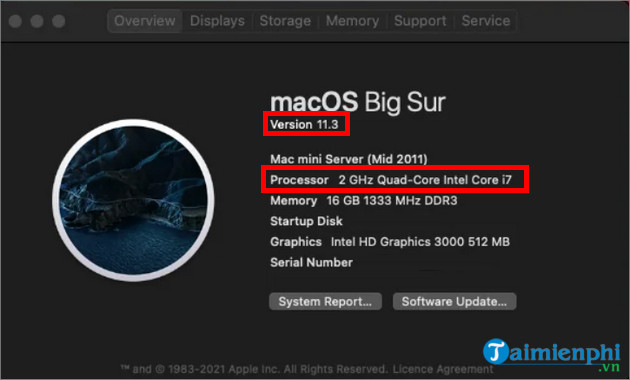
If your Mac's Chip/Processor Has the word Intel , you will have to download a different version than other Chips (eg Apple M1).
Download and Install Adobe Creative Cloud
You can download Adobe Creative Cloud from the official provider.
For Macbook 2022 Version
If the installation file is red, you need to follow these steps:
Step 1 : Double select the installation file.

Step 2 : Select Open .
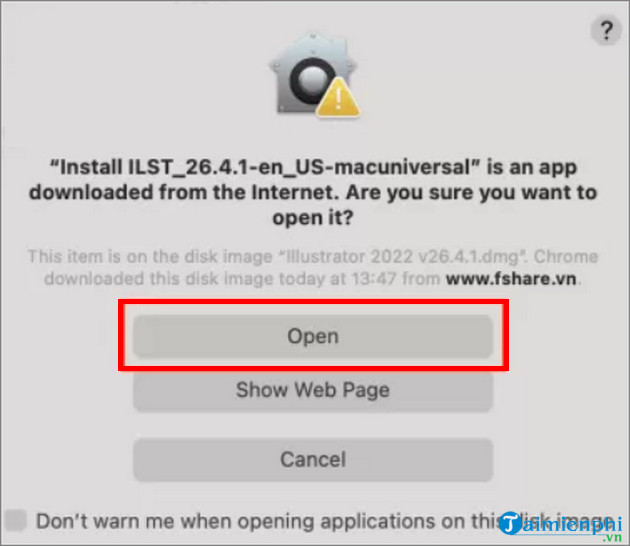
Step 3 : Select Install .

Step 4 : Enter the device password and select OK .

Step 5 : Wait for Adobe Creative Cloud to complete the installation process.

If you encounter errors when performing the above steps, move the installation file to another folder and then return it to the main screen. Then, copy the following command line into Terminal .
Xattr -Cr Drag-and-drop-installer-file-to-from the official provider-and-then-enter
At this point, you can repeat the above steps.
If the installation file is white, you need to follow these steps:
Step 1 : Right-select the installation file, select Show Package Contents .
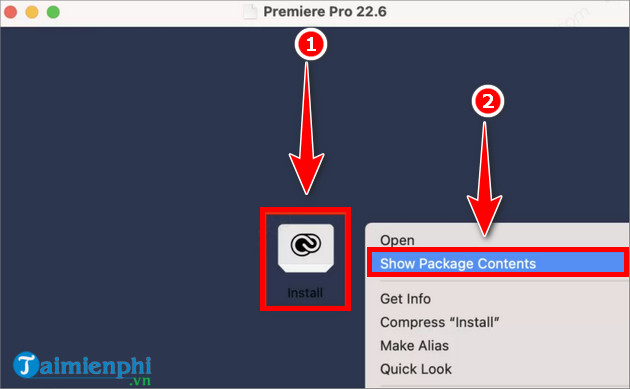
Step 2 : Open Contents > macOS > Install To install Adobe Creative Cloud for MacBook.
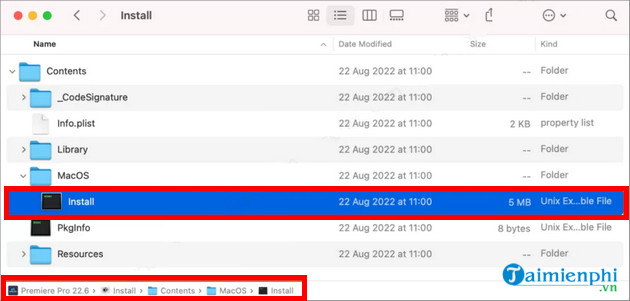
Step 3 : Select Deny When the software asks for the activation code.

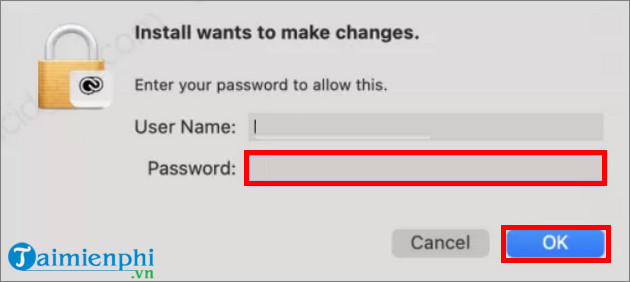
Step 4 : Enter your MacBook password and select OK .
Step 5 : Select Continue To install Adobe Creative Cloud.

Step 6 : Wait until the software is finished installing.

For Macbook 2021 and M1 Versions
Step 1 : Sign up for an Adobe account and log in to the software.

Step 2 : Open the Adobe Creative Cloud installation file, wait for this file to decompress then double select to open.
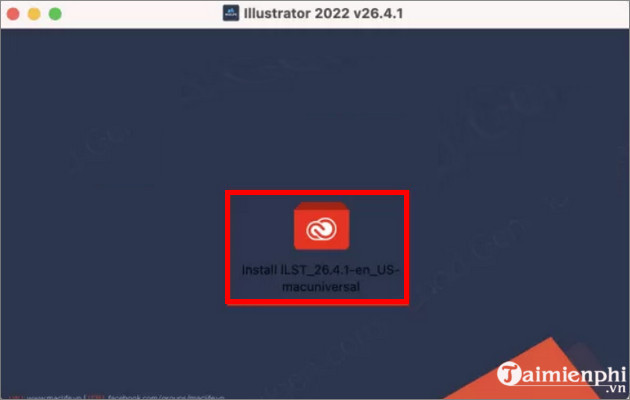
Step 3 : Select Open .

Step 4 : Select Install .
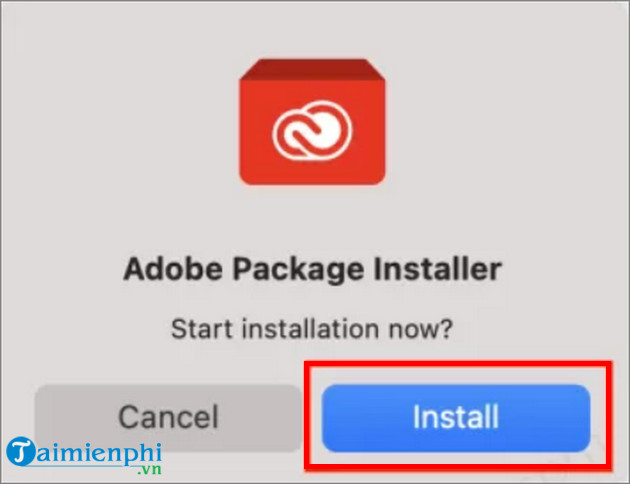
Step 5 : Enter the device password and select OK .

Step 6 : Wait for the software to finish installing.
For 2019 and 2020 Versions
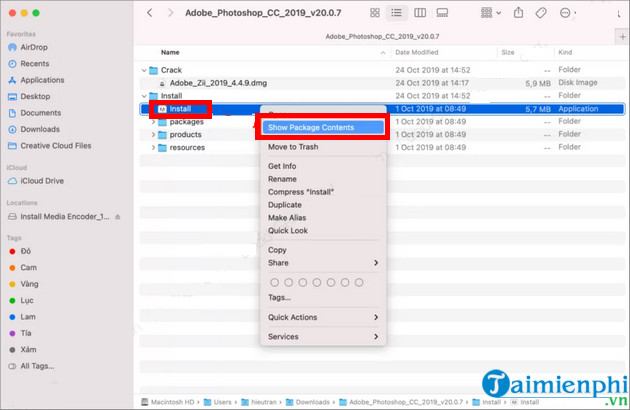
Step 1 : Open the downloaded. zip file, open the Install Folder, right-select the Install File and select Open Package Contents .
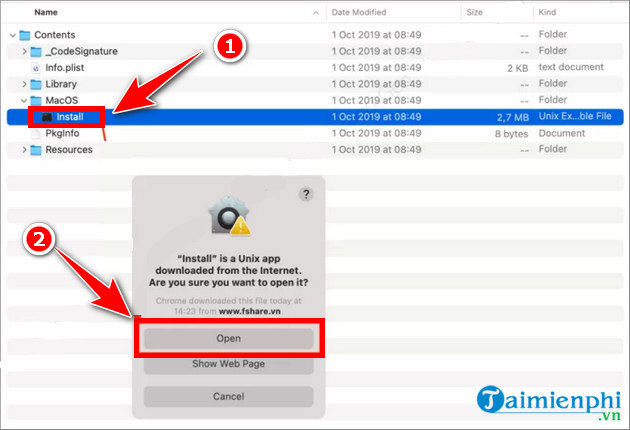
Step 2 : Select Contents > macOS > Install . then choose Open .
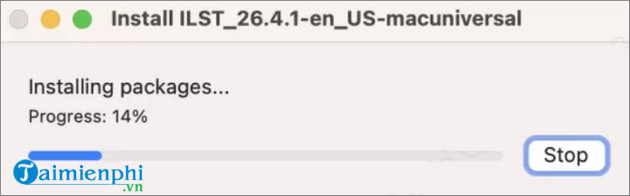
Step 3 : Wait for Adobe Creative Cloud to finish installing.
Install Adobe Illustrator
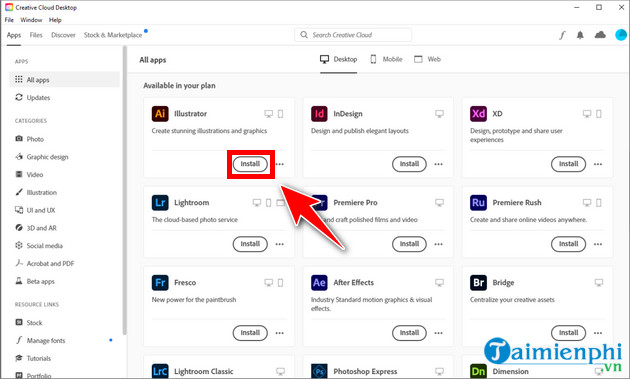
Open Adobe Creative Cloud, find Illustrator And select Install .
So, TipsMake has shown you how to install AI for MacBook. If you have any questions, please leave a comment below for everyone to answer.
FAQ
What do I need before I install AI for Macbook?
Prepare the required device, software, account access, and any files mentioned in the steps. Back up important data before changing system settings.
Why does the process look different on my device?
Menus and options can vary by operating system, app version, device model, or region. Use the closest matching setting and check the official documentation when needed.
What should I do if a step does not work?
Restart the app or device, confirm permissions and connectivity, update the software, and repeat the step carefully. Avoid unofficial downloads or tools.
Related Articles
 Top 5 MacBooks Worth Spending Money on in 20254 minutes read
 Instructions to Install Windows 10 on Macbook5 minutes read
 Compare Macbook, Macbook Pro and Macbook Air10 minutes read
 How to Install Windows 10 on the MacBook Pro (2016 and Newer Versions)?13 minutes read
 How to Install CorelDraw on a MacBook4 minutes read
 How to Install Office 2019 for Macbook3 minutes read
Reader Comments 0
Sign in with email or Google to join the discussion.