Table of Contents
Quick answer
Inserting images into PowerPoint makes presentations more visual and professional. With the Insert Picture feature, you can easily add illustrations to slides across various versions of Microsoft Office. Below are detailed instructions for each version.
Learn how to insert images into PowerPoint from version 2003 to 2021. This step-by-step guide will help you easily manipulate and edit your illustrations.
Table of Contents:
1. For the 2003 version
2. For the 2007 version
3. For the 2010 version
4. Versions 2013, 2016, 2019, and 2021
Instructions on how to insert images into PowerPoint
1. For PowerPoint 2003
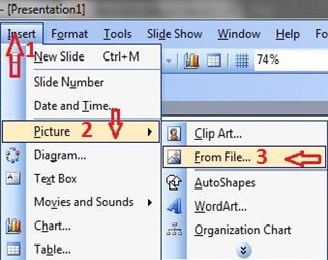
Go to Insert , select Picture , then move your mouse horizontally to the right and select From File … from the list of options that appears.
The Insert Picture window will appear. Select the image you want to insert into the slide, then click Insert to complete the process.
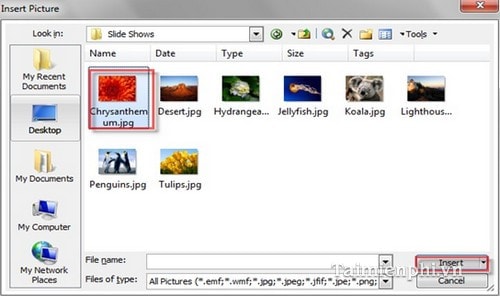
You can also change the image's position by clicking on it until a four-way arrow appears, then pressing and holding the mouse button and moving the image to your desired location. You can also adjust the image's size by hovering your mouse over the corners of the image until a two-way arrow appears, then increasing or decreasing the size as desired.
2. For PowerPoint 2007
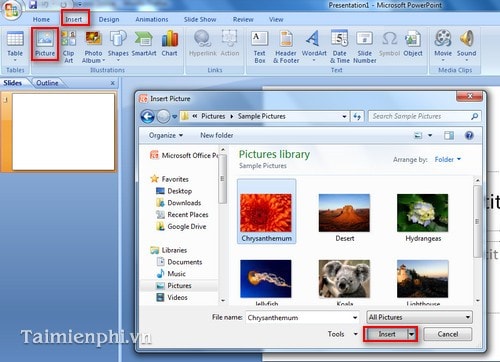
Go to the Insert tab , select the Picture icon . The Insert Picture window will appear; select the image you want to insert and click Insert . You can also adjust the image size and move it as instructed above.
3. For PowerPoint 2010
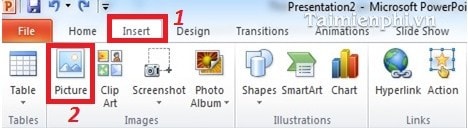
Click the Insert tab, then select the Picture icon in the Images group.
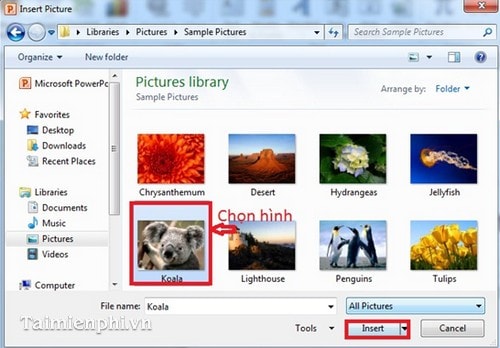
When the Insert Picture window appears, locate the image you want to insert and click Insert . Edit the image as desired, following the instructions above.
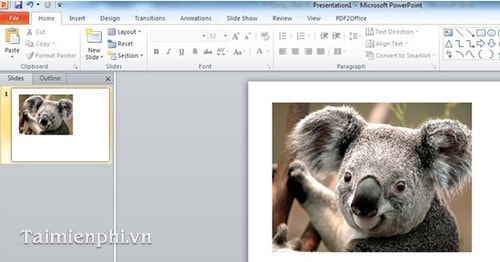
Result:
4. For PowerPoint 2013, 2016, 2019, and 2021
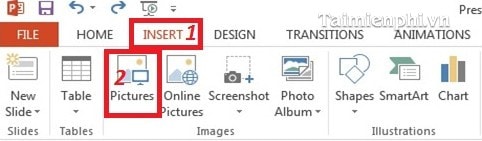
Go to Insert, then select the Picture icon .
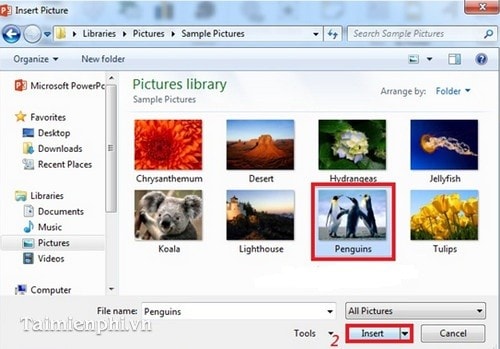
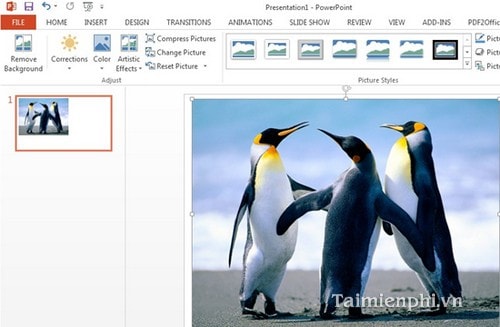
Find and select the image you want to insert in the Insert Picture dialog box , then click Insert to complete the process.
Result:
Inserting images into PowerPoint makes presentations more engaging and easier to understand. With the instructions above, you can easily add illustrations to your slides in various versions. Don't forget to check out more PowerPoint tips on Free Download to create even more impressive presentations.
Related Articles
 How to Insert Text into Images in PowerPoint: PowerPoint Tips4 minutes read
 How to Insert Images Below the Word on PowerPoint: PowerPoint Tips4 minutes read
 How to Insert Images into PowerPoint 20166 minutes read
 How to Insert GIF Images Into PowerPoint: Step-by-Step Guide5 minutes read
 How to Insert a Picture Below Another Picture in PowerPoint3 minutes read
 How to Integrate Pictures Into Text in PowerPoint3 minutes read
Reader Comments 0
Sign in with email or Google to join the discussion.