Table of Contents
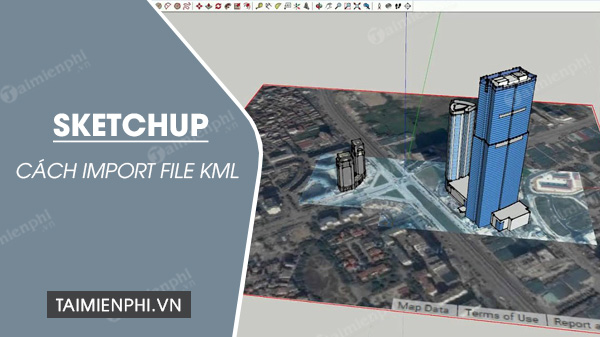
The old Google SketchUp Building Maker and Add KML Overlay workflow no longer exists. Current SketchUp does not treat a plain KML file as a universal editable modeling format. The reliable method depends on the data: use Add Location for site imagery and terrain, import a compatible KMZ when it contains SketchUp-readable 3D content, or convert KML paths and polygons to DXF in a GIS application before importing them.
Choose the right workflow
| KML content | Recommended route | Expected SketchUp result |
|---|---|---|
| A location, imagery or terrain context | Geolocate the model with SketchUp Add Location | Site context and terrain tied to the model location |
| A 3D model packaged for Google Earth | Save or obtain a KMZ and test File > Import | A component or model if the KMZ contains supported 3D assets |
| Paths, parcel boundaries or polygons | Open KML in QGIS, reproject to a suitable local CRS, export DXF, then import the DXF | Editable CAD linework at a manageable local scale |
| Placemark points | Convert in GIS to points or small reference geometry, then export DXF | Reference points; labels and metadata may need separate handling |
| A styled Google Earth overlay | Recreate or export its geometry and imagery separately | Styles, balloons, tours and network links usually do not become native SketchUp objects |
Option 1: Use Add Location for site context
- Open the SketchUp model.
- Start Add Location from the File menu or the geolocation controls available in your SketchUp edition.
- Search for the address, place name or coordinates.
- Select the required area and import the available site context or terrain.
- Open Model Info and confirm the geolocation and north direction.
SketchUp's current Add Location documentation explains the interface and data choices. This is the simplest route when KML was only being used to identify a site, and it avoids publishing a file to Google Drive or Dropbox merely to obtain a URL.
Option 2: Convert KML to KMZ for supported 3D content
KMZ is a zipped package that contains a KML file and can also include models, textures or other assets. SketchUp can work with some geolocated content and KMZ packages, but compatibility depends on what the package actually contains. Renaming .kml to .kmz is not a conversion.
- Open the KML in Google Earth Pro and inspect every placemark, path, polygon and model.
- Organize the required items in a folder under Places.
- Right-click the folder and choose Save Place As.
- Select KMZ and save it locally. Google's Save and share place information guide documents this export.
- In SketchUp, choose File > Import, select KMZ when the installed edition offers it, and import the file as a component.
- Compare the result with Google Earth and check scale, position, texture and orientation.
A KMZ containing only KML paths or placemark metadata may not become useful editable SketchUp geometry. In that case, use the GIS conversion workflow below.
Option 3: Convert KML paths and polygons to DXF with QGIS
1. Open and inspect the KML
Install QGIS from its official source, create a new project and add the KML as a vector layer. QGIS supports KML among many vector formats, as described in its data-opening documentation. Inspect the layer geometry, attributes and coordinate reference system.
2. Reproject to an appropriate local coordinate system
KML normally uses geographic longitude and latitude. Directly exporting those angular coordinates into a modeling program can produce tiny, distorted or far-from-origin geometry. Reproject the required layer to a projected CRS suitable for the site's region and required accuracy.
If this is survey, legal-boundary or construction work, obtain the CRS and control points from the project surveyor. Web map data and consumer GPS coordinates are not a substitute for a boundary survey.
3. Export a limited area as DXF
- Filter or select only the features required near the site.
- Use QGIS Project > Import/Export > Export Project to DXF, or export an individual layer to DXF.
- Choose the projected CRS, units, desired layers and a compatible DXF version.
- Save the file and open it in a CAD viewer to verify a known distance.
QGIS documents the current multi-layer workflow in its DXF export section.
4. Import the DXF into SketchUp
- In an eligible SketchUp plan, select File > Import.
- Choose DWG/DXF and select the converted file.
- Open Options and match the units used during the QGIS export.
- Import, then measure a known line and inspect the Import Results summary.
- Group the imported geometry immediately and move a working copy near the model origin if the workflow requires it.
Georeferencing and accuracy
- Record the source KML, coordinate reference system, conversion date and units.
- Keep the original geospatial dataset unchanged.
- Use at least one known control point and one known distance to validate the handoff.
- Avoid importing an entire city or very long path when only a small site area is needed.
- Do not flatten elevation values unless the project intentionally requires 2D linework.
- Coordinate with survey and BIM teams before moving georeferenced geometry close to the SketchUp origin.
What happened to Building Maker?
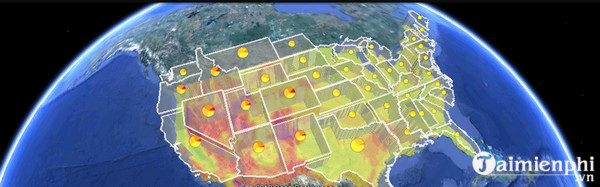
The source tutorial depended on Google Building Maker and an online Add KML Overlay field. That service was retired years ago, and SketchUp is no longer a Google product. Uploading a KML to public cloud storage and pasting its URL into that interface is not a current workflow and can expose location data unnecessarily.
Common problems
The imported geometry is extremely small or huge
The DXF units and SketchUp import units do not match, or longitude/latitude degrees were treated as meters. Return to QGIS, reproject to the correct local CRS and export with documented linear units.
The geometry is far from the SketchUp origin
Large real-world coordinate values can reduce modeling convenience and precision. Preserve a georeferenced master, then create a controlled local working copy with an agreed offset. Document that transformation rather than dragging geometry approximately.
Labels and colors disappear
KML styling and attribute labels do not map directly to CAD lines. Export attributes separately or create CAD layers and text deliberately. Verify whether the final deliverable needs data, appearance or only geometry.
Terrain is missing
KML paths and polygons do not contain a terrain surface by default. Use Add Location, a supported elevation dataset or imported contours, and confirm vertical units.
After conversion, see how to export SketchUp to DWG or DXF, compare 3D modeling tools, or review 3D interior design software. For geospatial work, the critical steps are the coordinate system, units and validation—not merely getting lines onto the screen.
Related Articles
 How to Use SketchUp to Design 3D5 minutes read
 Click: How to Use Sketchup10 minutes read
 How to Export SketchUp Files to AutoCAD6 minutes read
 SketchUp Keyboard Shortcuts - Complete Shortcut Keys in SketchUp4 minutes read
 How to Copy Styles Between 2 Word Files (Import, Import Styles from the Old3 minutes read
 Want: How to Copy and Create Arrays in Sketchup3 minutes read
Reader Comments 0
Sign in with email or Google to join the discussion.