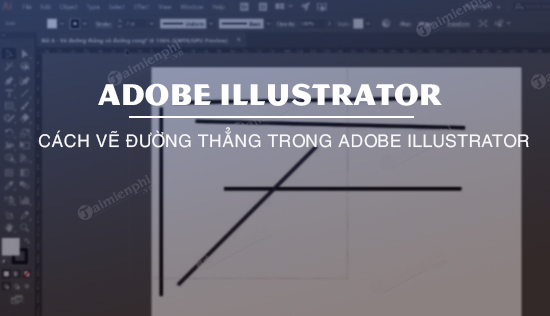
How to draw a straight line in Adobe Illustrator
In previous articles, TipsMake showed you how to draw and edit curves using the Curvature tool in Illustrator. This article will continue by guiding you on how to draw straight lines in Adobe Illustrator.
Table of Contents
Using the Pen Tool, we can place anchor points on the artboard. These anchor points are connected by paths, forming a straight line, line segment, or curve. Refer to the article below from TipsMake to learn how to draw straight lines in Adobe Illustrator.
1. How to draw a straight line in Adobe Illustrator
Note : In this tutorial, TipsMake uses Adobe Illustrator CS5; however, you can apply these steps to draw straight lines in all versions of Illustrator.
Follow the steps below to draw a straight line in Adobe Illustrator:
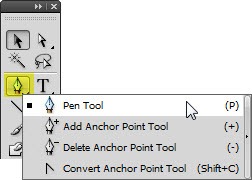
Step 1: Select the Pen Tool from the toolbox or press the P key . If you click and hold the mouse button on the Pen Tool for about 1 second, other hidden Pen Tools will appear on the screen.
The first time you select the Pen Tool, a small "x" icon will appear next to the cursor. The "x" here means we are about to start drawing a new path.
It's important to pay attention to the small icons displayed next to the Pen Tool cursor, as these icons affect how the Pen tool works.
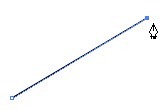
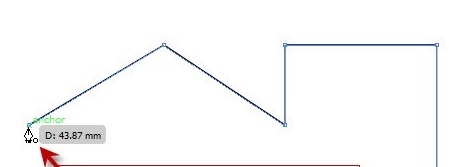
Step 2: Click once on the drawing board at the location where you want to add the first fixed point to draw the straight line. Note that you should not drag.
If the lines only appear (looking like auxiliary lines originating from a fixed point), it means you accidentally dragged the Pen Tool and drew a curve instead of a straight line. If this error occurs, press Ctrl + Z (on Windows) or Cmd + Z (on Mac) to undo and click again.
Step 3: Click again on the next fixed point.
To limit the angle of a line segment to a multiple of 45 degrees, press and hold the Shift key while clicking the mouse.
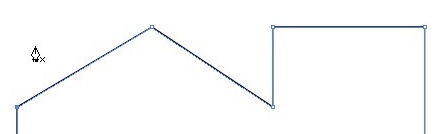
Note: The first fixed point you create when clicking on the first drawing board will now be empty, while the last fixed point is a solid square icon.
Step 4: To create other lines, simply click on the area of the canvas where you want to place the fixed point, and Illustrator will create a path in between.
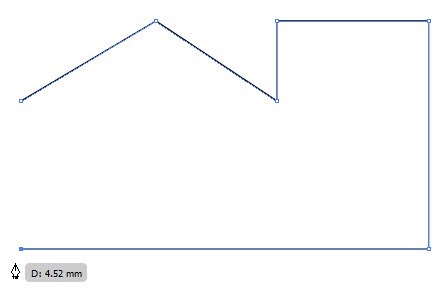
The path illustrated above is called an open path, meaning the starting and ending points are different. We don't need to create closed paths; open paths are sufficient to draw different types of lines, including straight lines.
If you want to fill an area, the ideal solution is to close the path. To close a path, simply click on the first point you created. A small circle icon will appear next to the Pen Tool cursor indicating that the path is closed.
After closing the path, the cursor will immediately change to indicate that the next mouse click on the drawing board will start creating a new path.
To keep a path open and then start a new one, simply press Ctrl + click (on Windows) or Cmd + click (on Mac) anywhere away from the objects on the drawing board. Alternatively, you can complete the creation of a path by clicking any tool in the toolbox.
2. Add and remove anchor points
In some cases, we will have to add or remove unnecessary fixed points. The principle is to use as few fixed points as possible when drawing straight lines.
To delete anchor points, select the Delete Anchor Point Tool from the toolbox (hidden within the Pen Tool) or press the minus sign (-) on your keyboard. Then click to select the point you want to delete.

The image illustrates the before (left) and after (right) removal of the fixed point.
To add anchor points, click anywhere along the line using the Add Anchor Point Tool . Often, the shape of the path won't change much after you add a point, but editing that point will make a difference.

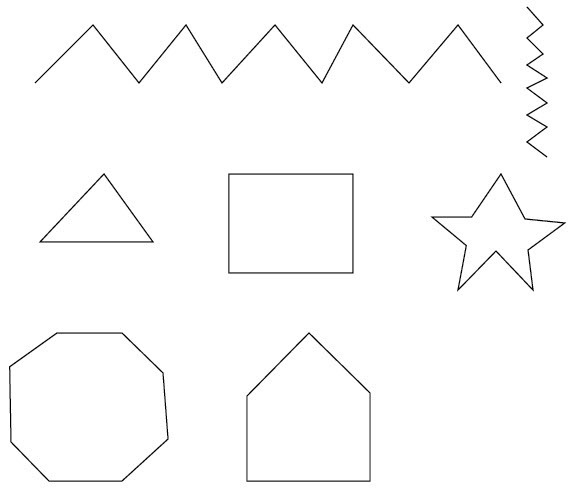
Basically, drawing straight lines in Adobe Illustrator isn't too difficult; you can apply the steps above to draw and create various shapes.
The article above from TipsMake has just guided you on how to draw straight lines in Adobe Illustrator. Along with straight lines, there are also articles on Taimienphi about how to draw curves in Illustrator, but drawing curves in Illustrator is slightly different from drawing straight lines.
Hopefully, the above article has provided you with useful information on how to use Adobe Illustrator. Additionally, if you have any questions or need clarification, please leave your comments in the section below the article.
The resizing function in Adobe Illustrator is also fully utilized, allowing you to change the size (magnitude) of objects in your image. See detailed instructions on resizing in Adobe Illustrator on Taimienphi.
Was this article helpful?
Your feedback helps us improve.
Related Articles
 Guidelines for drawing straight lines in Adobe Illustrator3 minutes read
 Tutorial drawing ... 'unicorn' in Adobe Illustrator10 minutes read
 How to draw basic shapes in Adobe Illustrator5 minutes read
 Adobe Illustrator 2021.26.0 - download Adobe Illustrator 2021.26.0 here3 minutes read
 Instructions on cropping and deleting shapes in Adobe Illustrator3 minutes read
 What is Adobe Illustrator? Learn Adobe Illustrator for what5 minutes read
Reader Comments 0
Sign in with email or Google to join the discussion.