How to crop images in Adobe Illustrator
If you're new to Adobe Illustrator and don't know how to crop images, check out this article from TipsMake to learn how.
Table of Contents
In previous articles, TipsMake introduced you to how to change the default background color in Illustrator . In this article, TipsMake will guide you on how to crop images in Adobe Illustrator.
1. How to crop an image in Adobe Illustrator
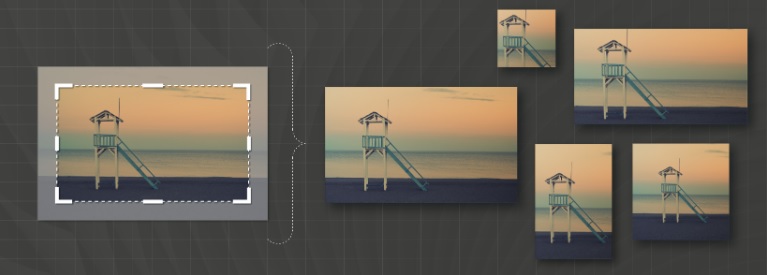
We can crop linked or embedded images in Illustrator. During the cropping process, we can use visual widgets to work with the selected images. The Image Crop feature only works on the currently selected image. Additionally, the linked image will be embedded immediately after cropping.
There are currently many image cropping software programs available for you to explore and choose from. Using these programs will help you extract the desired objects from your images.
Note:
- The cropped portion of the image will be permanently removed and cannot be recovered.
- We cannot convert images during the cropping process. If you try to convert an image after selecting the Crop Image option, Illustrator will exit the cropping interface.
Follow the steps below to crop an image in Adobe Illustrator:
Step 1: Select File => Place and choose the image you want to place, then click Place.
Step 2: Use the Selection tool () to select the image you want to crop.
Note: Illustrator calls the Selection tool by default when we select the Crop Image option. If any other tool is active, Illustrator will automatically switch to the Selection tool.
Step 3: Follow one of the steps below to crop the selected image.
- Click on Crop Image in the Control Panel.

- Select Object => Crop Image.
- Select Crop Image from the menu.
Note:
If two or more objects have been selected, we cannot choose the Crop Image option.
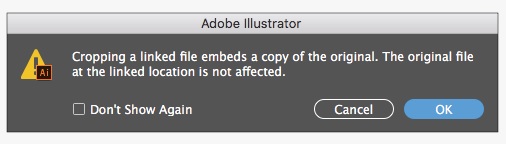
Step 4: If you are working with linked images, Illustrator will display a message stating that the linked files will be embedded after cropping. Click OK to continue.
Step 5: Drag the widget corners and handle edges to define the cutting boundaries.
Note:
For any image, the cropping widget is a rectangular icon, and we cannot rotate the cropping widget.
Step 6: Specify the cutting options using the Control Panel.
Step 7: Perform one of the following actions:
- Click Apply on the Control Panel.
- Press Enter (on Windows) or Return (on Mac OS).
Note for Windows 64-bit and macOS:
- When you select the Crop Image option to crop an image, Illustrator will identify the visually significant parts of the selected image. The default cropping box will be displayed based on the identified areas.
If desired, you can adjust the size of the cropping box. After selecting the cropping location, click Apply in the Properties window or press Enter (on Windows) or Return (on macOS) to crop the image.
To disable this feature, uncheck the " Enable Content Aware Defaults" option in Edit => Preferences => General on Windows or Illustrator CC => Preferences => General on macOS. By unchecking this option, the default Crop Image, Freeform gradient, and Puppet Warp features are also disabled.
To exit the cropping interface without applying any changes, you can follow one of the steps below:
- Click Cancel in the Control Panel.
Press the Escape key.
- Select any tool from the Tools panel, except for the Zoom tool and the Hand tool.
2. Adjust the image cropping widget.
2.1 Resizing

Perform one of the following actions to resize the image cropping widget:
- Specify the Height and Width values in the Control Panel.
- Pull the corner or edge of the handle.
Press the Shift key to scale the widgets on both sides.
Press the Alt key to scale the widget in the center.
- Use the pinch-to-zoom gesture on touchscreen devices.
Note: Illustrator Touch for Windows tablets does not support cropping images.
2.1 Adjust the position
Perform one of the following actions to adjust the position of the cropping widget:
- Click and drag the mouse to any location to crop the image.
Press the arrow keys to move the cropping widget.
Press and hold the Shift key while simultaneously pressing the arrow keys to move the widget by 10 units (default) or as specified in your Preferences.
3. Image cropping options
We can specify the following options in the Control Panel during the image cropping process:

- PPI: Select the resolution for the cropped image from the available options. Also, specify the image resolution in pixels per inch (ppi). If the image resolution is lower than the available options in the menu, the options will be disabled. The maximum value that can be entered must be equal to the resolution of the original image or 300 PPI.
- Reference Point: All transformations are performed around a fixed point called the reference point. By default, this point is located in the center of the image cropping widget we are transforming. If desired, we can change the reference point to a different location using the reference point positioning tool in the Control Panel.
- X and Y dimensions : The combined values of the selected reference point.
- Height and Width: Specify the dimensions of the image cropping widget. If the Height and Width frames are linked, the values will maintain their aspect ratio when changed. Click the () icon to delete and modify the width and height values independently.
The article above from TipsMake has just guided you on how to crop images in Adobe Illustrator. Additionally, readers can refer to other articles on TipsMake to learn about Illustrator's Stroke function and how to use it.
You should also learn about the Mesh Tool in Illustrator, which is one of the most difficult tools to use. The Mesh Tool can illustrate vectors that look like 3D or realistic images.
Was this article helpful?
Your feedback helps us improve.
Related Articles
 Instructions on how to resize, position, rotate, and flip images in Adobe Illustrator.3 minutes read
 How to Warp, bend text in Adobe Illustrator5 minutes read
 Adobe Illustrator 2021.26.0 - download Adobe Illustrator 2021.26.0 here3 minutes read
 Tutorial drawing ... 'unicorn' in Adobe Illustrator10 minutes read
 Instructions on cropping and deleting shapes in Adobe Illustrator3 minutes read
 How to cut images in AI (Adobe Illustrator)2 minutes read
Reader Comments 0
Sign in with email or Google to join the discussion.