Table of Contents
This practical guide walks through how to delete a partition using the powershell command, explains the main requirements, and highlights common issues that may appear along the way.
Step 2. Get the list of partitions using the "Get-Volume" cmdlet . This command will display a table in the PowerShell window with all available partitions.
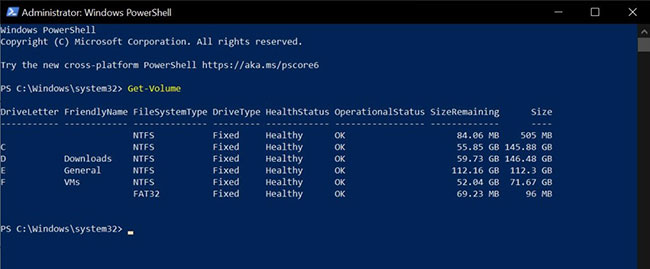
Step 3. To remove a partition, execute the command below. Replace "X" with the actual drive letter of the partition you want to delete. For example, to delete partition "E" , replace "X" with the drive letter.
Remove-Partition -DriveLetter X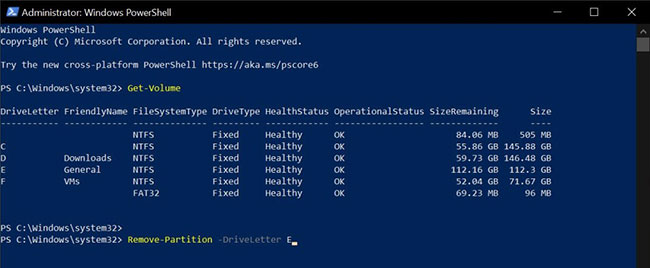
Step 4. Type "Y" into the PowerShell window and press Enter. This action will confirm that you really want to get rid of the target partition.
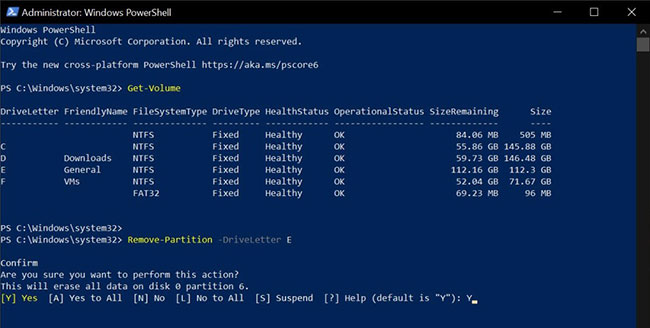
As soon as you confirm the action, Windows PowerShell will delete the partition and mark it as unallocated.
Since the deleted space is marked as unallocated, you can use it to create a new partition or extend an existing one. To extend the partition, we recommend first backing up all the files in the partition you want to extend.
Furthermore, use the partition manager GUI tool, like the built-in Disk Management tool. This is especially important if you've never done this through the command line.
Key Takeaways
Use the information above as a practical reference for how to delete a partition using the powershell command. Review each step carefully, confirm any requirements, and choose the option that best fits your situation.
FAQ
What does this guide explain about Delete a Partition Using the Powershell Command?
It explains the main concepts, practical considerations, and useful steps related to delete a partition using the powershell command without requiring advanced knowledge.
Who can benefit from learning about Delete a Partition Using the Powershell Command?
This information is useful for readers who want a clear overview, practical guidance, and reliable steps related to delete a partition using the powershell command.
What should I check before applying this information?
Review the requirements, confirm that your device, software, or situation matches the instructions, and back up important data before making major changes.
Related Articles
 Powershell Command in Windows: Explained3 minutes read
 Should I Use Powershell or Command Prompt?7 minutes read
 How Are Command Prompt (Cmd) and Powershell Different?6 minutes read
 Use Powershell to Download Any File on Windows 104 minutes read
 About Powershell15 minutes read
 How to Replace Command Prompt with PowerShell in the Power Menu on Windows 104 minutes read
Reader Comments 0
Sign in with email or Google to join the discussion.