GarageBand is a very interesting application on iOS and macOS operating systems. GarageBand is considered by users as a miniature recording studio with many unique features. With its capabilities, GarageBand can help users create attractive music without having to spend too much effort.
However, the situation of GarageBand not displaying audio files is something that worries many people. In case you are also encountering this error when using GarageBand, the following tricks will help you handle it.

Why Isn't GarageBand Showing the Audio File?
As you know, GarageBand is an application for creating and processing audio. So why doesn't GarageBand have audio files? There are many reasons for this. Among them, the reasons listed below are the most common.
1/ Because Users Do Not Know How to Operate
In theory, GarageBand is not too difficult to use. However, it takes a lot of time to learn and get used to this application. If you are new to GarageBand, you may have difficulty finding where to store audio files in this application.
2/ Application Error
It's not uncommon for an app to crash. Of course, this is no exception for GarageBand. If you haven't updated the app in a while or if you have some software that's interfering with GarageBand, it may crash and not play audio files.
How to Fix When GarageBand Doesn't Show Audio Files
If the GarageBand app on your device does not display audio files. The first thing you should try is to close and reopen the app. Then check and update GarageBand if there is a new version. In case you have done the above methods and GarageBand still does not display audio files, it is likely that you have not done it correctly. In this case, please continue to the instructions below to know how to handle it.
Instructions on How to Set Ringtones for iPhone Using GarageBand and Documents
Now, I will guide you how to set ringtones for iPhone using GarageBand and Documents application. If GarageBand application does not show the audio file, please check if you have followed the steps in the instructions below correctly!
To set ringtones using GarageBand, you first need to download this application to your device. Currently, you can download GarageBand directly from the Appstore or click on the link here .
- Step 1 : Open the GarageBand application and select the audio recorder .
- B2 : Click on the 3-bar icon as illustrated.
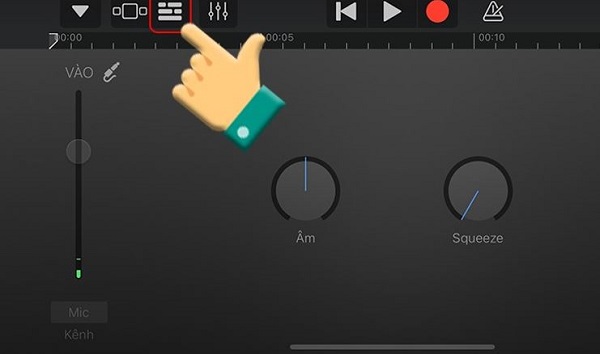
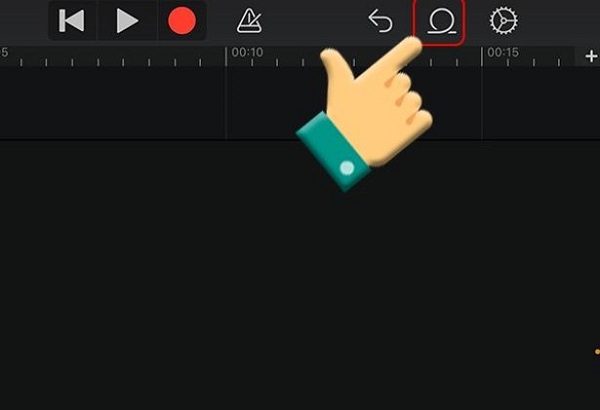
- B3 : Click on the icon next to the settings icon.
- B4 : Select ' Browse items from the file application '. This step will help you view the folders containing audio files on your phone. If GarageBand does not show the audio files, go to this section to check.
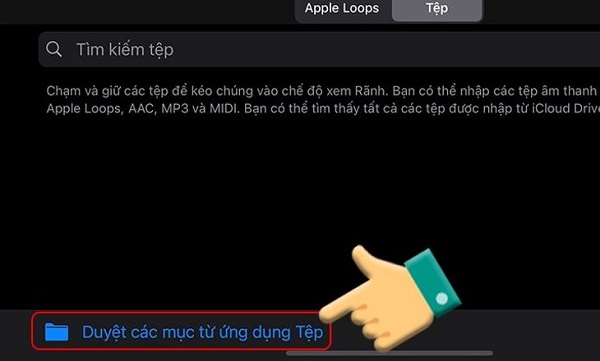
- B5 : A list of folders containing audio will appear and you can select the folder you want. (If your phone does not have any audio, this item will be empty).
- B6 : Select the song you want to use as a ringtone. The system will put the song into the editor, click on the plus icon.
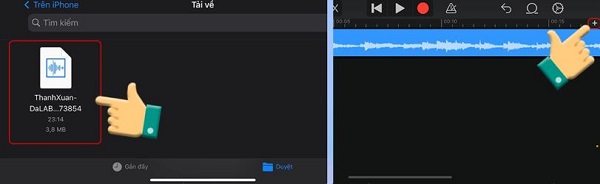
- B7 : Select ' section A ' and click done .
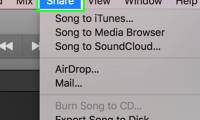
- B8 : Click on the arrow in the upper left corner and select my song . Then click on your song and select share .
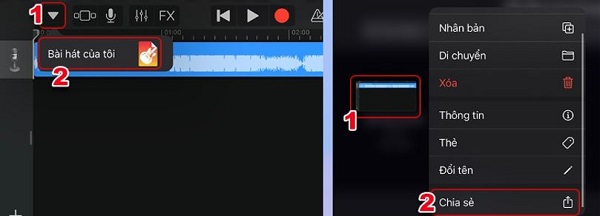
- B9 : Select the ringtone section and press continue .
- B10 : Name the ringtone you just created, then press export and select ok to confirm export.
- B11 : Finally, open the ringtone settings on your iPhone, then find and select the song you just created.

In case you don't want to use GarageBand to set ringtones, Documents will be a great alternative. To create ringtones with Documents , download this application to your device and follow the instructions here:
- Step 1 : Open the Documents app, then go to the browser to find and download the song you like.
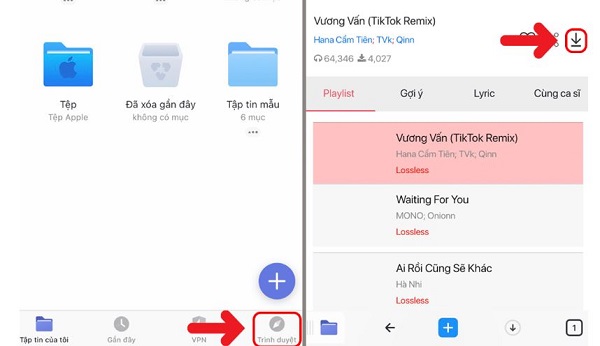
- Step 2 : Select the done item to save the file, then go to the download section and select the 3 dot icon below the song.
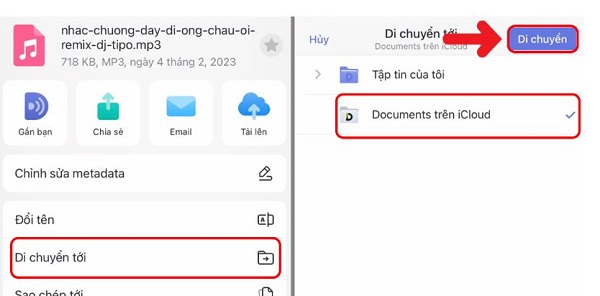
- B3 : Select ' move to ' > select Document on iCloud and press move . Now, you just need to go to settings to select the song you just downloaded as ringtone.
GarageBand not displaying audio files is a fairly common problem and is not too difficult to fix. If you encounter this error, just confidently apply the methods I just shared above.





Reader Comments 0
Sign in with email or Google to join the discussion.