DNS Tricks to Access More Content on Smart TV
There's a simple DNS trick that unlocks more shows and movies on your Smart TV without slowing down your Internet connection..
Being locked out of streaming content because of where you live is frustrating. Luckily, there's a simple DNS trick that can unlock more shows and movies on your Smart TV without slowing down your internet connection.
How Smart DNS Proxy Unlocks More Content
It's strange how so much streaming content is blocked just because of where you live. That's why people are looking for alternatives, and that's where Smart DNS Proxy comes in. This special DNS service unlocks new content on your Smart TV without slowing down your connection or making streaming a hassle.
Smart DNS Proxy works by handling only part of the Internet traffic that streaming services use to check your location. When you open Netflix , Hulu, Amazon Prime, or another platform, your device first asks a DNS server for the website's address. With Smart DNS Proxy, those requests are routed to a special server, which responds in a way that makes the streaming service think you're in the country where the content is. Your real IP address doesn't change, and your Internet traffic for the actual video stream still goes straight to the streaming service, so you get the same speeds you're used to—without any caching or lag like you might experience with a VPN .
This is one of the reasons people prefer using a DNS proxy over a VPN for streaming region-restricted content. Since it doesn't encrypt your traffic or reroute everything through another country, you can maintain your fast connection while unlocking shows and movies from other regions. You can also easily switch between different content libraries without having to switch servers or mess with additional apps.
Note, however, that Smart DNS Proxy focuses on convenience and accessibility, rather than privacy. Unlike a VPN, it doesn't hide your browsing activity or encrypt your data, so if privacy is your top concern, a VPN is a better choice for streaming region-blocked content in any country while keeping your connection secure. But if your goal is simply to watch more content on your Smart TV without any hassle, Smart DNS Proxy gets the job done.
How to Set Up Smart DNS Proxy on Smart TV
Setting up Smart DNS Proxy on a Smart TV requires manually changing the device's DNS settings. The process varies slightly between TV brands, but the core steps are the same across Samsung, LG, Sony, and other major manufacturers. Here's how to set up Smart DNS Proxy on Google TV:
Step 1: Get Smart DNS address
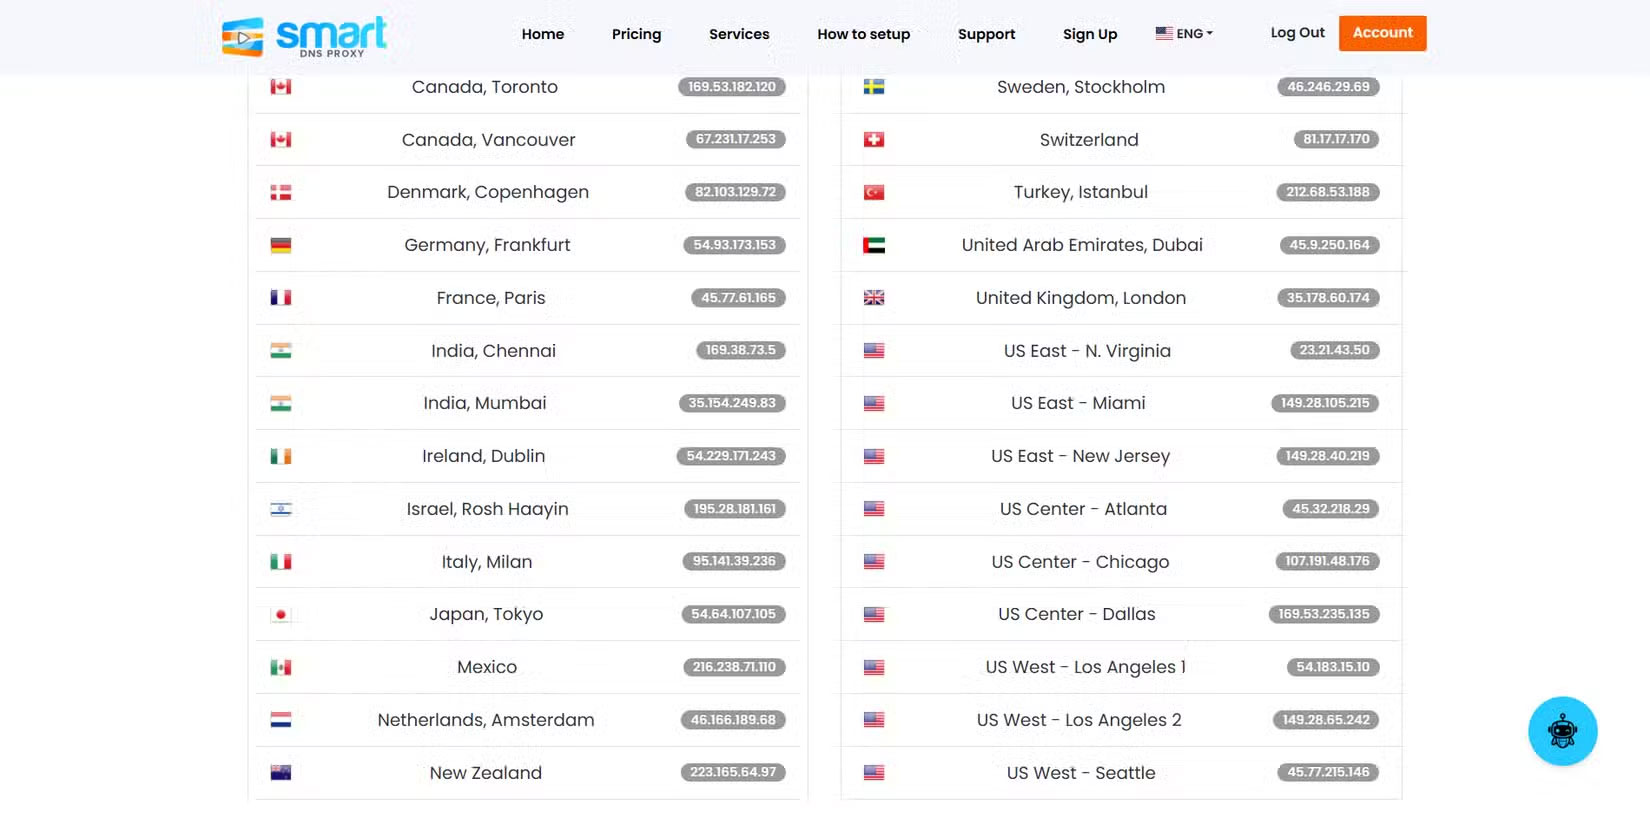
On your PC, start by signing up for Smart DNS Proxy . Once signed up, go to their proxy server list. This list includes all the proxy servers they host.
When setting up DNS, you will be asked to provide two DNS addresses to act as your primary and secondary DNS. So for this example, we selected Japan (54.64.107.105) and New Zealand (223.366.64.97).
Step 2: Change DNS settings on Smart TV
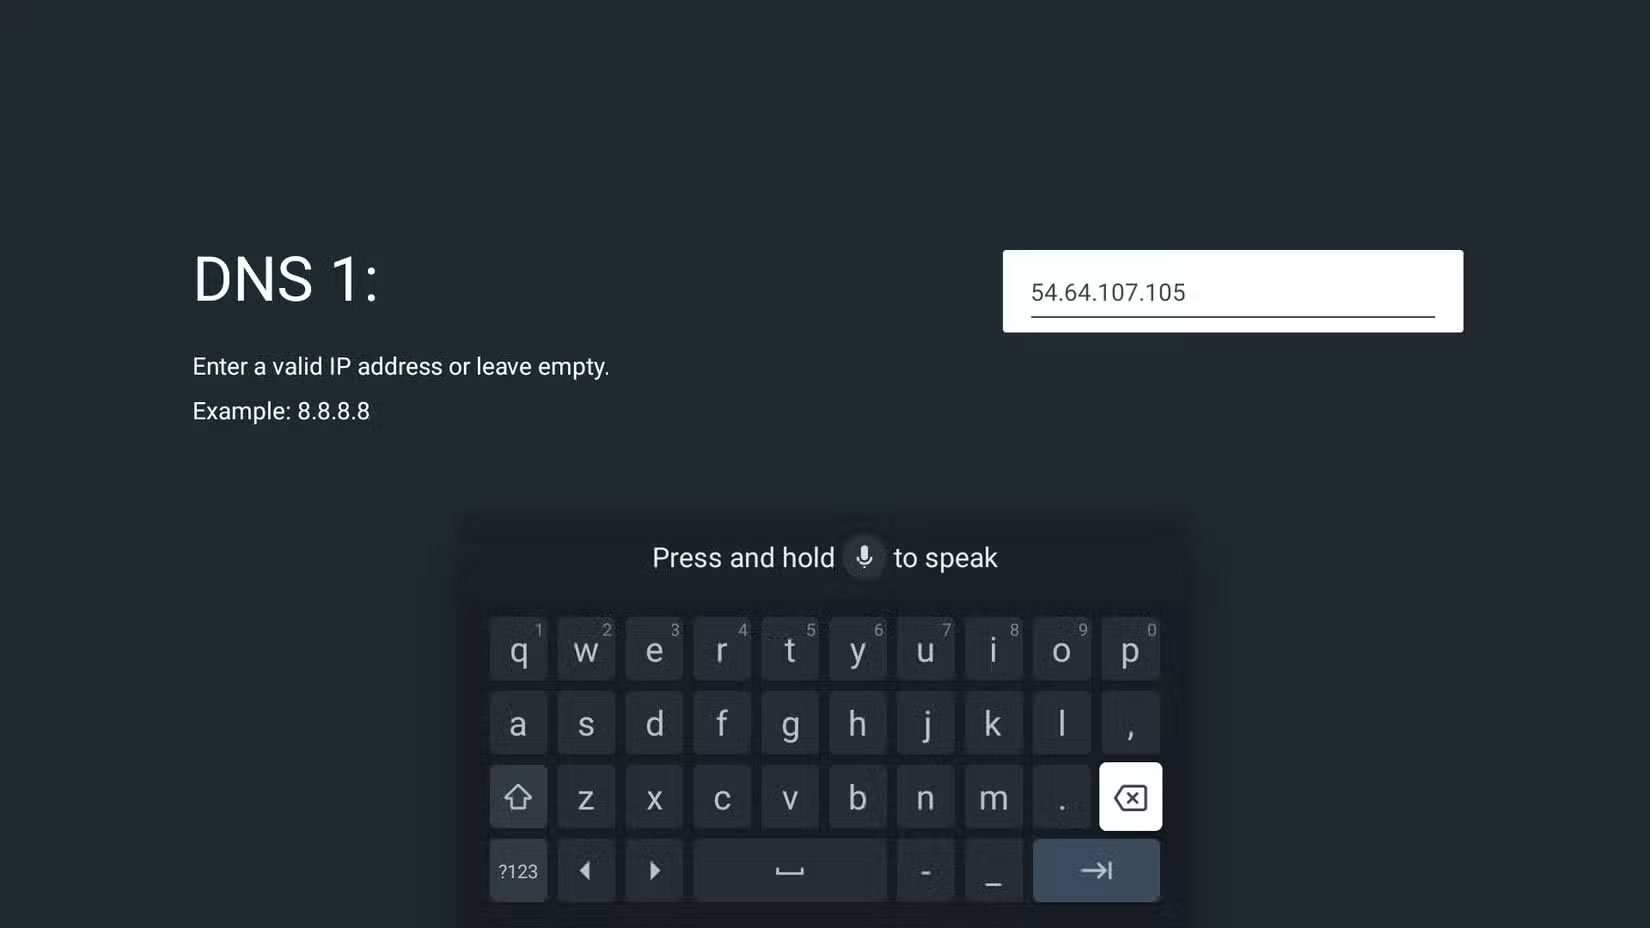
Now, press the Home button on your Smart TV remote to navigate to the settings menu. From there, select Network & Internet , select your Wi-Fi network, and scroll down to IP settings . Then, change the settings from DHCP to Static . This allows you to set specific IP and DNS addresses without the router automatically changing them over time.
After selecting Static, the TV will prompt you to specify your IP address, Gateway, and DNS. The only thing that needs to be changed are the DNS fields, where the example entered 54.64.107.105 (Japan) as DNS 1 and 223.366.64.97 (New Zealand) as DNS 2.
Step 3: Save and restart
After entering the DNS address, save the settings and restart your Smart TV. This step is important because the changes will only take effect after the restart.
Step 4: Enable Smart DNS Proxy
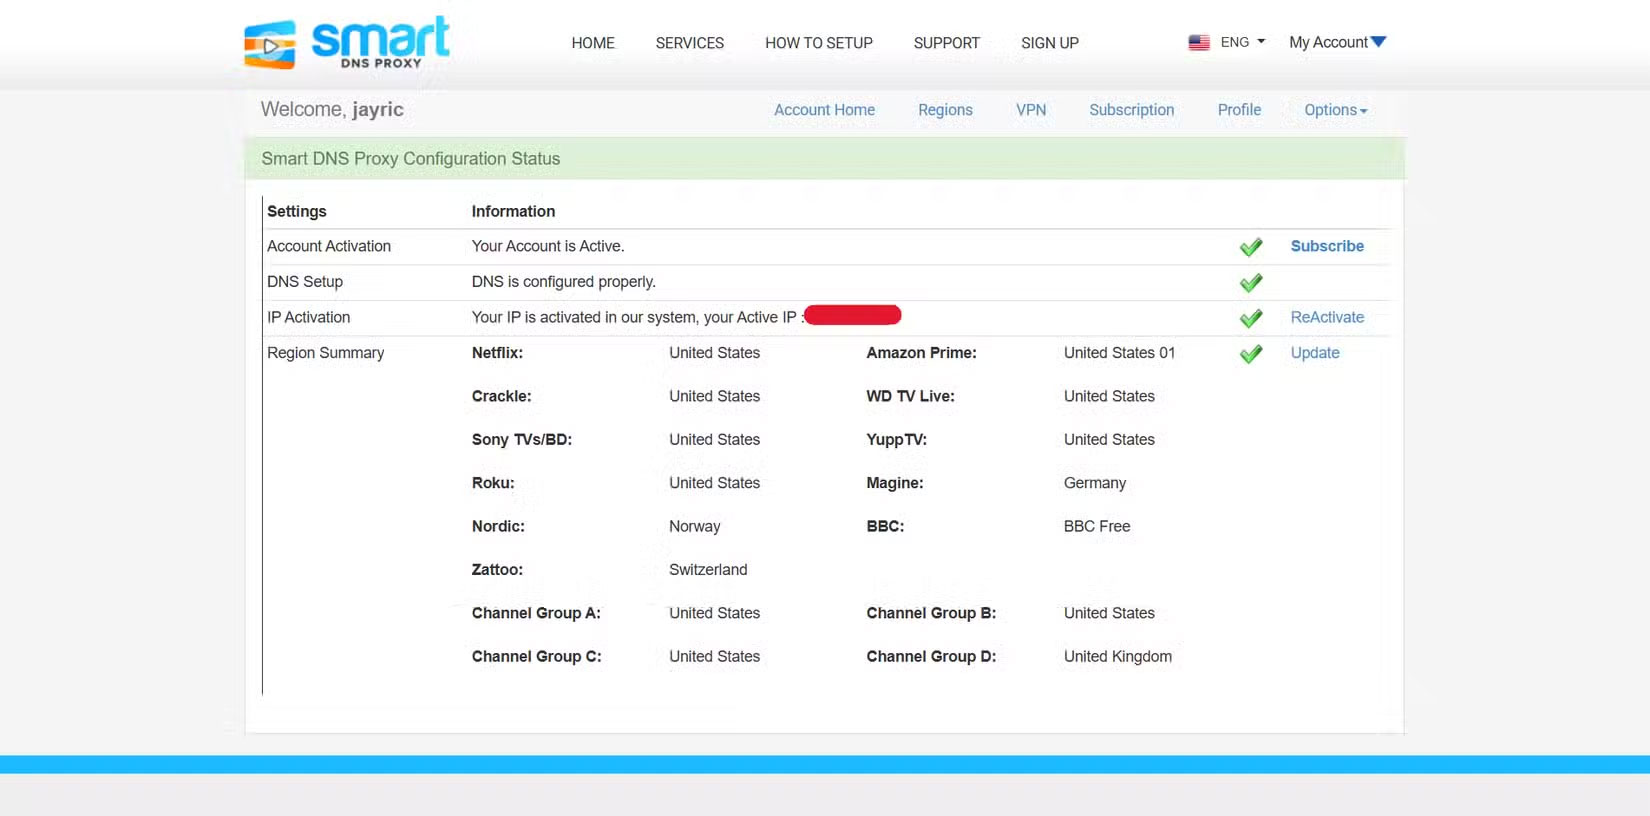
Once your TV is back online, open a browser on your PC and log in to your Smart DNS Proxy account. The status on DNS Setup should now show a check mark indicating that the setup has been enabled on the Smart DNS Proxy network and is active.
If the setup doesn't work, double check for any DNS typos. It's also possible that the DNS server you selected is currently offline. In that case, use the other servers provided in the Smart DNS Proxy list.
Step 5: Check stream access
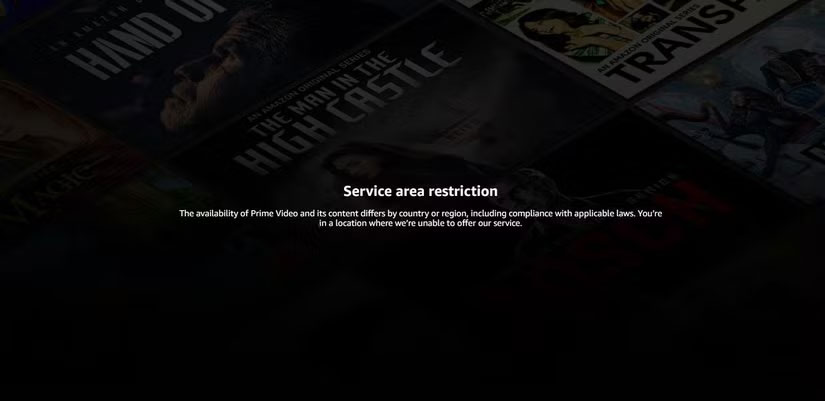
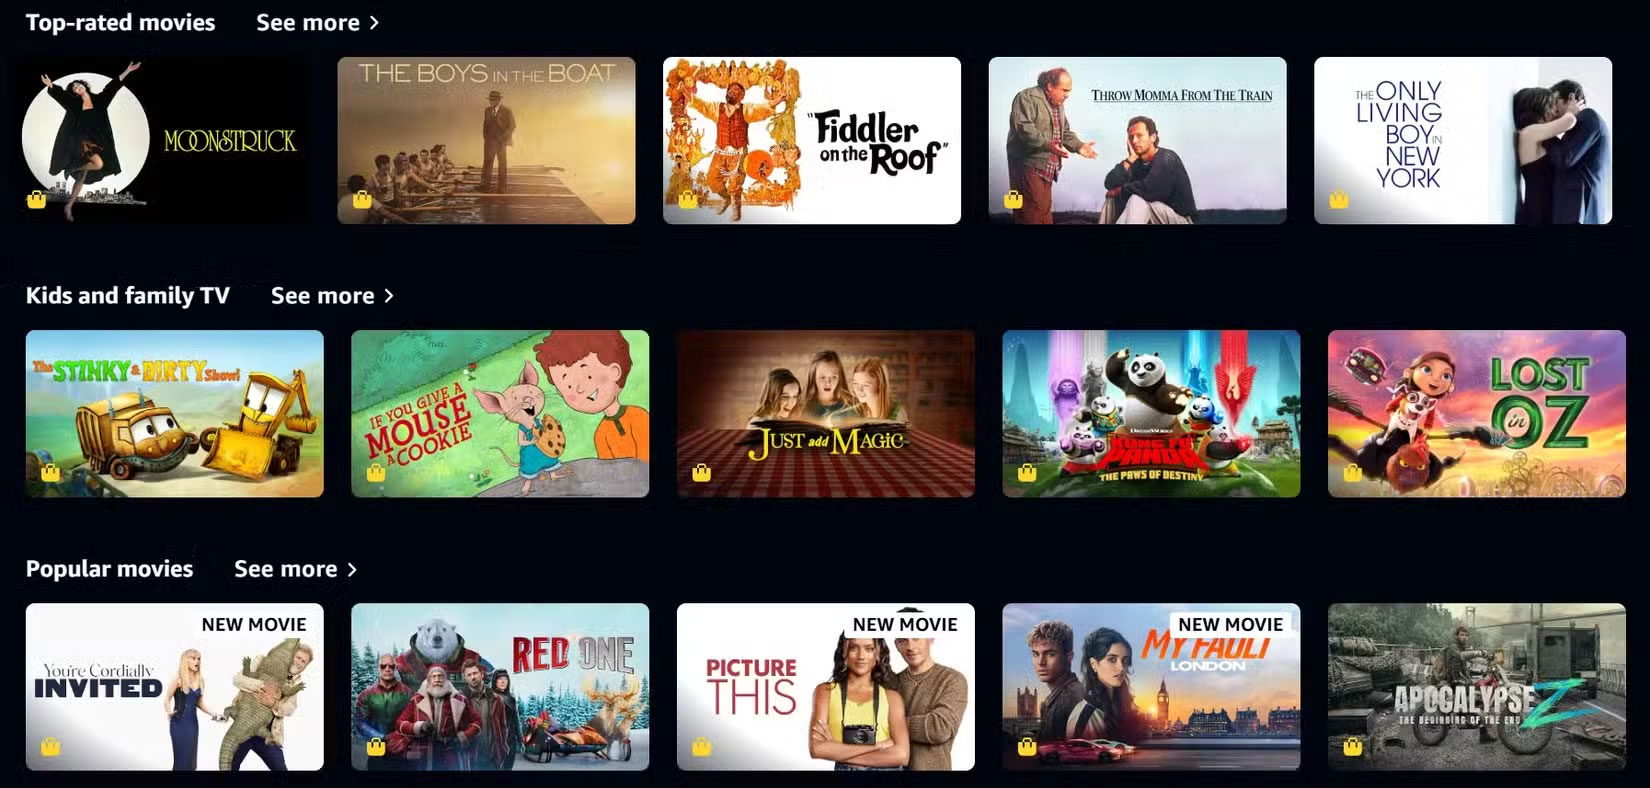
Once everything is set up, open Amazon Prime to see if you can finally browse the service's shows. You should immediately notice that the content is now available. Additionally, the streaming quality should be as smooth as any other streaming service you've used.
Unlocking more content on your Smart TV is as simple as changing a few settings. The few minutes it takes to set it up are definitely worth it. If you're tired of running into streaming restrictions, try Smart DNS Proxy. You might be surprised at how much more content you're missing out on.