Creating a website is incredibly easy with Readdy.AI.
Readdy.AI is truly a powerful tool for creating websites, even if you know nothing about coding, design, and more..
In the age of AI , owning a personal or business website is no longer the exclusive privilege of programmers. You don't need to know how to type a single line of code, nor do you need to worry about complex HTML/CSS tags. With Readdy.AI , website design is now simply a matter of chatting with AI and clicking to select options.
This article will guide you step-by-step, following the standard process from Readdy.AI's visual interface system, helping you turn your idea into a complete website in no time.
A step-by-step guide to creating a simple, basic website with Readdy.AI.
Readdy.AI's system operates on an optimized mechanism: Receive command ( Prompt ) -> Suggest structure -> Intelligent block-by-block editing -> Publish . Below is the detailed process:
Step 1: Launch and enter the Idea Prompt
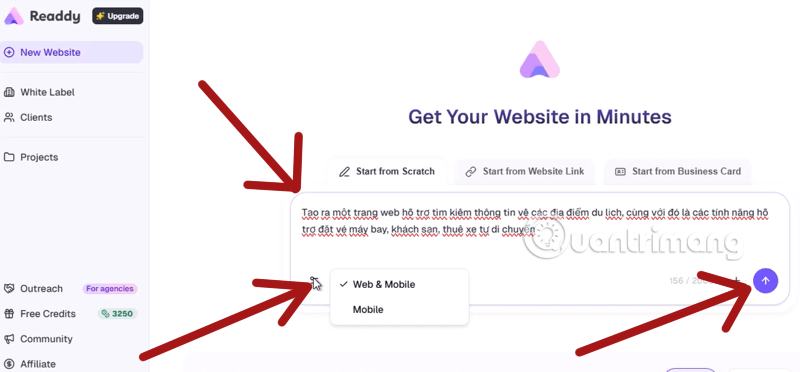
Upon accessing the main interface of Readdy.AI , you will be greeted with a central input field. Here, act as a "customer" and give commands to the AI, selecting either the mobile-only version or the version for both web and mobile.
Instructions: Enter a description of your desired website in the blank field (e.g., "Create a website selling specialty coffee, minimalist style, warm color tone" ).
Tip: Typing in English will help the AI understand better and provide the most accurate results, although Vietnamese is still very well supported. Then, press the Generate button to start processing. The system will automatically suggest options after you create a basic request such as "Create a travel website".
Step 2: Choose the structure and design style.
Continue expanding the prompt with features such as user ratings and comments, and interactive maps to plan your trip based on suggestions from Readdy.AI. Once you are satisfied with your prompt, submit a request for Readdy AI to start creating your website.
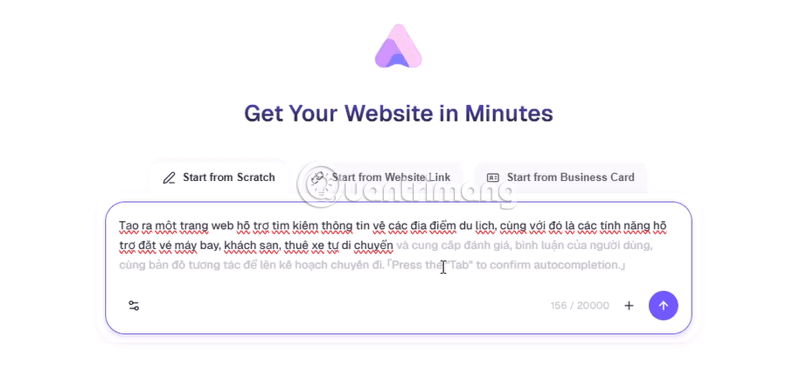
Above the request form will be the following options:
1. Start from Scratch (Start from scratch / Write a description)
This is the default option selected in the image.
- Essentially: Create a completely new website based on your pure ideas using natural language (Prompt) .
- How it works: You simply type your request into the text box below (for example, a prompt for a travel website, flight booking, or hotel you're entering). The AI will automatically act as both a designer and a developer, creating the layout, writing the content (copywriting), choosing colors, and designing the buttons from scratch to best match your description.
- Best suited for: New projects, fresh ideas popping into your head, or when you want the freedom to create a unique framework without being constrained by any pre-existing templates.
2. Start from Website Link (Start from an existing website link)
- Essentially: "Restructuring" or copying layout ideas from an existing website on the internet.
- How it works: When you select this option, the system will ask you to paste a URL link of any website you like (for example, a competitor's website or a beautiful portfolio page). Readdy.Ai's AI will "scan" the structure, sitemap, and layout of that link, then create a similar version in the editor so you can customize it to your content.
- Best suited for: Those who want to conduct competitor research, want to migrate/refresh their old website interface, or simply are too lazy to think about layouts and want to "borrow" a standard, successful framework to optimize their time.
3. Start from Business Card (Name Card)
- Essentially: Transforming the condensed personal or business information on a business card into a full-fledged website (Landing Page or Bio Link).
- How it works: You provide information from a business card (or upload a photo of your business card). The AI will automatically extract key data fields such as: Name, title, company name, phone number, email, address, social media links, etc. From there, it will automatically build a highly professional personal portfolio or contact landing page that is consistent with the branding on the business card.
- Best suited for: Freelancers, small business owners, or individuals who need to quickly create an "online business card" page to attach to their Facebook, TikTok, or LinkedIn bios for personal branding purposes without needing complex design skills.
Step 3: AI suggests and initializes sections.
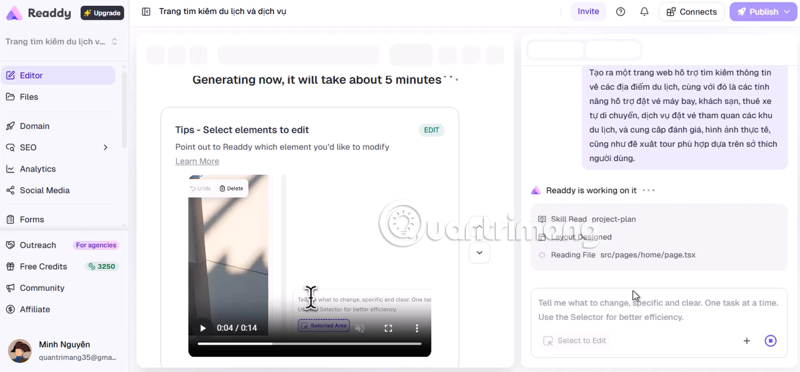
Before creating the detailed design, the AI will display a sitemap containing core elements such as: Hero Section, About Us, Services, Testimonials , and Contact .
Readdy.AI will display the 'Generating now' status and allow you to edit individual sections using selectors. Users can request specific changes such as color, layout, or content.
You can check or uncheck unnecessary items before pressing confirm to allow the AI to generate the interface template.
Step 4: Explore the intuitive editing interface
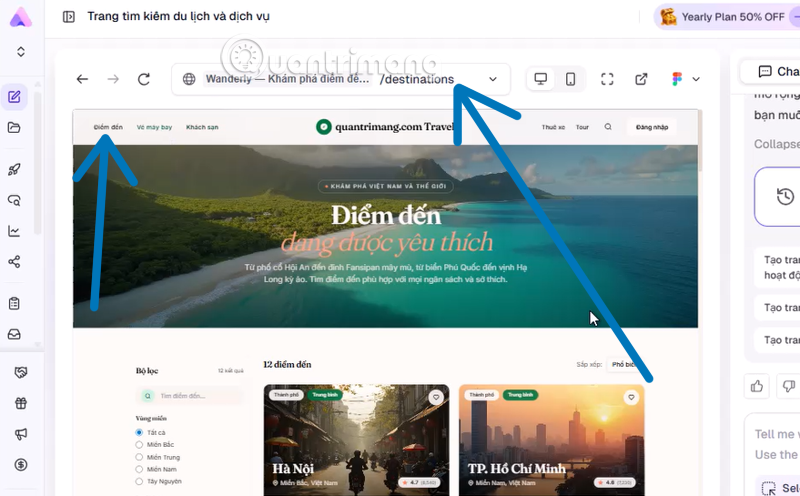
When the overview interface appears, you'll see an extremely intuitive editor. Readdy.AI divides the website into independent blocks. When you hover your mouse over any area, the system will display quick customization toolbars next to it, allowing you to deeply modify the layout without breaking the overall structure.
- The list of destinations (/destinations) includes filters by region, budget, and season.
- Destination details (/destination/:slug): displays photo gallery, activities, nearby hotels, and a map.
- Personalized recommendations: A quiz to help you choose a suitable tour based on your interests.

Step 5: Optimize content for each section using AI suggestions.
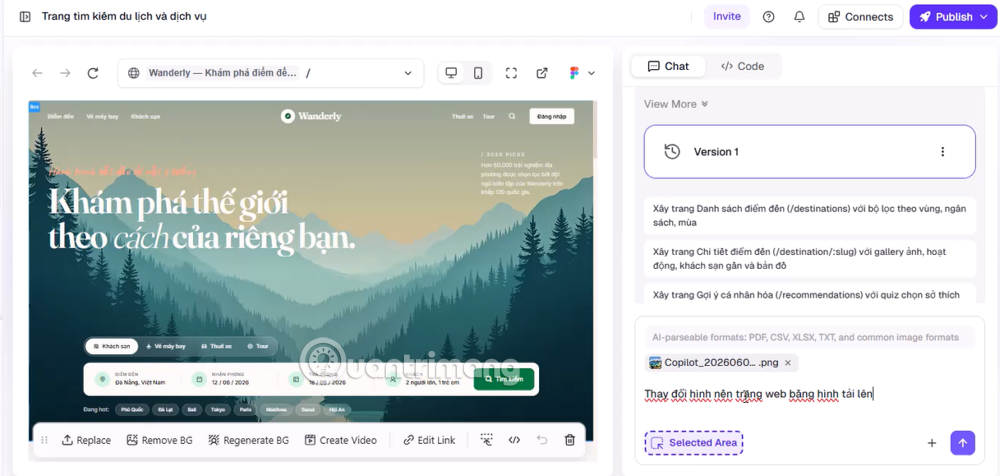
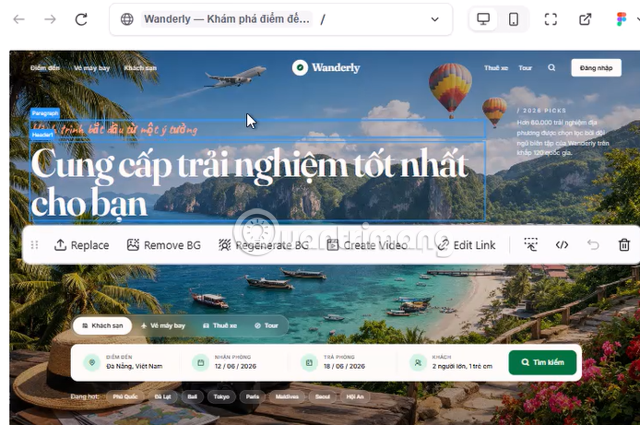
The selling point of Readdy.AI is its AI Assistant feature , available right during editing. If you're stuck for ideas on headlines or calls to action (CTA):
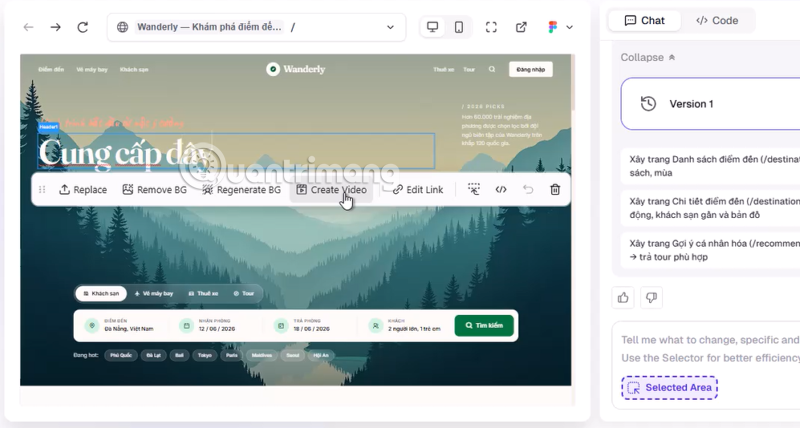
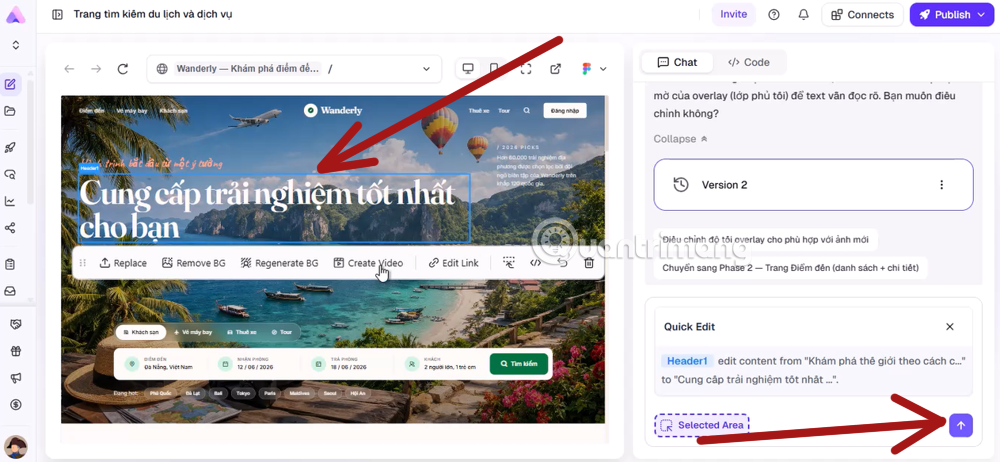
Click on the text, select an icon, or choose "Select to Edit" in the request submission box and select any area within the website interface you have created. Each section will have different options.
The system will offer 3-4 alternative suggestions, ranging from concise and formal to more urgent, to help you optimize your conversion rate. These include adding a link to another page (Edit Link), creating a video (Create Video), removing the background from an image (Remove BG), replacing the image with a different one (Replace), and editing using code.
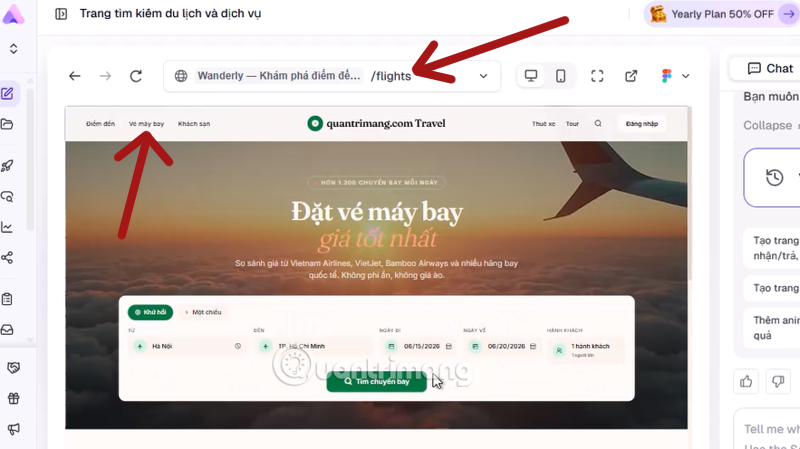
For each section, the content, for example, "Flight Tickets," will be in the format /flights as shown in the image below. Before creating a page for that section, it will be a blank page. If you want to create content for this section, click on it. Send your request in the chat box next to it and ask Readdy.AI to create it for you.
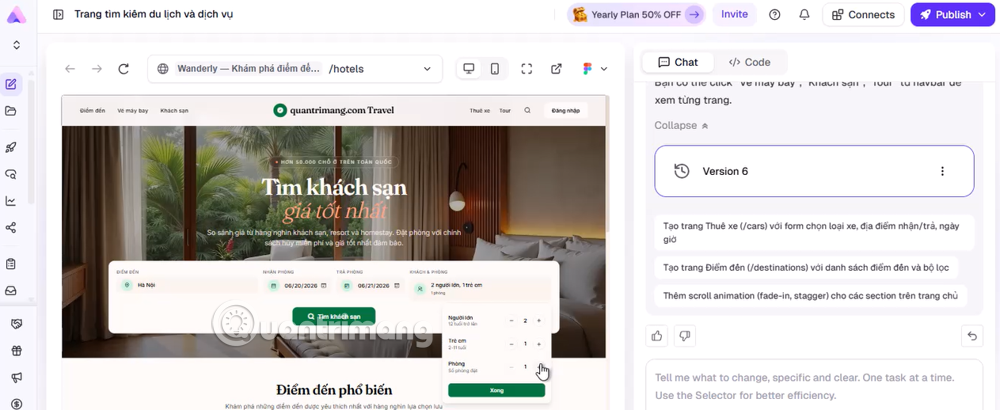
The prompt creates an interface where you can set options such as Round-trip tickets, One-way tickets, number of passengers, departure date, return date, etc. Readdy.AI will suggest options before you decide on the interface for that item. It all depends on the command you type on the right side of the chat box. Below is a complete prompt for creating an interface in the Hotel feature.
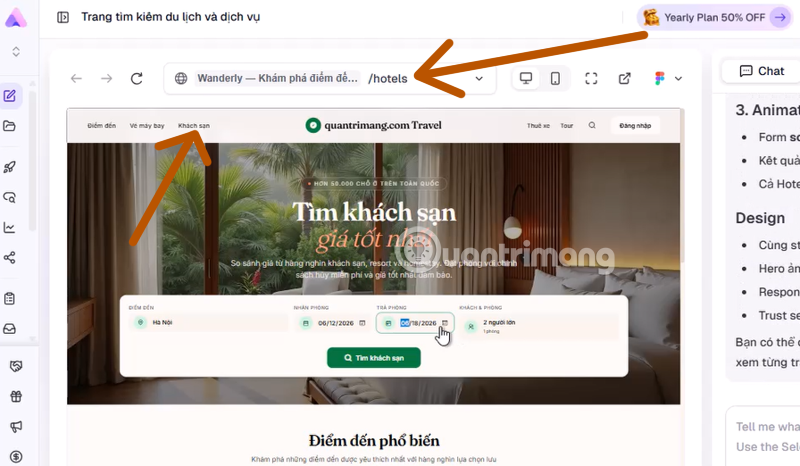
Đóng vai một chuyên gia thiết kế giao diện UI/UX Frontend. Hãy tạo một giao diện web hiện đại, sạch sẽ và tinh tế, có hỗ trợ hiển thị tốt trên mọi thiết bị (responsive) cho trang con đặt phòng khách sạn (đường dẫn: /hotels) dựa trên thương hiệu "TipsMake.com Travel". Các yêu cầu thiết kế chi tiết bao gồm: 1. Thanh điều hướng (Header & Navigation): - Thanh điều hướng màu trắng hoặc trắng mờ, cố định ở trên cùng màn hình khi cuộn (sticky navbar). - Bên trái hoặc chính giữa: Hiển thị logo chữ "TipsMake.com Travel" kèm theo một biểu tượng hình tròn nhỏ màu xanh lá cây đậm ngay bên cạnh. - Các menu liên kết bao gồm: "Điểm đến", "Vé máy bay", "Khách sạn", "Thuê xe". - Riêng mục "Khách sạn" phải được đặt ở trạng thái đang kích hoạt (Active/Selected state) bằng cách làm nổi bật với một khung viền màu xanh dương bao quanh chữ, hoặc có đường gạch chân rõ ràng để khớp với đường dẫn /hotels. 2. Khu vực Banner chính (Hero Section): - Ảnh nền: Sử dụng hình ảnh chất lượng cao, góc chụp rộng và ấm áp về không gian phòng khách sạn hoặc resort cao cấp. - Tiêu đề chính (Heading): Chữ cỡ lớn, in đậm, nội dung: "Tìm Khách sạn lý tưởng cho chuyến đi của bạn". - Khung tìm kiếm (Search Widget): Thiết kế một thẻ (card) màu trắng phẳng hoặc có hiệu ứng kính mờ (glassmorphism) nổi lên trên ảnh nền, bên trong chứa các ô nhập liệu: * Ô nhập điểm đến ("Bạn muốn đi đâu?") * Bộ chọn ngày ("Ngày nhận phòng" & "Ngày trả phòng") * Chọn số lượng ("Số khách & Số phòng") * Một nút "Tìm kiếm" màu xanh lá cây hoặc màu xanh dương nổi bật, kích thước lớn. 3. Các khu vực nội dung phía dưới (Main Content): - Phần "Điểm đến phổ biến": Thiết kế các ô lưới (grid) hiển thị ảnh các thành phố du lịch, kèm số lượng cơ sở lưu trú hiện có. - Phần "Khách sạn ưu đãi tốt nhất": Các thẻ danh sách khách sạn bao gồm: Ảnh đại diện khách sạn, số sao (icon ngôi sao), Tên khách sạn, Địa điểm, Giá tiền theo đêm (VND) và nút "Xem chi tiết". - Bộ lọc nhanh (Filters): Thiết kế thanh lọc tối giản ở cạnh bên (sidebar) hoặc hàng ngang trên cùng để lọc theo Khoảng giá, Hạng sao và Tiện ích (Wifi, Hồ bơi, Bữa sáng). 4. Phong cách thiết kế & Màu sắc (Styling): - Sử dụng tông màu chủ đạo chuyên nghiệp: Màu trắng, xám nhạt, chữ màu than tối (charcoal) để dễ đọc, màu xanh lá cây đậm làm màu điểm nhấn (accent màu thương hiệu). - Phông chữ hiện đại, không có chân (sans-serif), bo tròn các góc thẻ (rounded-xl), và đổ bóng mờ nhẹ nhàng (shadow-md). - Đảm bảo giao diện tự động co giãn linh hoạt và hiển thị chuẩn chỉnh trên cả màn hình Máy tính (Desktop) và Điện thoại (Mobile).
Alternatively, you can use the suggestions provided by Readyy.AI as shown in the image below. However, if you want more detail about the features you want, create a detailed prompt like the one above with the features you want and submit it.
Step 6: Flexibly change the layout.
If you don't like the way images or buttons are arranged in a particular section, you don't need to manually drag and drop them, which is time-consuming.
Instructions: Select the block you want to edit, then click on the "Layout Suggestions" option . Readdy.AI's AI will automatically calculate and display different layout options (e.g., switching from grid to slide view) for you to choose from with just one click.
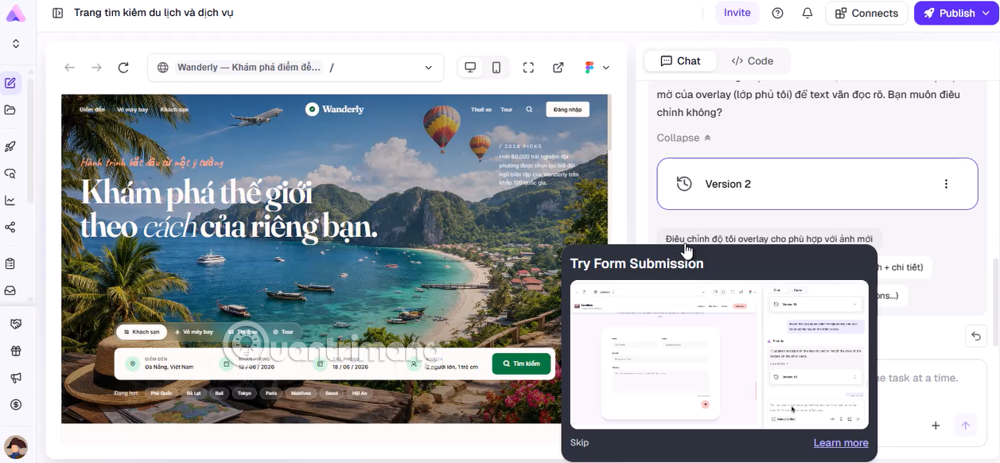
In the example below, I'm changing the background image using a command and uploaded image. Before that, please select the background image for your website, upload the image, and submit the request as shown in the image below. Alternatively, you can request that a different image be added directly to the background image you've chosen.
Step 7: Manage and refresh your image and media library.
Images are the soul of a website. Readdy.AI integrates a library of high-quality, free, copyrighted images and an AI image generator.
Simply select the image box, enter keywords describing the image you want to replace, and the AI will automatically "draw" or search for an image that perfectly fits the current frame.
Step 8: Refine the overall settings (Theme & Style)
Before finalizing, you can check the consistency of the entire website through the Theme management toolbar in the corner of the screen. Here, you can easily change the system font or change the entire main color tone of the website from cool to warm in an instant if you are not satisfied.
Each item will have different features and interfaces that Readdy.AI understands and suggests commands for. Therefore, use those suggestions to create more detailed prompts about the features of that item. You can use other AIs to create prompts.
Step 9: Preview and Publish
The final step to bringing your product to the world!
Press the Preview button to check if the interface displays correctly on different devices: Desktop, Tablet, and Mobile.
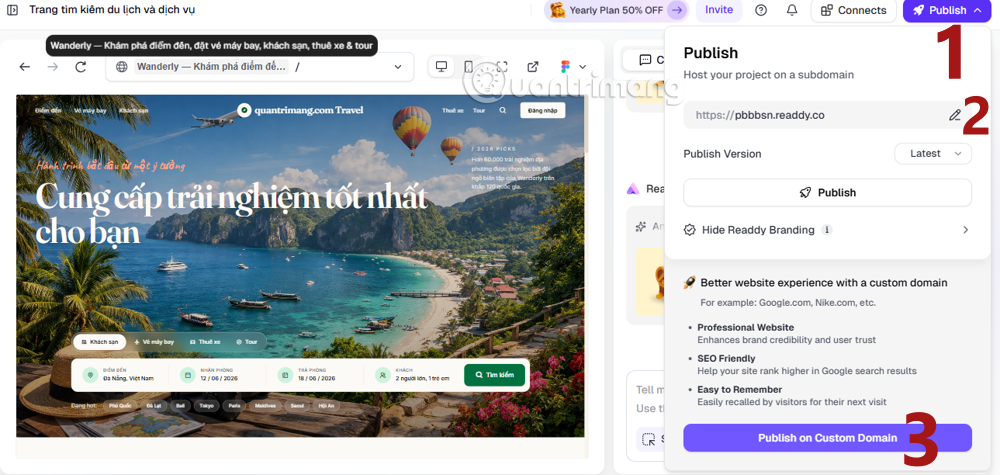
If everything is perfect, press Publish . Readdy.AI will give you a free access link (1) or you can connect to your personal domain (2) and then share your own domain with others (3). Of course, using your own domain will cost you Credit points.
Why choose Readdy.AI over traditional design platforms?
Previously, using WordPress or Wix required time-consuming drag-and-drop operations and precise padding/margin adjustments. Readdy.AI, however, has elevated this experience to a new level thanks to its superior advantages:
| Criteria | Traditional platforms (Wix/WordPress) | Readdy.AI |
| Initialization speed | It takes anywhere from a few hours to a few days. | Just 2-5 minutes |
| Required skills | You need to know how to drag and drop and adjust CSS parameters. | Just need to know how to type text (Prompt) |
| Content creation | You have to write the article yourself or copy from an external source. | AI automatically suggests text and generates images on the spot. |
| Optimize display | The mobile interface needs to be recalibrated manually. | Automatically optimized for 100% responsiveness. |
How to write a prompt so that Readdy.AI can create the website that best suits your needs?
To ensure the AI doesn't misunderstand your intent and produces a perfectly functional interface on the first try, apply the prompt writing formula below:
[Website Type] + [Brand Name/Industry] + [Design Style] + [Special Requirements]
A bad example: "Make me a website to sell clothes." (Too generic; AI will create a generic interface).
A good example: "Create a landing page selling streetwear for the brand 'Z-Style', with a strong Cyberpunk design style, using dark neon colors, including a section to showcase new collections and a sign-up form for special offers."
The more detail you provide, the more satisfying the results will be for you.Ready.AI.
Conclude
Readdy.AI is truly a powerful assistant, freeing content creators and small business owners from the fear of "website development." By making the most of the intelligent suggestions from the system and the intuitive block-based design process, owning a professional, smooth website is now within your reach. Visit Readdy.AI today to create your first website yourself.