Create a virtual machine on a USB drive with VirtualBox.
TipsMake will share a guide on creating virtual machines on a USB drive using VirtualBox in the following article, so you can use VirtualBox to create virtual machines effectively, allowing you to create virtual machines that run smoothly on your operating system.
Table of Contents
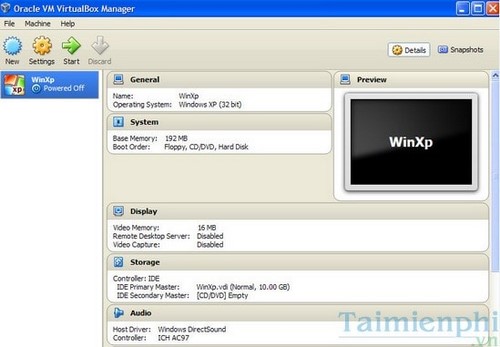
VirtualBox is a software widely used in the process of installing virtual machines on computers. If in the previous article you learned how to create a virtual machine on a physical machine using VirtualBox , in this article we will learn how to create a virtual machine on a USB drive with VirtualBox.

Create a virtual machine on a USB drive with VirtualBox.
Guide to creating a virtual machine on a USB drive with VirtualBox
Prepare:
- Download VirtualBox software to your computer
- A USB drive with a capacity of more than 4GB
Step 1 : Download the latest version of VirtualBox
Step 2 : Open the program you just downloaded.

Step 3 : A new window will appear. Here, click on (.) to select the USB drive where you want to install the virtual machine.
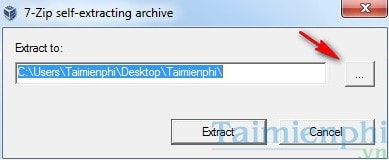
Select USB and then press OK.

Press Extract after selecting the USB drive.

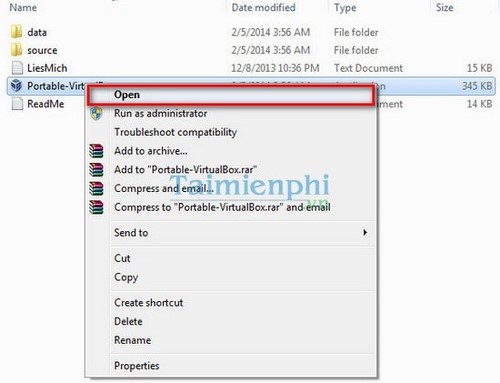
Step 4 : Wait a moment for the process to complete, then go to your USB drive and run the Portable-VirtualBox file.
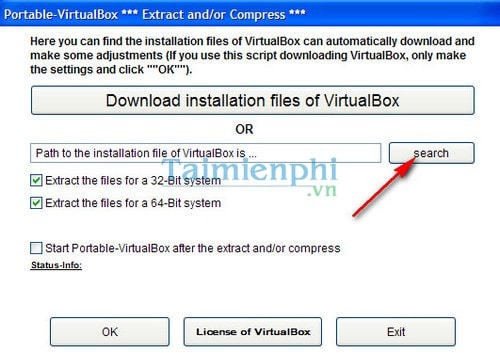
Step 5 : Next, a new window will appear. Here, select search to locate the Virtual *exe file on your computer, or click Download Installation files of VirtualBox if you don't have it.
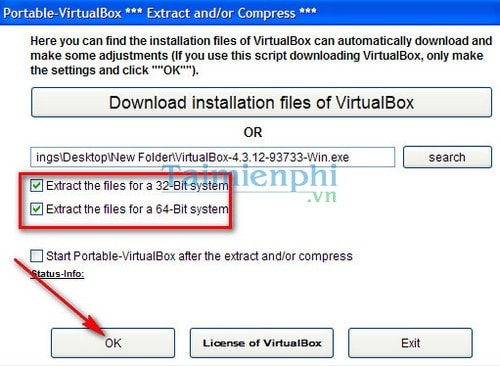
Check the box for "Extract the files for a 32-bit system" or " Extract the files for a 64-bit system" depending on whether you want to use a 32-bit or 64-bit system, then click OK.
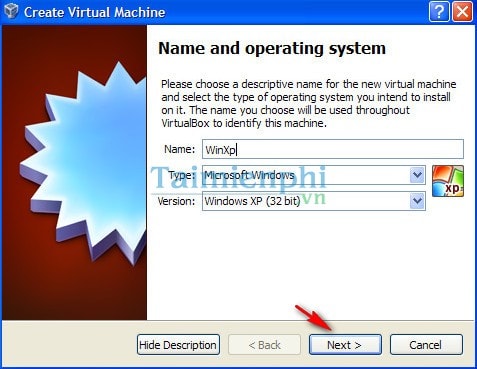
Step 6 : Wait a moment for the exe file extraction process to complete on the USB drive. Run the Portable-VirtualBox file on the USB drive, then click New to create a virtual machine on the new USB drive.
Press Next
You set the normal options, but when you reach this window, stop clicking on the option as shown below.
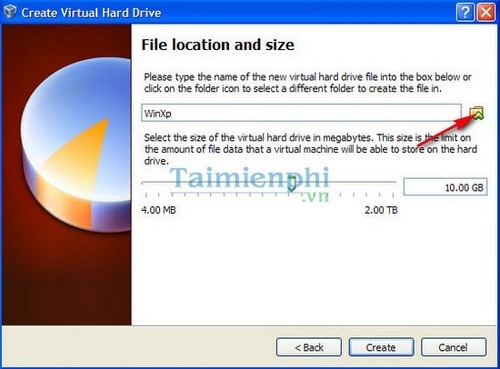
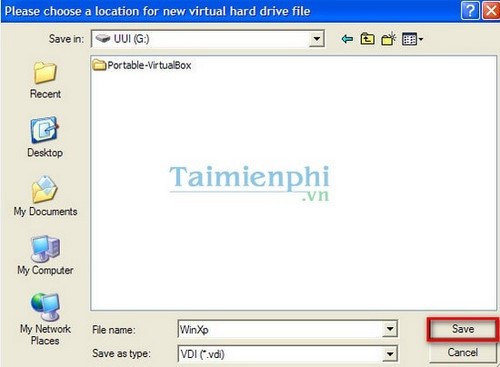
Go to your USB drive and select Save.
Now, install Windows on Virtual Machine as usual. Once the installation is complete, you will have a virtual machine on your USB drive. You can boot and run it normally.
So now you know how to create a virtual machine on a USB drive using VirtualBox software. Now you can run the operating system on any computer. With these simple steps, you have a fully functional portable operating system, just like a normal operating system.
Was this article helpful?
Your feedback helps us improve.
Related Articles
 Instructions to increase the virtual hard drive capacity on Virtualbox5 minutes read
 How to create a Windows 10 virtual machine with VMware Player and VirtualBox10 minutes read
 Create clone virtual machine for current Windows hard drive6 minutes read
 VirtualBox and VMware Player: Which virtual machine should you choose?8 minutes read
 How to fix mouse error and virtual machine keyboard in VirtualBox3 minutes read
 Installing Ubuntu in VirtualBox does not need DVD or USB5 minutes read
Reader Comments 0
Sign in with email or Google to join the discussion.