Table of Contents
This practical guide walks through 5 ways to fix the error can not connect iPhone to the, explains the main requirements, and highlights common issues that may appear along the way.
1. Turn off image format conversion
By default, iPhone automatically converts multimedia files (photos, videos) to a format compatible with the receiving device (Mac or PC). However, this process sometimes causes The device is unreachable error on Windows.
To turn off image format conversion, disconnect your iPhone from your computer, then go to Settings - Photos (photos) and select Keep Originals in the Transfer section. to Mac or PC (transfer to Mac or PC).

2. Use a different connection cable
Almost any type of cable can charge iPhone, but the witty cables will not support data transfer and are not safe for long-term use.
When you want to use a third-party Lightning cable, users should choose famous brands such as Anker, Aukey, RAVPower . that support fast charging according to PD standard and get Apple's MFi certification.

3. Use the error correction tools available on Windows
Windows has a built-in tool to help you quickly check and fix common problems.
To use, plug your iPhone into your computer, then press Windows + R, enter the command msdt.exe -id DeviceDiagnostic and click OK. The Hardware and Devices troubleshooting tool will now launch.
If the troubleshooter doesn't detect any errors with your device, try updating the USB driver.
4. Update the USB driver
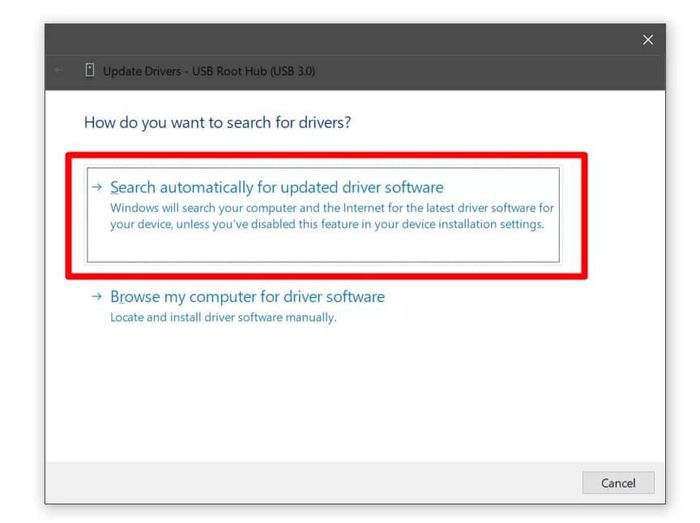
First, right-click the Start menu in the lower left corner of the screen and select Device Manager. Next, users just need to navigate to Universal Serial Bus controllers, right-click on the USB Root Hub line and select Update driver - Search automatically for updated driver software.
5. Update iOS
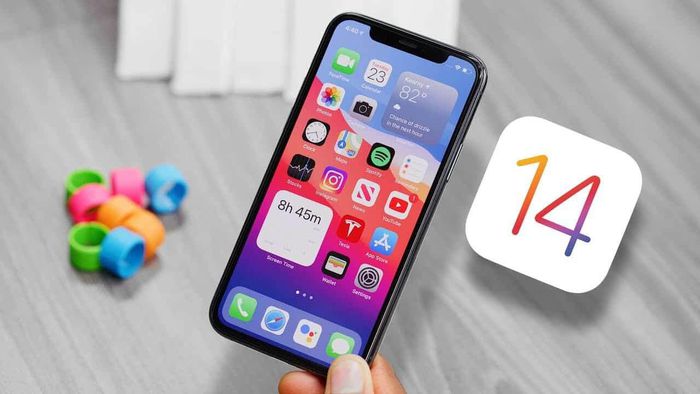
If none of the above solutions fix the problem, try updating iOS by going to Settings - General - Software Update - Download & Install (download and install). Setting). Note, the size of the update may vary depending on the device you are using.
Before updating, users should back up all data on iPhone via iTunes or iCloud to minimize possible risks.
Key Takeaways
Use the information above as a practical reference for 5 ways to fix the error can not connect iPhone to the. Review each step carefully, confirm any requirements, and choose the option that best fits your situation.
FAQ
What does this guide explain about 5 Ways to Fix the Error Can Not Connect iPhone to the?
It explains the main concepts, practical considerations, and useful steps related to 5 ways to fix the error can not connect iPhone to the without requiring advanced knowledge.
Who can benefit from learning about 5 Ways to Fix the Error Can Not Connect iPhone to the?
This information is useful for readers who want a clear overview, practical guidance, and reliable steps related to 5 ways to fix the error can not connect iPhone to the.
What should I check before applying this information?
Review the requirements, confirm that your device, software, or situation matches the instructions, and back up important data before making major changes.
Related Articles
 How to Fix iPhone Error Does Not Show Trust This Computer7 minutes read
 6 Ways to Fix Wi-Fi Connection Errors on iPhone 65 minutes read
 Fix Itunes Error: 'An iPhone Has Been Detected but It Could Not Be4 minutes read
 Instructions for Syncing iPhone / iPad via Wi-Fi5 minutes read
 Fix the Error of Turning on 3G Data but Cannot Connect to the5 minutes read
 OneDrive Error Cannot Connect and Solutions to Fix It on the Computer Explained7 minutes read
Reader Comments 0
Sign in with email or Google to join the discussion.