Table of Contents
Overview
This guide covers share how to fix laptop not catching Wi-Fi in clear, practical terms. It covers the key concepts, recommended steps, common limitations, and useful checks so you can make a better-informed decision.
During the process of using a laptop, you must have encountered a situation where your laptop cannot catch Wi-Fi. But you do not know the cause and how to fix this situation other than taking it to a repair shop. Today, this guide explains to find the cause and how to fix this situation right at home!
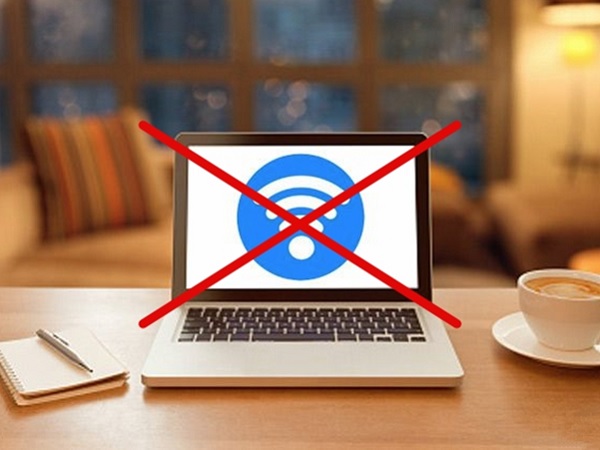
Reasons why laptop cannot catch Wi-Fi
To find a way to fix the situation where the laptop cannot catch Wi-Fi, we must first know the cause of the error to find the fastest and most accurate way to fix it. But there are many reasons why your computer cannot connect to Wi-Fi, and one of those reasons can be listed as follows:
- Accidentally turned off the Wi-Fi switch, or did not activate the Wi-Fi feature on the laptop. Some laptop models such as Dell, HP,. will have this switch. Therefore, the phenomenon of Dell laptop not being able to connect to Wi-Fi may be because you accidentally turned off the Wi-Fi switch.
- The computer does not have a Wi-Fi network driver installed or the driver is old, corrupted due to a virus or software conflict.
- Due to network system, Wi-Fi router error or no network connection.
- Same IP as other machines in LAN
- Computer infected with virus
- Use fake IP software or VPN to change IP
How to fix the error
Laptop cannot catch Wi-Fi with red X
If you cannot connect to the network and the Wi-Fi has a red X icon, you need to check if the Wi-Fi is turned on or not. On some old Dell or HP laptop models, there will be a physical switch to turn the Wi-Fi on and off. Therefore, when the Dell laptop cannot catch the Wi-Fi, first check this switch to see if we accidentally turned it to OFF mode or not.

For current laptop models such as Dell laptops or HP laptops, the physical Wi-Fi switch on the edge of the machine is designed as a button next to the power button. Try turning on Wi-Fi on your laptop with this hotkey. When turned on, the Wi-Fi button has a blue indicator light, on the contrary, when the indicator light is orange or red, it means the laptop's Wi-Fi is off.
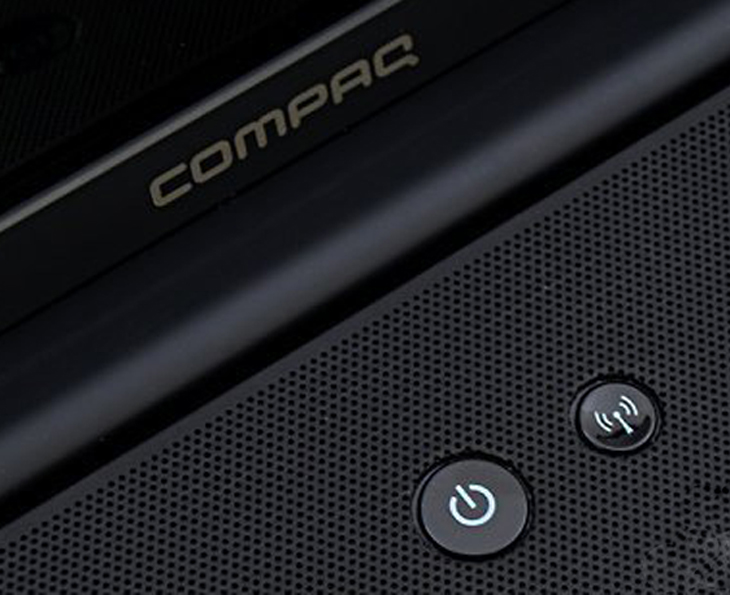
In case your device does not have the quick Wi-Fi on/off buttons as above, you can also use the shortcut key combination to re-enable Wi-Fi.
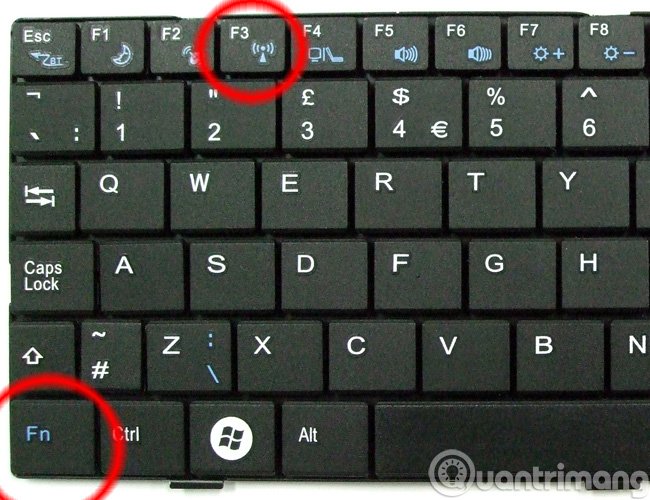
Key combination to turn on/off Wi-Fi on laptops:
- Dell Laptop: Fn + PrtScr
- Asus Laptop: Fn + F2
- Lenovo Laptop: Fn + F5 or Fn + F7
- Acer Laptop: Fn + F5 or Fn + F2
- HP Laptop: Fn + F12
- Toshiba Laptop: Fn + F12
Reinstall driver
If you used it normally before but suddenly your laptop can't catch Wi-Fi anymore, then the possibility of your network driver error is very high. To check your laptop's Wi-Fi driver, do the following:
Step 1: On the This PC icon on the desktop, right-click and select Manager
Step 2: Continue to select Device Manager and check in the ' Network adapter ' column to see if the Wi-Fi driver is present. The normal Wi-Fi driver will have the symbol Wireless
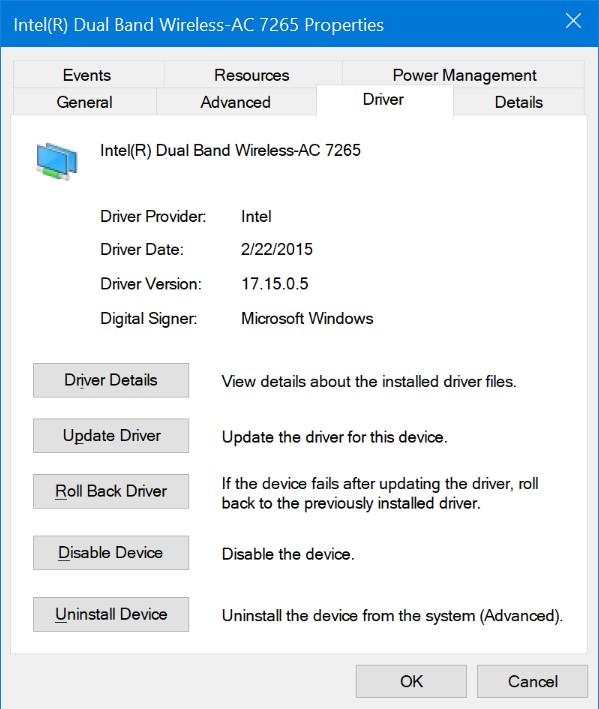
Step 3: If you do not have the Wi-Fi driver, you must use another device to download the driver, copy it to the USB and then reinstall it. If you cannot download the Wi-Fi driver or cannot find the driver, you can use All in one driver automatic installation software such as Driver Booter or Wandrive to automatically reinstall it.
Step 4: After installing the Driver, if the signal bar icon is the same as before, it is successful. In case the new device has not installed the driver, you can also do it this way.
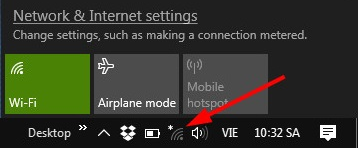
Wi-Fi not connected and has yellow exclamation mark
When your laptop cannot connect to Wi-Fi and has a yellow exclamation mark or the laptop loses the Wi-Fi icon, this is a common sign when your computer has an IP that overlaps with devices using the network with you. To fix this situation, you can delete this old Wi-Fi and reconnect.
If after reconnecting to Wi-Fi it still doesn't work, please refresh the IP address as follows:
Step 1: Open the RUN window by typing " run " into the search box on the window.
Step 2: Continue typing cmd and enter to open the Command Prompt application.
Step 3: The cmd window appears, you use the command ipconfig /release ⏩ then press Enter to execute: This command helps you delete the old IP that is having an error.
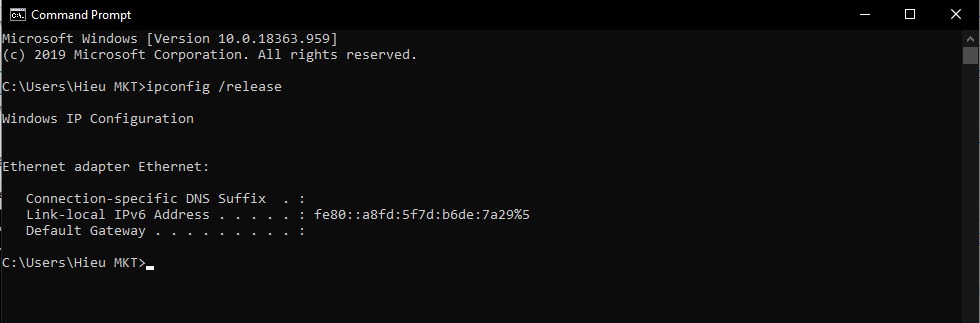
Step 4: Next, type the command ipconfig /renew for the computer to receive a new IP address.
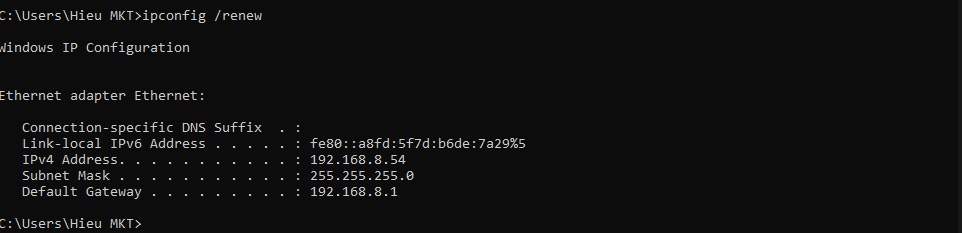
After completing this step, restart your computer to check the results.
Above are some of the most common causes and solutions for laptop not catching Wi-Fi errors. Hopefully this information can help you fix this error quickly and effectively if you encounter it. Good luck!

Key Takeaways
Use the guidance above as a practical reference for share how to fix laptop not catching Wi-Fi. Check compatibility, follow the steps carefully, and verify important details with official documentation when software, security, accounts, health, or purchases are involved.
FAQ
What is the main point of this article?
This article explains share how to fix laptop not catching Wi-Fi, including the central facts, context, practical implications, and details needed to understand the topic.
Why does this topic matter?
It may affect performance, cost, safety, convenience, purchasing decisions, or how people understand a broader development.
Could the information change over time?
Yes. Product details, software features, prices, policies, codes, and news developments can change, so verify time-sensitive information with official sources.
Related Articles
 How to Play Wi-Fi on Laptop with MyPublicWiFi - Share Wi-Fi3 minutes read
 Instructions to Play Wi-Fi by Laptop with Wi-host Software4 minutes read
 Play Wi-Fi on Super Simple Computers with Mypubicwifi4 minutes read
 How to Share a VPN via Wi-Fi Hotspot from a Laptop4 minutes read
 How to Play Wi-Fi on Windows 8, Share Wi-Fi on Windows 8 Without Software4 minutes read
 How to Fix the Error of Laptop Catching Flickering Wi-Fi7 minutes read
Reader Comments 0
Sign in with email or Google to join the discussion.