Make your laptop's heat sinks super simple
Hot summer air often causes your laptop to be in continuous heat up, affecting the speed at which it is particularly damaged to the components of the device. Network administrators have introduced to you how to reduce laptop heat through the computer system intervention in lesson 5 simple way to help laptop heat dissipation effectively. Or make a cold fan blow away the heat for the computer according to the lesson How to make a super simple mini fan for desktop cooling.
And in this article, we will show you how to cool down your computer, with a self-made heat sink from cardboard. The advantage of the heat sink is that the material is extremely simple, easy to take anywhere and doesn't cost you much money. Join the Network Administrator to start making heat sinks for laptops according to the instructions below.
- Four step instructions for installing more RAM
- How to buy a desktop computer
- The best desktop chip today
Material for making base:
- Ruler, pen, knife along the paper.
- Glue and glue gun.
- The computer has Adobe Acrobat or Foxit Reader software installed.
- Paper cardboard. To be able to withstand the weight of the machine, choose a hardcover. You can get a laptop box right away.
Instructions on how to make laptop cooler base:
Step 1:
First of all, you need to download 2 pre-loaded templates according to the link below.
- Download sample 1 laptop cooler base
- Download sample of 2 laptop heat sinks

Print form number 1 for use.
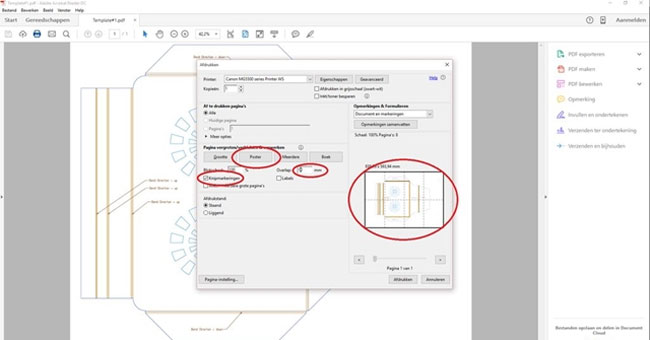
Step 2:
Paste the printed design onto the cardboard cover so that you can perform precise cutting or folding operations.Note : the blue line is the cutting line and the orange line is folded.
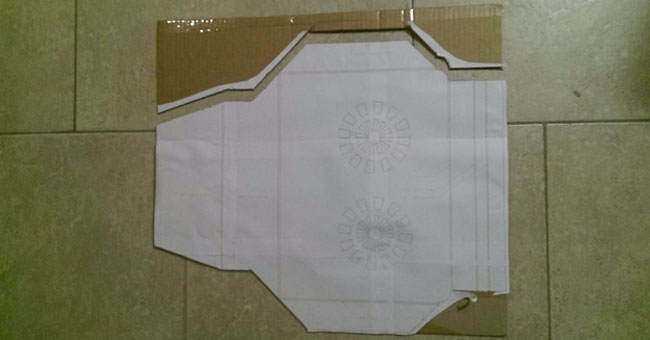
Step 3:
Based on the lines, you cut and fold the cardboard back and are like the image below.

Use glue to fix the fold. Be sure to stick it properly to avoid opening it.

Step 4:
After completing form 1, proceed with pattern 2. You also perform the same operation: pasting on cardboard, cutting and folding with the available path.
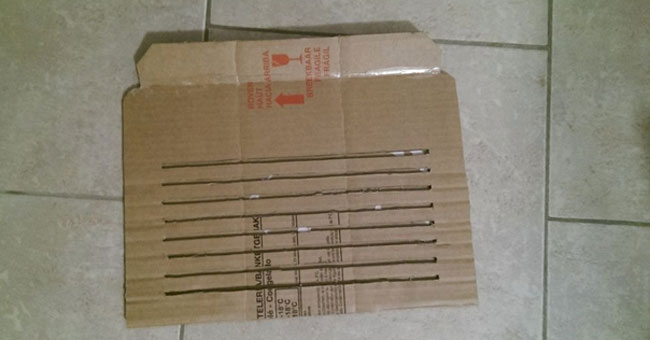
Step 5:
So we have 2 complete parts from 2 cardboard samples as shown below.
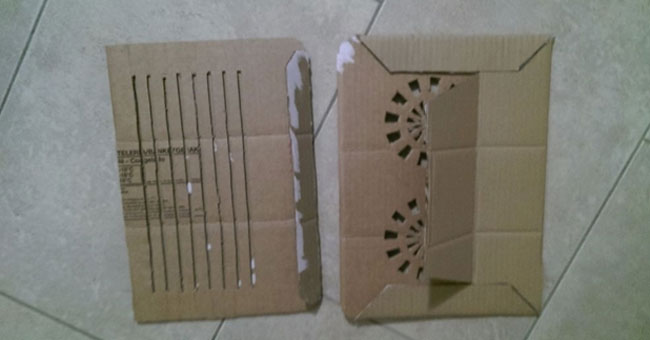
Step 6:
Assemble the two parts of the heat sink firmly together with glue.
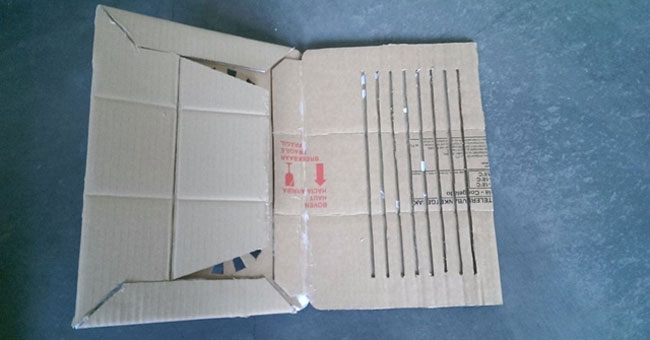
To create a tilt for the stand when placing the laptop, pull the brush and plug it into 1 of the pre-cut slots.
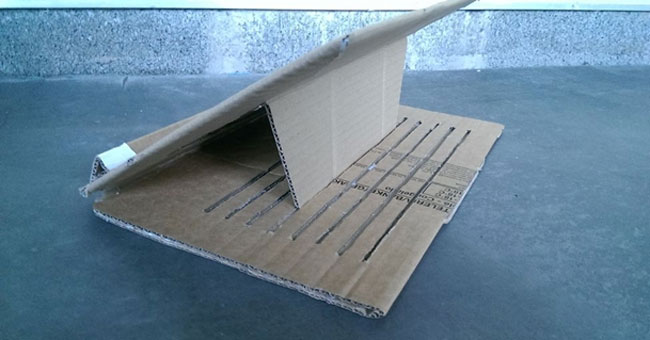
Now just put your laptop up and admire your achievements. Without going through hard to implement and not needing a lot of supplies, you can completely cool your laptop super simple.
Refer to the following articles:
- Experience gold when choosing to buy an external hard drive
- What is the best color correction for the screen?
- You have to use thermal paste properly?
I wish you all success!
You should read it
- ★ You have to use thermal paste properly?
- ★ 'Relieve heat' for laptops with Thermaltake's Massive 14² heat sink CL-N001-PL14BU-A
- ★ 5 simple ways for efficient laptop heat dissipation
- ★ Why is high-grade nickel-plated heat sink even though it is inferior to copper and aluminum?
- ★ Top 5 best heat sinks 2019