Table of Contents
Every character in ScratchJr can have its own scripts. Adding a second character therefore does more than place another picture on the stage: it lets you create conversations, coordinated movement, collisions, and simple games.
This guide shows how to add, edit, delete, and program a character without confusing the character list on the left with the page list on the right.
Add a character to the current page
Open an existing project from My Projects or create a new one. In the character area on the left, tap the plus sign beneath the character thumbnails.
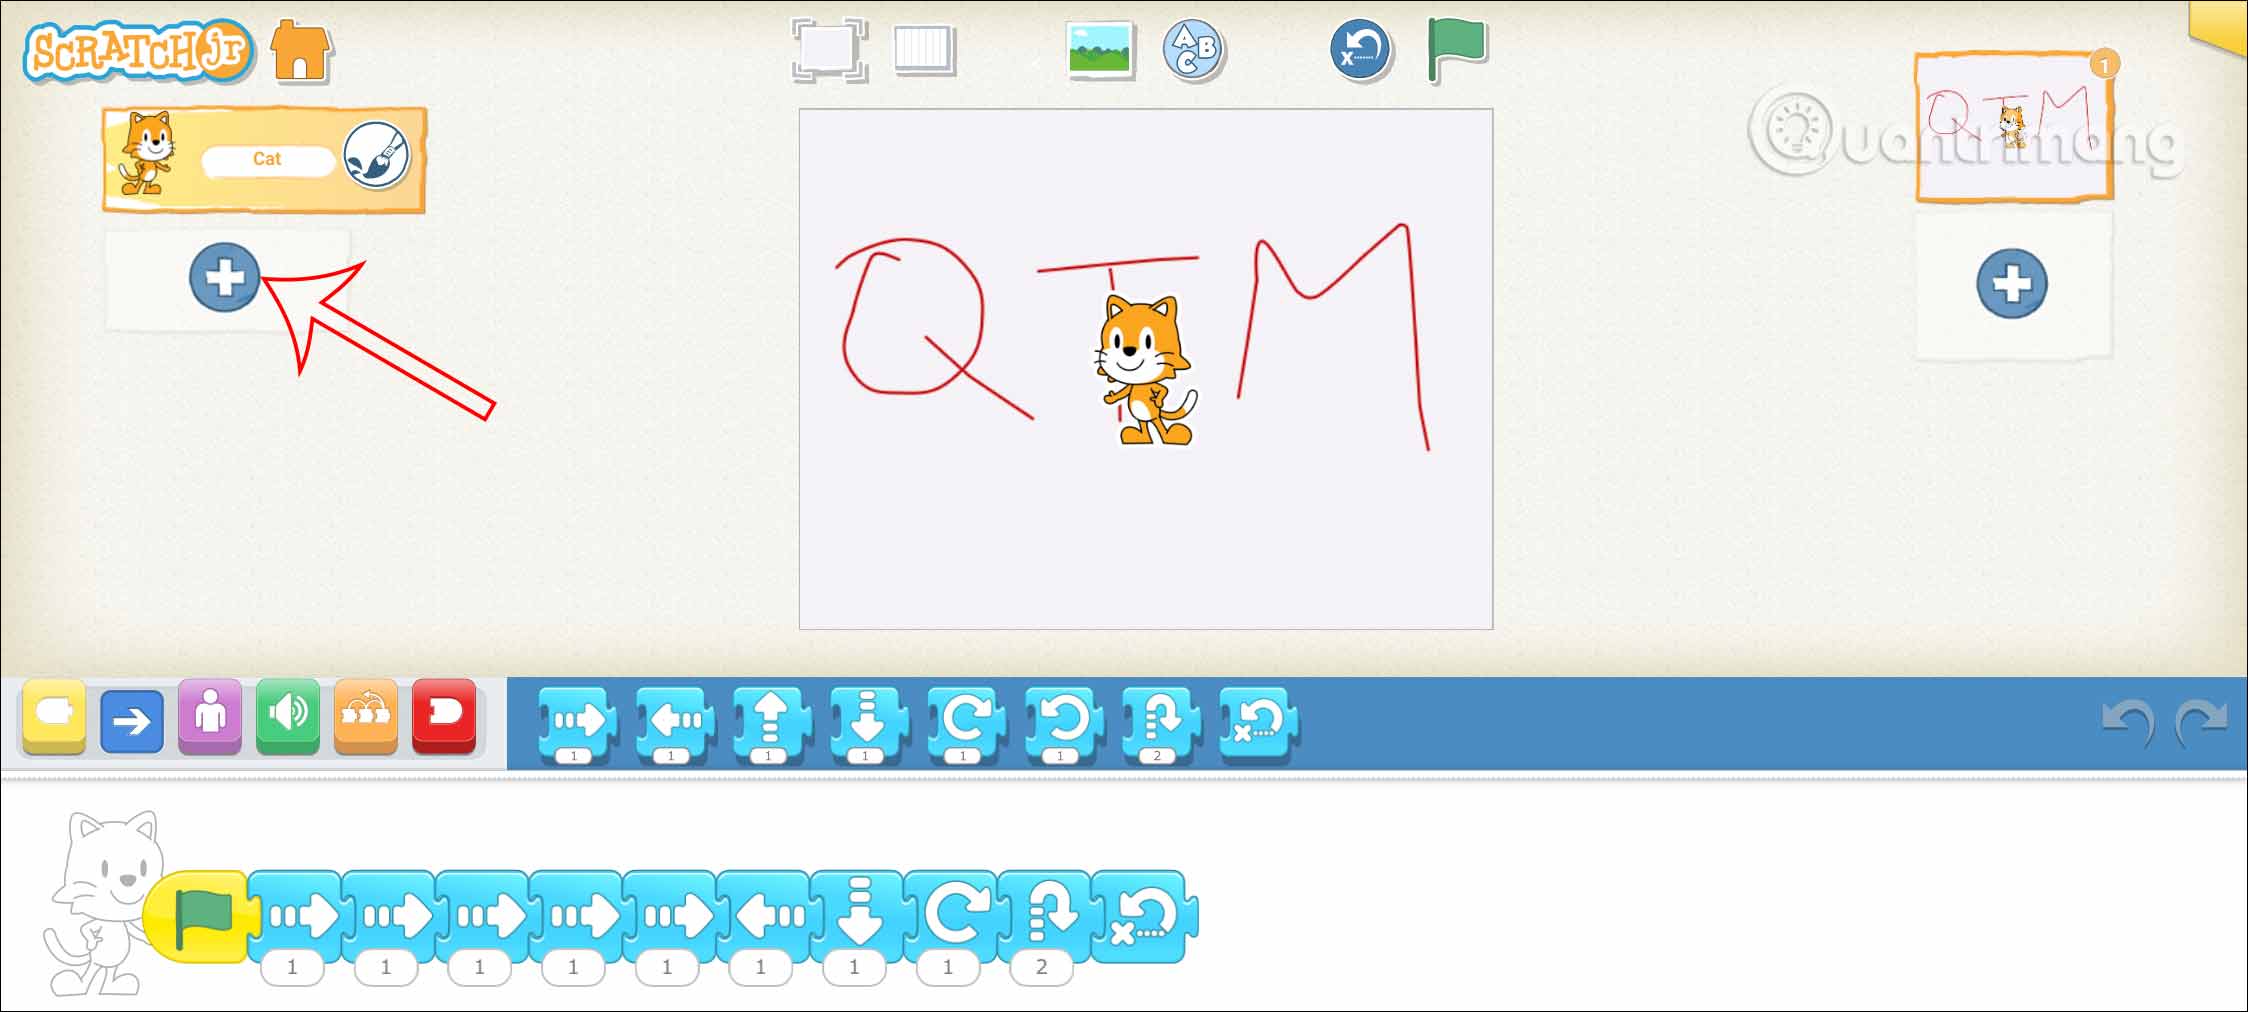
The character library opens. It contains people, animals, objects, and other ready-made characters.
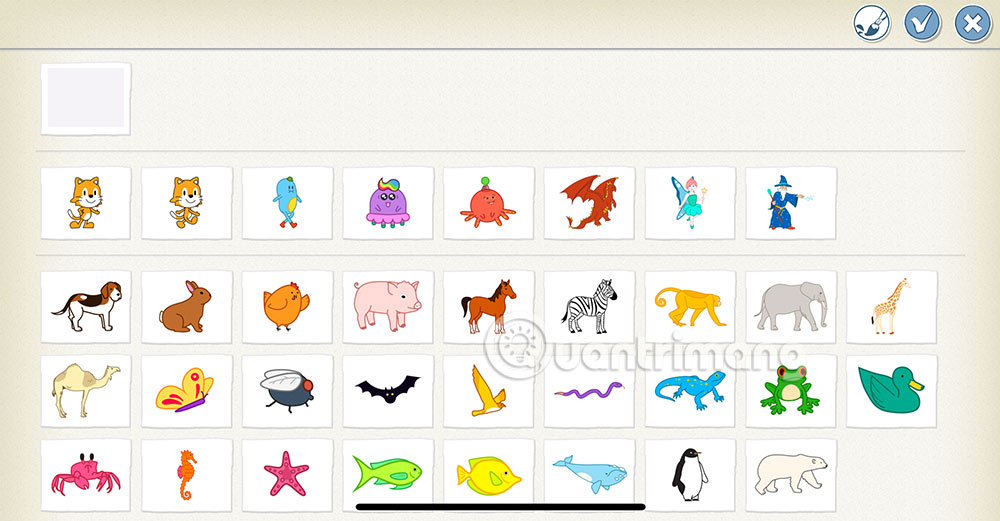
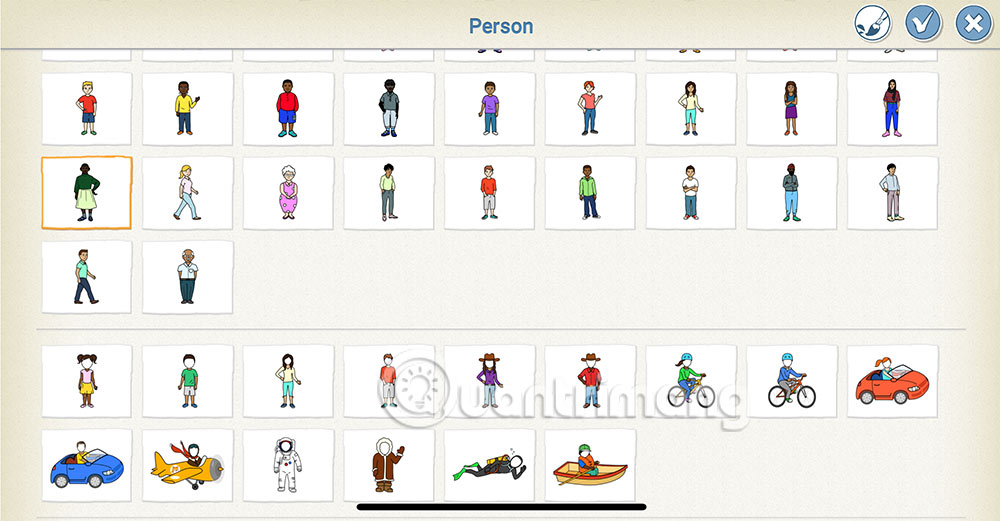
Browse the library, tap the character you want, and select the checkmark to add it.
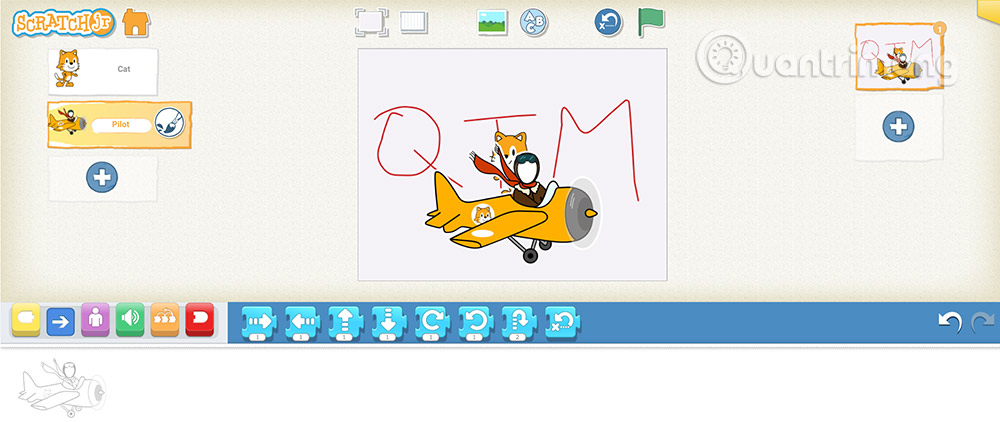
The new character appears on the stage and in the character area. Drag it on the stage to choose its starting position.
Delete or redesign a character
To remove a character, press and hold its thumbnail until a red delete mark appears.
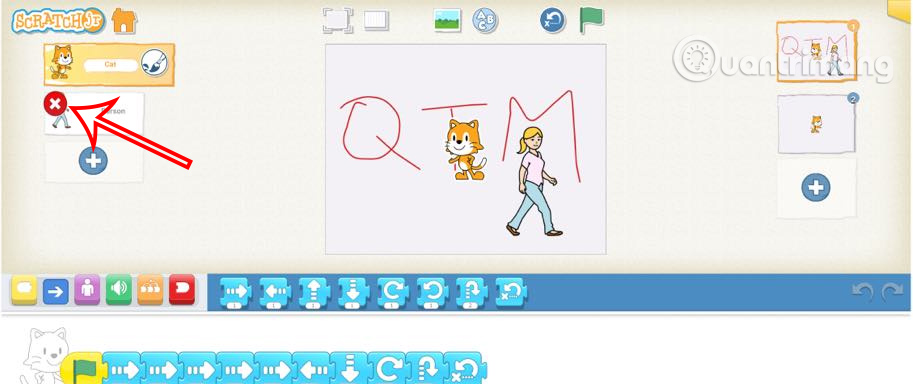
Tap the red mark to delete the character. This also removes that character's scripts, so check that you selected the intended thumbnail before confirming.
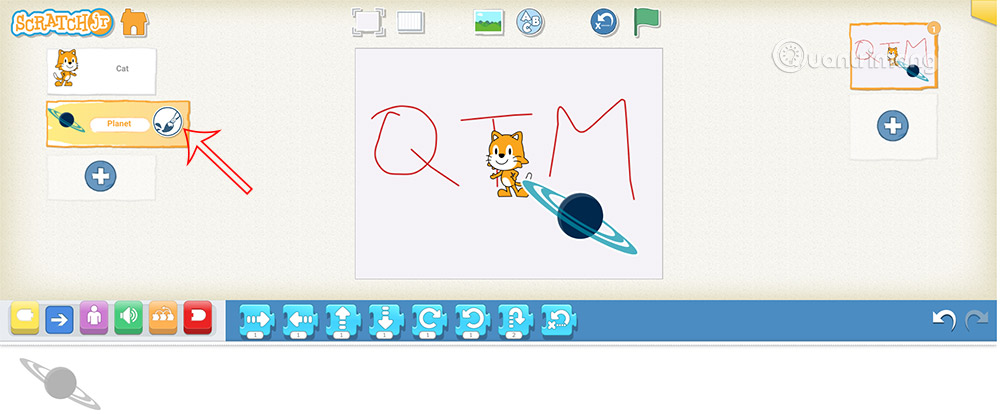
To change a character instead of removing it, select the thumbnail and tap the paintbrush icon.
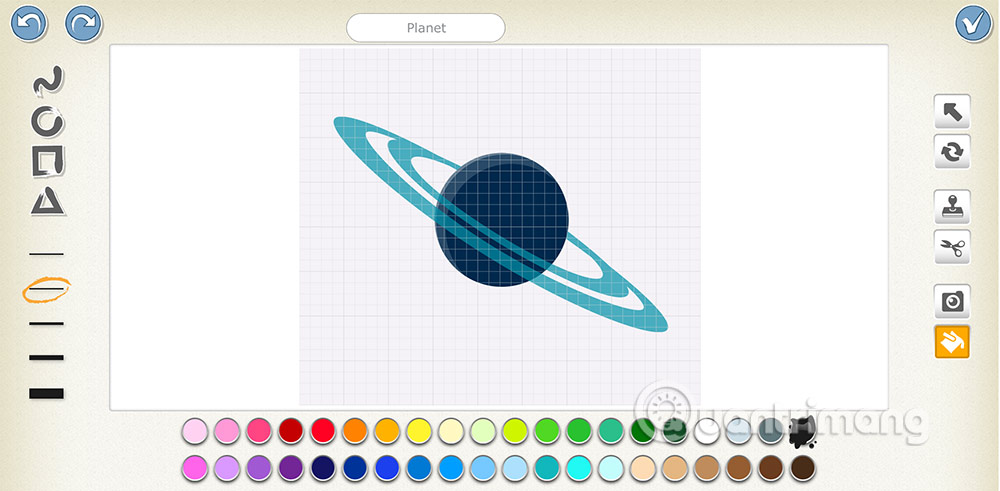
The paint editor lets you change colors and shapes or add details. Use the checkmark to keep the edited appearance.
Create a script for the new character
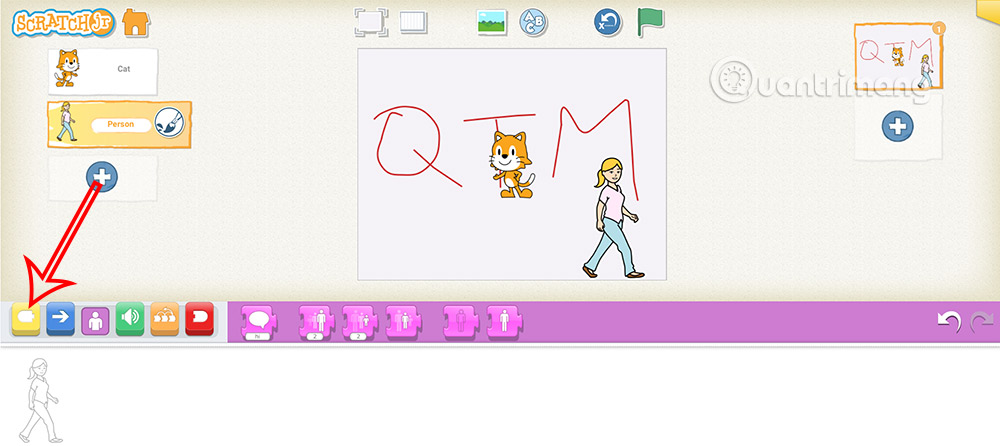
Tap the new character's thumbnail. The programming area now belongs to that character; scripts for the original cat are still stored with the cat.
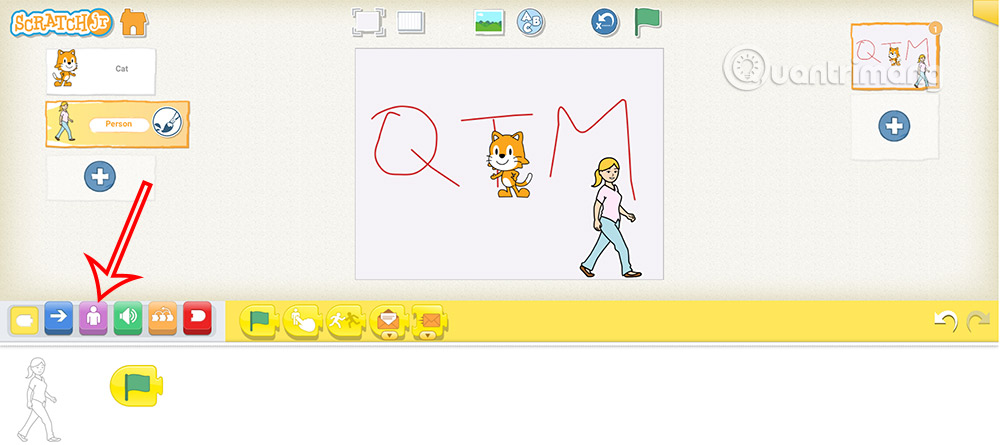
Open the yellow Triggering category.
Drag Start on Green Flag into the programming area. Any script that begins with this block starts when you tap the green flag above the stage.
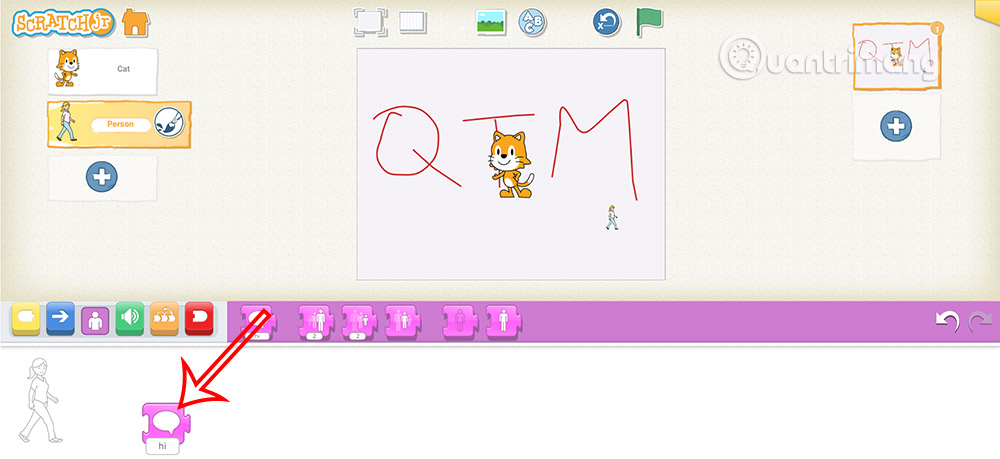
Open the purple Looks category to add speech or change the character's size or visibility.
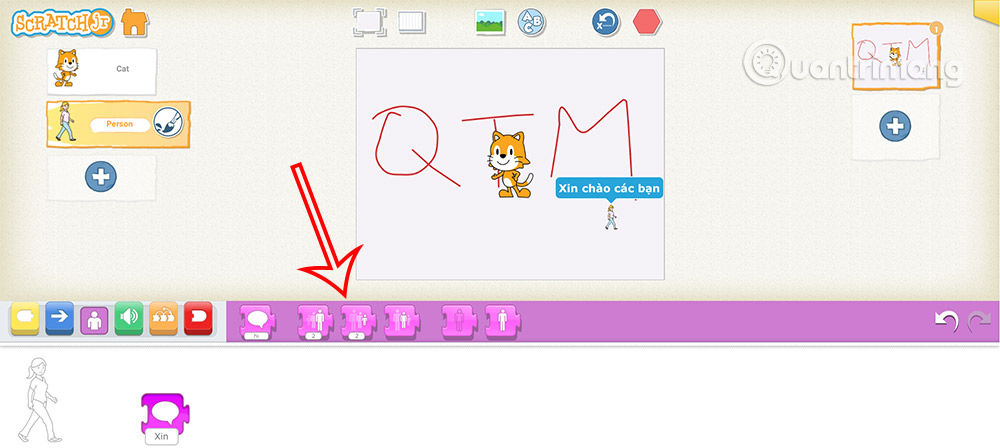
Connect a Say block to the trigger.
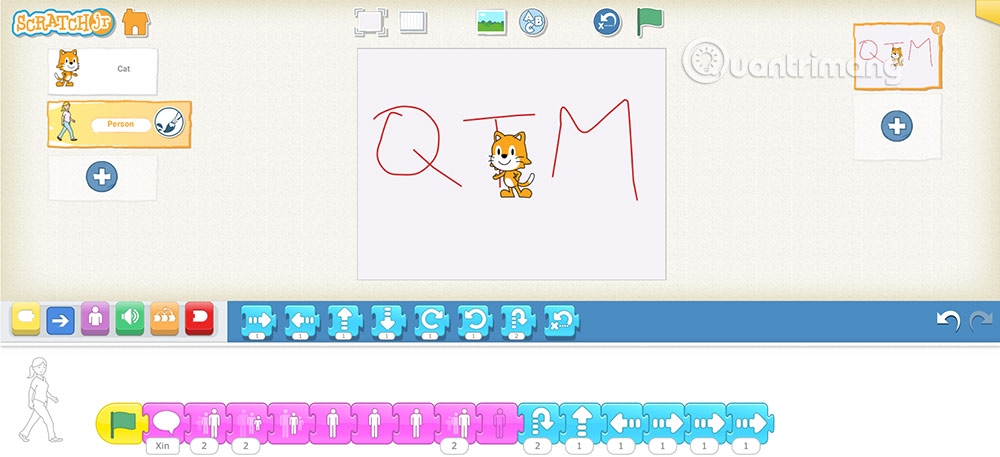
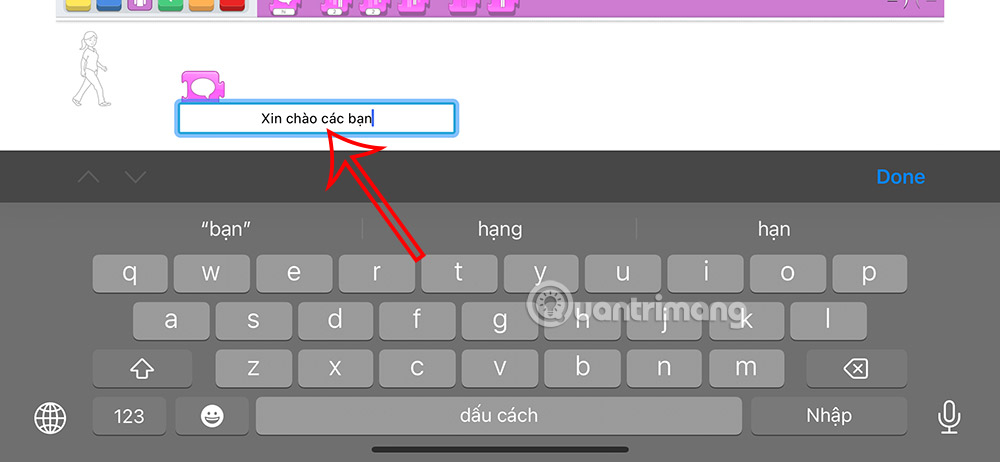
Tap the text on the Say block and enter the character's greeting.
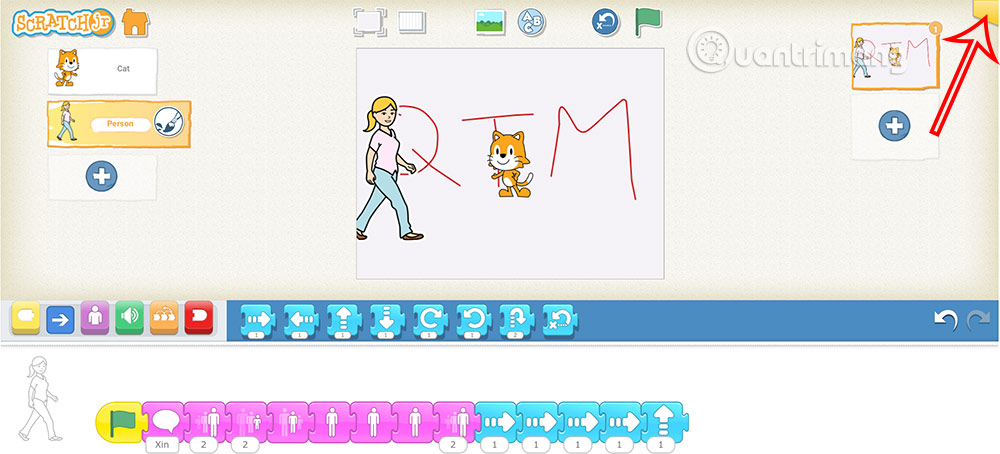
Add Motion, Looks, Sound, Control, or End blocks after the greeting. A simple sequence is Start on Green Flag → Say → Move Right → Hop → End.
Tap the green flag to test the whole project. Tapping a block directly is useful for testing a command, but it is not a substitute for giving a finished script an appropriate trigger.
Name the project
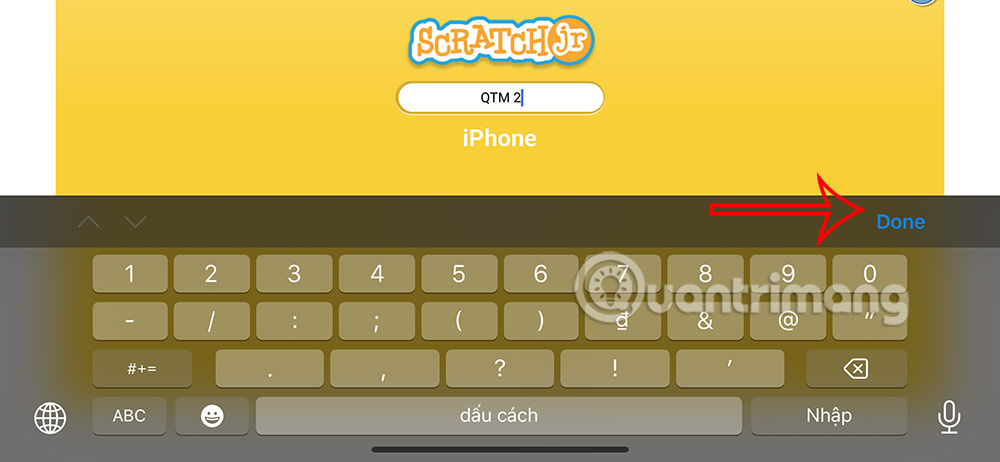
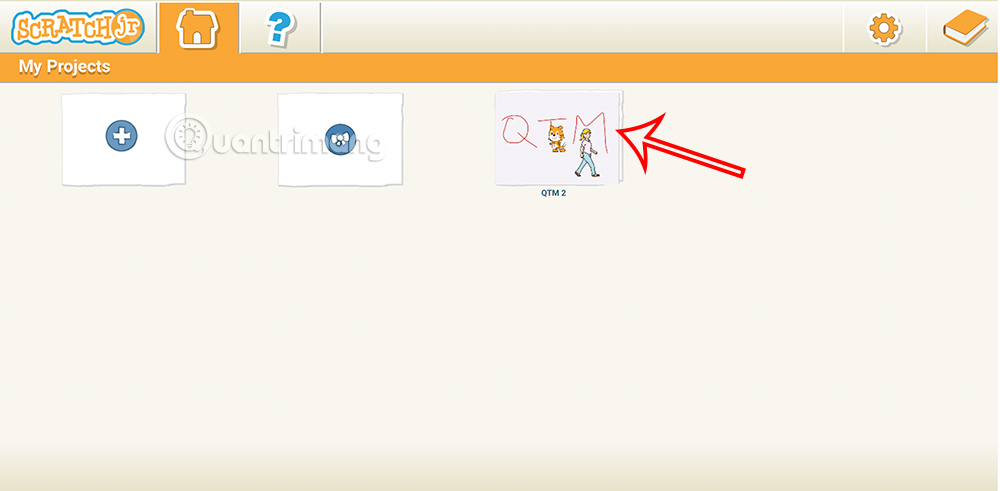
Open the yellow Project Information tab in the upper-right corner, enter a descriptive name, and confirm it. Return to My Projects when you finish.
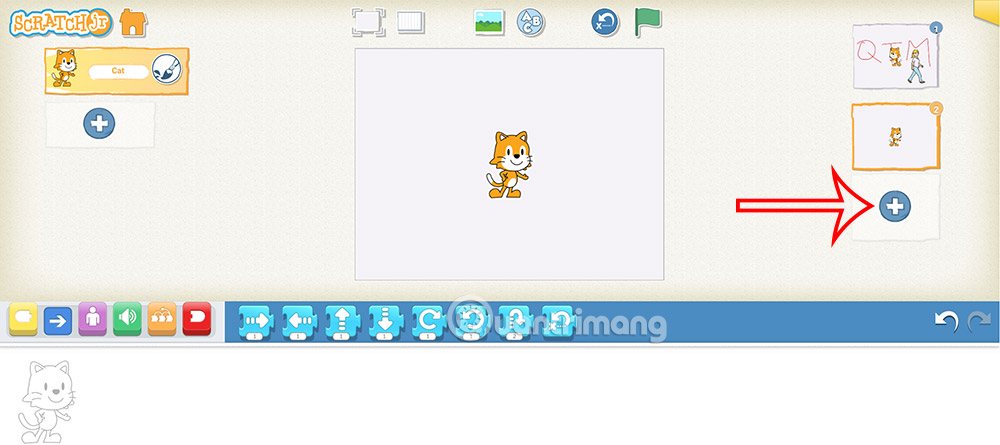
Add a page, not another character
The plus sign in the page area on the right creates a new page. Use pages for a change of scene or a later part of a story. Use the plus sign beneath the character list when you want another character on the current page.
Tips for projects with several characters
- Select a thumbnail before editing so you do not accidentally change another character's code.
- Give each character a sensible starting position before testing Go Home.
- Use Start on Green Flag when scripts should begin together.
- Use matching Send Message and Start on Message blocks when actions must occur in a specific order.
- Test after adding each new script; errors are easier to identify while the project is still small.
The official multiple-character tutorial demonstrates the workflow. For a refresher on the commands used in a script, see this beginner visual-programming guide, or browse other coding apps for children.
Related Articles
 ScratchJr Quiz - Lesson 2: Adding Characters4 minutes read
 Instructions for Using Sound in ScratchJR: Main Insights4 minutes read
 What Is ScratchJr?4 minutes read
 Instructions for Developing ScratchJR Animation Scenes: What to Know5 minutes read
 Instructions for Building Text Animations on ScratchJR: Complete Overview4 minutes read
 Basic ScratchJr Quiz - Lesson 1 with Answers4 minutes read
Reader Comments 0
Sign in with email or Google to join the discussion.