Instructions for using MacPhun Luminar for beginners
What exactly is Luminar? Simply put, it is a photo editing software designed by Macphun (available for Windows).
Table of Contents
If you haven't used it before, your first question will be: What exactly is Luminar? Simply put, it is a photo editing software designed by Macphun (available for Windows).
Luminar may differ slightly from other photo editing software you have used, as this is just an image editor, not including the image creation component. Luminar is also a one-time purchase, not a subscription-based product. Luminar's workflow focuses on easy-to-use presets, allowing you to press a button and completely handle your image, ideal for beginners.

In this article, TipsMake.com will upload some images, as well as 'walk around' the user interface so you can understand where all the tools are located and what functions they perform. After that, the article will cover some basic editing techniques. Hopefully after reading the article, you will have some great ideas on how to use Luminar to edit your own photos.
Start with Luminar
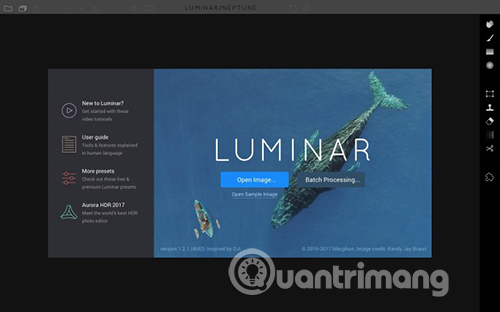
To start, click the Luminar icon. The initial screen requires you to open the image ( Open Image ). Click the blue button to open the Finder window (or Explorer), navigate to the image you need, select it and click Open. Your image will open in Luminar.
Open Luminar from Lightroom
If you want to start in Lightroom, right-click on your image, select Export> Luminar> Open Original Image . Your image opens in Luminar.

Note : You can also choose Edit in> Luminar .
If you have adjusted your image in Lightroom, such as adjusting the lens, cropping, straightening, removing points or reducing noise - instead of selecting Open Original Image , select 'Use .TIFF with Lightroom Adjusters' , or Edit in> Luminar and select 'Edit a copy with Lightroom adjustments' among the options.
The main part in Luminar
Top Toolbar (Top Toolbar)
Let's look at the top toolbar inside Luminar. The article will discuss the location of the tools and their functions, but in case you are not sure what each icon plays, move the cursor over it. A small pop-up window will appear and you can confirm that you are looking for the right tool.

Side Panel (Side control panel)
Starting at the top right corner of the Top Toolbar is an icon that allows you to open and close the panel on the Side Panel (this is where you add layers and filters to adjust your image). Many people like to work with Side Panel open, but if you need to see a larger version of the image, click on this icon to turn it off and give yourself a bigger workspace. Click it again to turn on the control panel again.
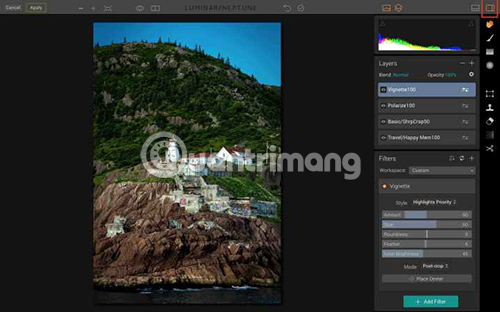
Here, the working space of the Luminar with Side Panel is turned on. Note that if the icon is white, it is turned off. If the icon is orange, it is turned on.
Preset Panel (preset control panel)
The icon for Preset Panel is on the left side of the Side Panel. Again, click on the icon below to turn on and turn off this panel.
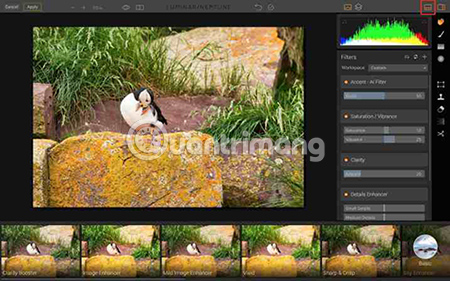
When enabled, the Preset Panel runs along the bottom of the Luminar workspace, giving you a preview of each effect when applied to the image.
Layers and Histogram
The next icon is the Layers panel. It looks like two sheets of paper overlap. Because the focus of this article is on beginner techniques, Layers will not be mentioned here. Just make a quick note of this icon's location so that when you need it, you'll know how to find it.
To the left of the Layers icon is the Histogram icon.
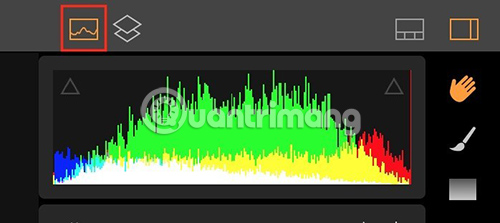
The Histogram icon highlighted here is in red, on the right is the Layers panel. Currently the Layers are turned off so it is gray.
Histogram itself has two triangles that can be clicked on and off. The orange triangle shows this feature is turned on. These warnings on these triangles indicate that your image has any highlights (white) overexposed or underexposed black (black) shadow points. If this is the case, they will call the corresponding red or green on the image.

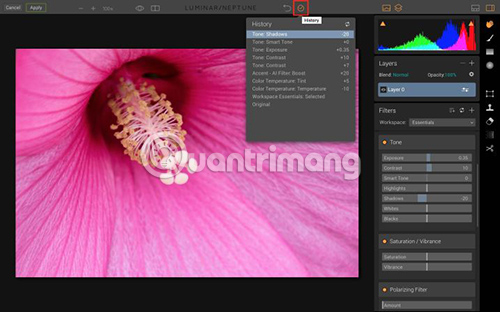
History (history)
Click the small clock icon to see the history of all the changes you have made to your image. If you're not sure what you like, click on any previous step to return to the desired point.
Undo
The curved arrow to the left of the History icon will undo the last step you took.
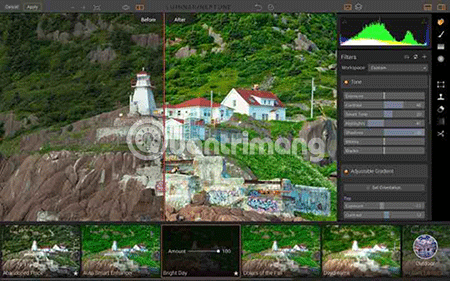
Compare (compare)
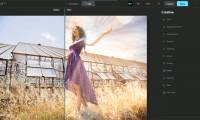
One of the favorite Luminar features, Compare is a small icon to the right of the eye. When you activate the comparison frame, you can slide the line separating the image before / after editing to see how your adjustments affect the overall appearance of the picture.

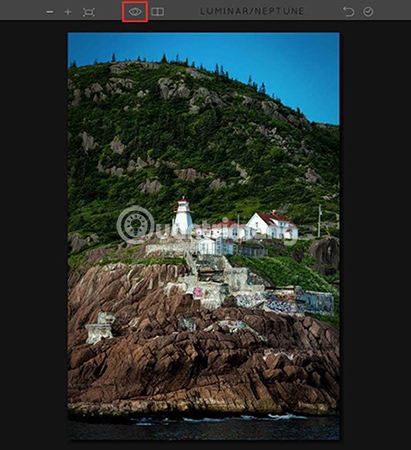
Preview (Preview)
The eye icon can be turned on and off to quickly show you the original compared to the edited image.
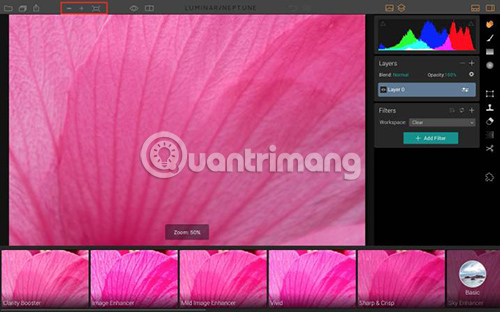
Zoom icon
There are 4 Zoom icons. You can switch between 100% and Fit to Screen or make resizing by using the + and - icons.
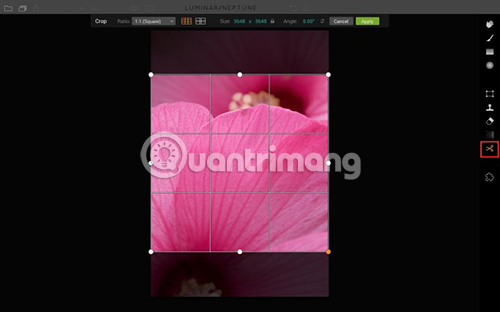
Side Toolbar (Side Toolbar)
At the bottom right is a list of more advanced tools, so the article won't go into them. However, the Crop Tool, a crop icon, is part of almost every workflow.

Edit photos in Luminar
Filters (Filters)
Now, you know where all the tools are. Next, let's talk about how to use them to adjust your image.
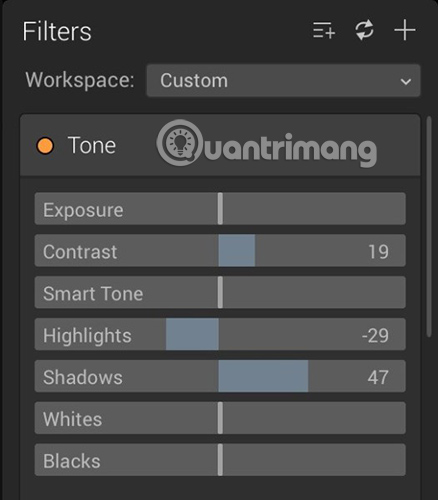
Luminar calls each regulator a Filter . For example, the Filter contains adjustable sliders, Exposure, Contrast, Whites, Blacks (exposure, contrast, white, black areas), etc. Some filters, such as Polarizing filters , contain only one thing. correction.
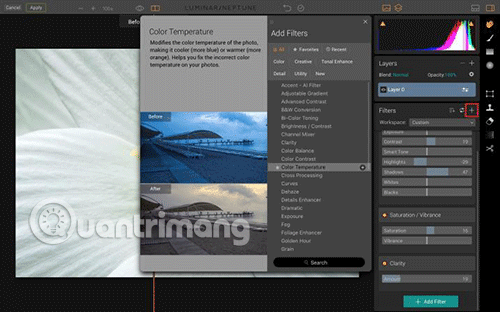
To add additional filters to the image, click the + to open the flyout menu, scroll through it, select the filter you need and then adjust the slider.
Note : If you click on the name of the filter, it will be added and the flyout menu will close. But if you want to add more filters, just click the small + sign at the end of the filter name. The filter will then be added and keep the menu open so you can add more options.
Workspace (Workspace)
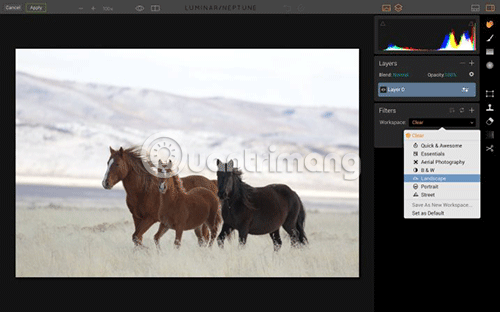
Luminar offers quite a number of different filters and while you are still in the process of learning about it, you may not know which filter is best to add to your image. One of the ways that Luminar helps you narrow things down is to provide Workspace options. For example, suppose your image is monochrome (or you want it to be monochrome), you can choose B&W Workspace as the starting point. If it's a landscape picture, select Landscape Workspace.
Filters included in each workspace have been selected to enhance only the type of image you are working with. Adjusting each slider can be done according to your needs.
If you have never used Luminar before (or have, but failed), start with Quick and Awesome Workspace . With some images, applying the Accent-AI Filter is all you need to do. Enable Compare so that when you adjust this filter, you can see what it is doing. Add Saturation, Clarity and Vibrance if needed. What does everything look like? If you still need additional adjustments but are not sure which modifications to apply, this is the time to try the presets.
Preset
Presets are similar to Workspace because in each preset there is a set of filters selected. However, the preset in Luminar allows adjusting the sliders (or placing them in advance) to create a unique look. Normally preset's name will give you an idea of the interface that the preset will create.

One of the favorite parts of presets in Luminar is the ability to adjust their Opacity. In the image below, the Image Enhancer Preset looks a bit too strong. Dragging the Opacity slider to reduce opacity to 65 is a perfect and easy solution.
4 favorite presets
If you are not sure where to start or choose which preset, here are 4 favorite items:
- Happy Memories in Travel.
- Warm Sunset in Travel.
- Bright Day in Outdoor.
- Mild Image Enhancer in Basic.
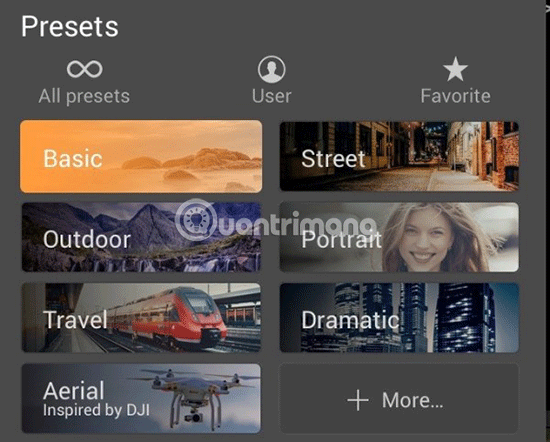
To locate presets, click the Preset menu icon in the lower right corner of the interface, then click through the selections in each category. When you find yourself using the same setting repeatedly, add it to Favorites so you can locate it faster. Just click the star icon on the preset to add it to the Favorites list .
Apply presets by using Compare
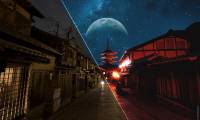
To select the appropriate preset for your images, scroll through them with the Compare preview panel enabled. When you click on each preset, you will see both your original image and the new image after applying the 100% preset. That will help you learn how each preset affects your image and ultimately, find your own favorites.
Refine presets
If the preset you choose for images looks nice but not perfect, remember that you can tweak them. Once you apply them, you can reduce the opacity. You can also adjust individual sliders or add and delete filters in the Side Panel.
Save your image
If you start in Luminar, have completed the work on your image and want to create a JPG file, select File> Export to image , then select the correct folder and rename the file accordingly.
If you plan to continue working with the image or you may want to make changes in the future, select File> Save As to create the original Luminar file, then select the folder and rename the file accordingly. This option will retain any layers you have used as well as the edit history ( History ).
Save your image to the Lightroom catalog
If you have started in Lightroom, the application will quickly save your image. After you have finished processing your image in Luminar, click the Apply button in the upper left corner of the interface. This will save your image and also catalog it in Lightroom (in the same folder as the original image).
Hopefully, you can handle some images in Luminar after reading this article. Now, take a minute to upload your best picture and let everyone know about how you created it in Luminar in the comment section below!
Hope you are succesful.
Was this article helpful?
Your feedback helps us improve.
Related Articles
 Invite to download Luminar beta for Windows - Best Imaging Software 2017 on macOS2 minutes read
 How to use Luminar AI with Photoshop to create more perfect portraits5 minutes read
 How to use Luminar AI for beautiful landscape shots3 minutes read
 How to restore old family photos with Luminar Neo8 minutes read
 Instructions on how to use Outlook from AZ for beginners3 minutes read
 Instructions on how to play Minecraft for beginners8 minutes read
Reader Comments 0
Sign in with email or Google to join the discussion.