Table of Contents
This guide explains how to use the gnotes notes app - note, notepad & memo Android using a clear, step-by-step process. It also highlights the settings and checks that can help you avoid common errors.
For more convenience at work, many people choose a note-taking application to be able to track jobs more quickly and conveniently. The previous note applications usually only stop at the basic feature that is creating notes, editing notes,. However, with the continuous development of technology, the app notes today. has more features.
How Use the Gnotes Notes App - Note, Notepad & Memo Android Works
Note - Note, Notepad & Memo is a note-taking application on Android, with many useful features besides creating notes. You can insert data into notes like images and then manage these notes on Gmail. In particular, when a user registers an account on the app, all notes will be synchronized on multiple devices. The steps below explain how to create notes on GNotes - Note, Notepad & Memo Android.
Step 1:
Go to the link below to download the GNotes - Note app to your device.
- Download the GNotes - Note Android app
Step 2:
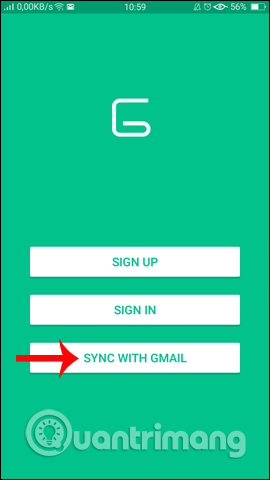
To use the app we will not need to register an account, but when needed to sync notes and manage multiple devices, you need to register an account. Click Sign in To register your account, or click the plus icon to create notes.
Next click Sign up To register an account with email address and password.


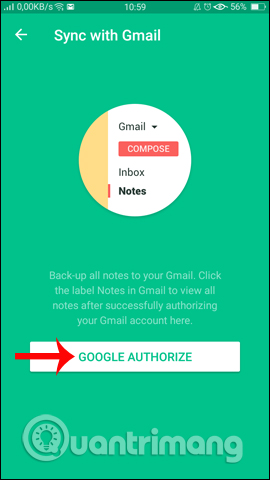
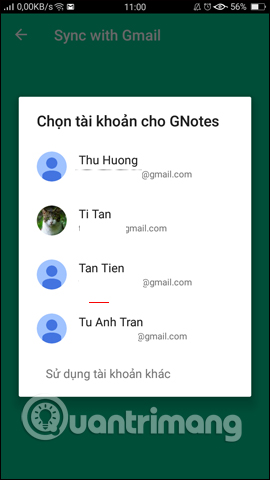
If users want to Manage notes from Gmail , click Sync with Gmail . Then click Google Authorize To confirm the connection. You will select the Gmail account that is logged on the device to initiate the connection.
When connecting successfully and accessing Gmail, check the note you click The Notes Under Inbox to view.
Step 3:
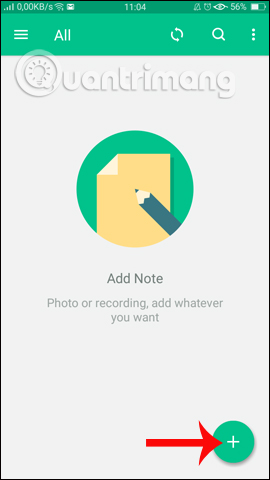
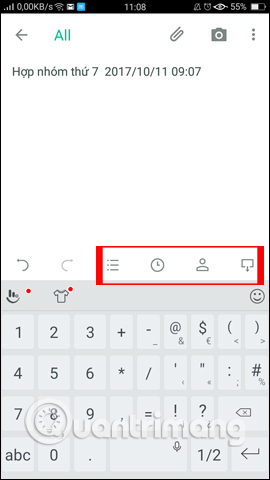
Once you have successfully created an account, click The blue plus icon To create a new note. At the content entry interface, below will have the function buttons, including creating notes list, adding the current time, adding contacts, expanding the screen interface.
Step 4:
When clicking on The paper clip icon , users will have more options for notes, including Photo, Recorder, Handwrite, Graffiti, Attach.
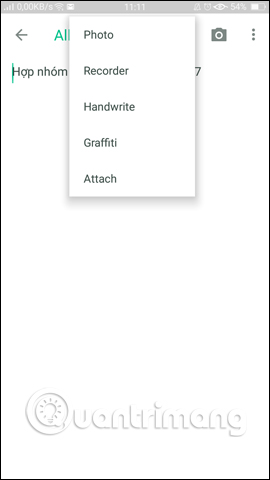
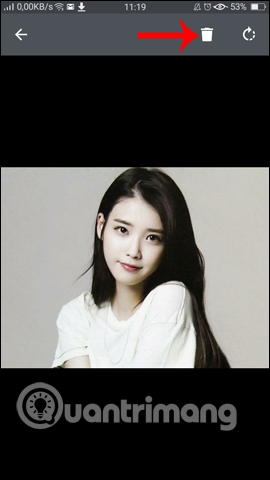
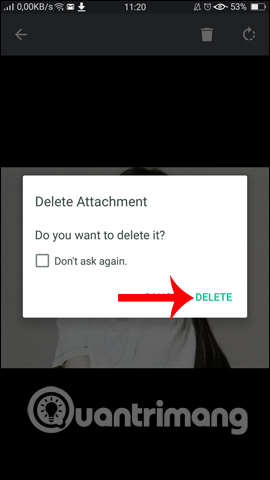
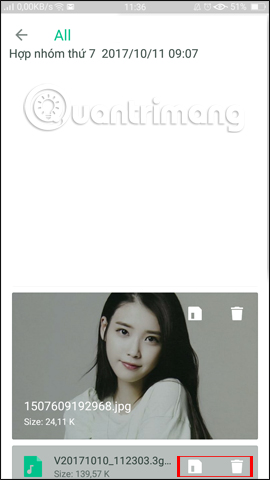
Photo to Insert existing photos into notes . To take a new photo press the camera icon. users will select the image to be inserted in the library. To Delete the inserted photo Click the image and press The trash can icon again . Then Press Delete To confirm deleting the picture in the note.
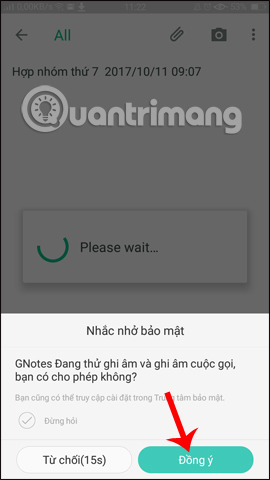
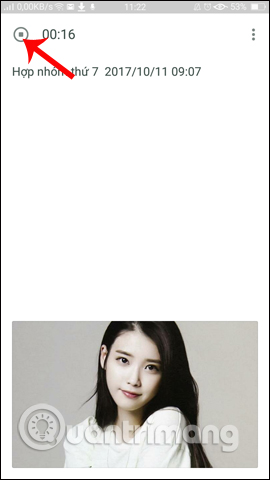
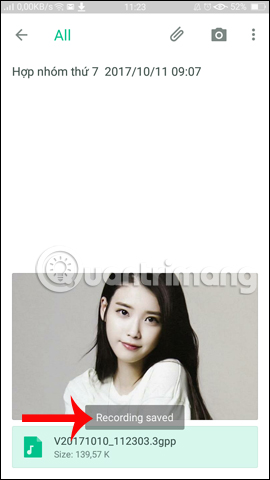
Recorder Will proceed To record on notes And save to device. You need to agree to the app be allowed to record, then the recording process will take place. Press The circle button icon To stop recording and will receive a notification of completed recording.
We can click the audio file to choose to save the device or delete the audio recording.
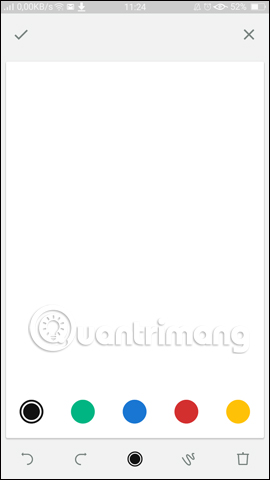
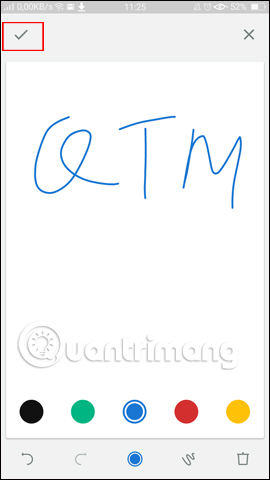
Graffiti To draw and insert images into notes and images saved in notes as PNG files. Press the Traces To save the drawing to the note.
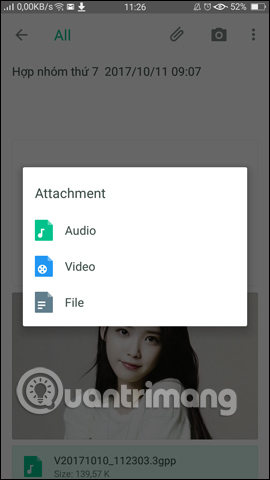
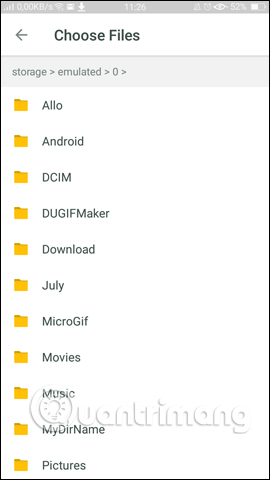
Attached to Help users choose attachments to notes including audio, video or other formats. If in the format supported by GNotes - Note application, you can see it right away in the note.
Step 5:
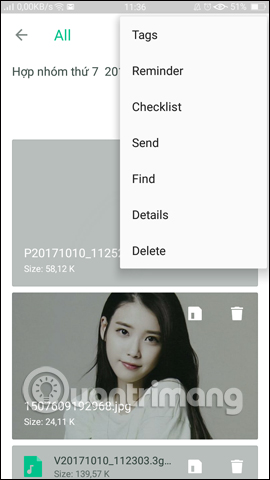
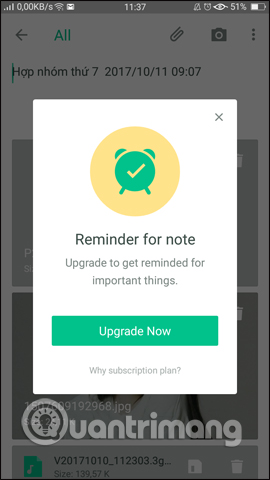
Also at the note interface when clicking on The three vertical dots icon , users will have some additional functions including Tags (subject tagging), Reminder (creating reminder message - charging feature), Text ( display notes without list check boxes), Send (share notes),.
Step 6:
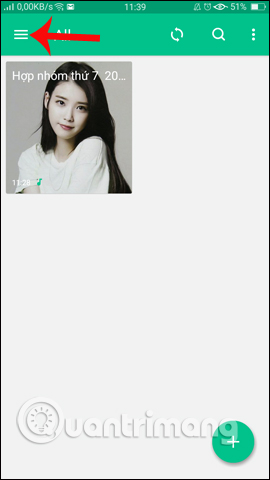
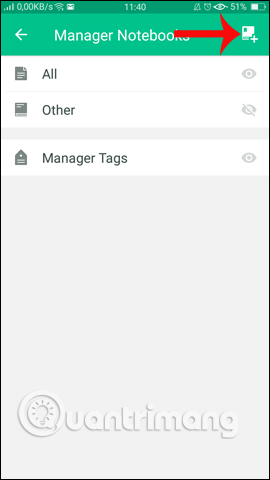
When creating the note, return to the All interface. We click The 3 dashes icon , then select Manager Notebooks From the list. This will put the note in the notebook for easy management.
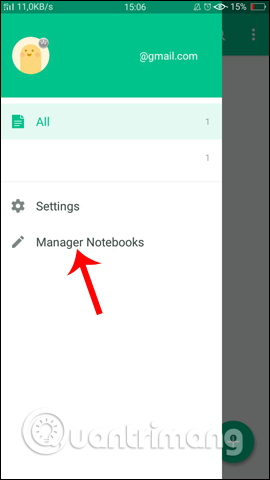
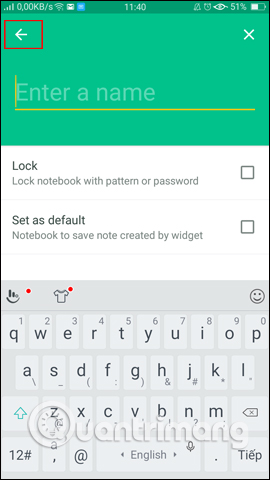
Next, click The plus icon In the top right corner, then Enter a name for the notebook . 2 features Lock lock notes and Set as default as default notebook for notes will charge. Click the Arrow in the top left corner To return.
Step 7:
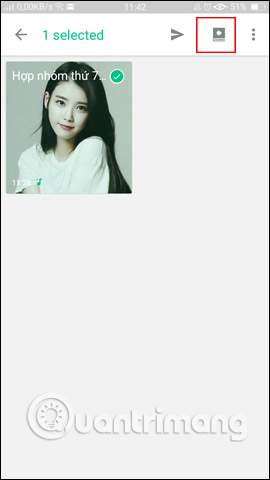
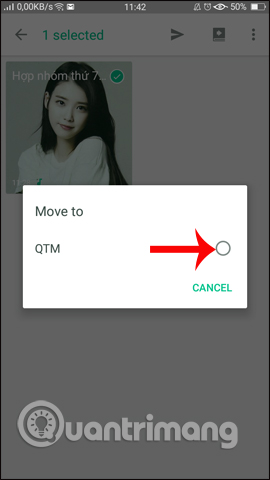
To Put a note in the notebook you just created , press and hold on the note, select The book icon And Tick the notebook To move the note to the list.
Step 8:
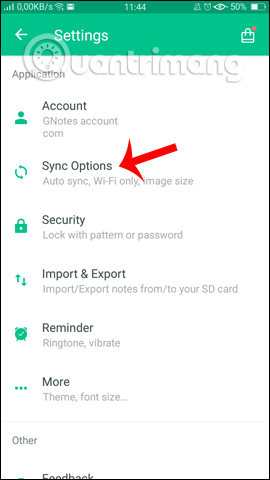
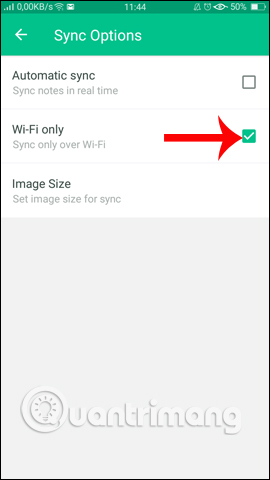
Swipe the screen from left to right and select Settings . In the Settings interface, click Sync Options And then select Wi-Fi only To then sync via Wi-Fi. Automatic sync option will be charged.
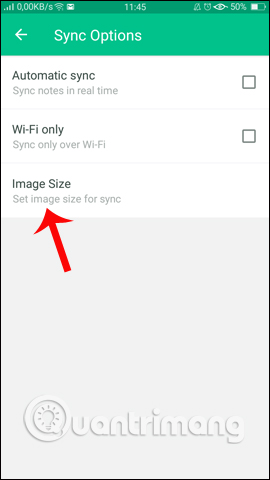
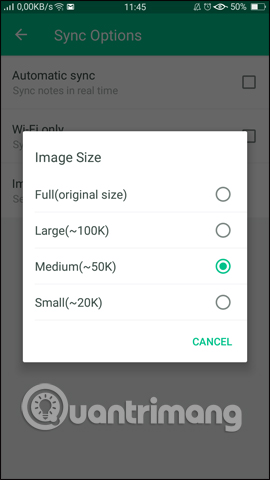
Click Image size To select the level of sync allowed. The free GNotes - Note version will only sync Photos up to 100KB in size .
Step 9:
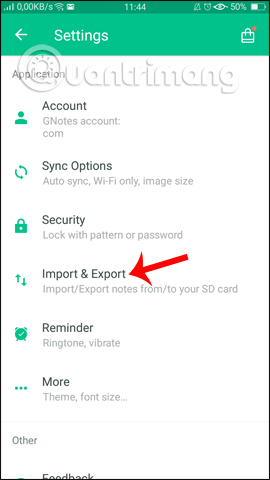
Also at the Settings interface click Import & Export To extract the attached data in the notes to the device, the password to recover. Click Export Now To extract the entire note.
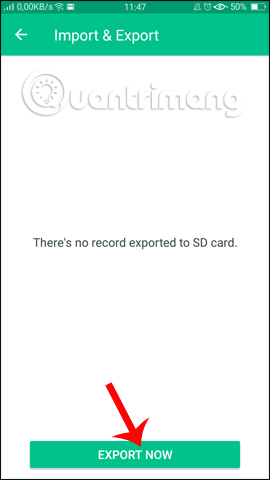
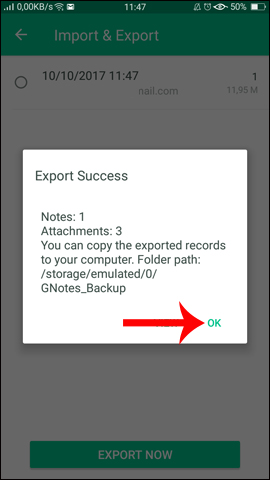
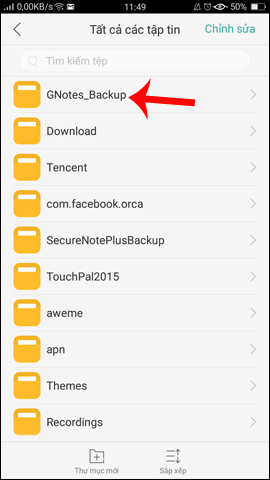
Depending on the amount of notes created, the process of extracting to the device is fast or slow. The Export Success notification Interface appears successfully, click OK To close the notification interface. The extracted file will be saved in The device 's Gnotes_Backup folder .
Step 10:
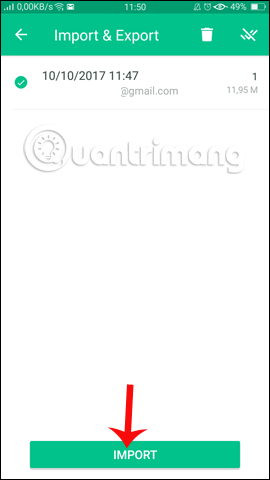
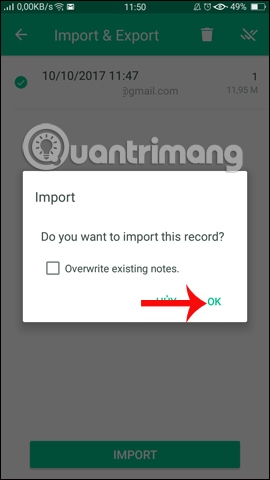
To Restore the note , also open The Import & Export section And Select the note you want to restore , click Import Below. the app will need user verification, click OK To restore.
In general, the GNotes - Note note application on Android has a basic note-taking feature, along with many other attractive options, such as inserting images, data or drawings for notes. Besides, you can then extract and restore notes from data on the phone.
I wish you all success!
FAQ
What should I prepare before I use the gnotes notes app - note, notepad & memo Android?
Review the requirements in the guide, confirm that your device or software is compatible, and save important work before changing settings related to use the gnotes notes app - note, notepad & memo Android.
Why might use the gnotes notes app - note, notepad & memo Android not work as expected?
The most common causes are incompatible versions, missing permissions, incorrect settings, or an interrupted internet connection. Recheck each step and restart the app or device when appropriate.
Can beginners follow these use the gnotes notes app - note, notepad & memo Android steps?
Yes. Follow the steps in order, avoid skipping confirmation screens, and compare your interface with the screenshots because labels may differ slightly between versions.
Related Articles
 Why Is Notepad Still a Great Note Taking Application?7 minutes read
 How to Write Notes Online in Notepad: Notes Software5 minutes read
 Three Note-taking Apps That Make a Perfect Combination: Google Keep4 minutes read
 How to Create a Note on Chrome with Notepad by Clickup4 minutes read
 Usage Notes Application Secure Notes - Note Pad Android9 minutes read
 How to Use Neon Notepad to Take Notes on Windows 104 minutes read
Reader Comments 0
Sign in with email or Google to join the discussion.