How to Use CMake to Get Binaries from Source Code
CMake is useful in compiling source code for get binaries. Compiling a library from the source code guarantees that the resulting library is perfectly tailored for your CPU/OS, a luxury pre-compiled binaries don't always provide. It is...
Table of Contents
Method 1 of 3:
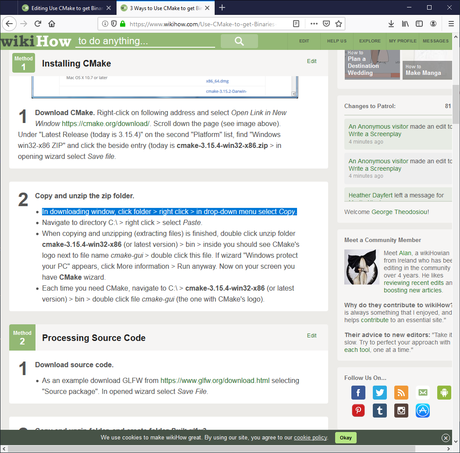
Installing CMake
-
 Highlight what you expect to do. For example see picture above.
 -
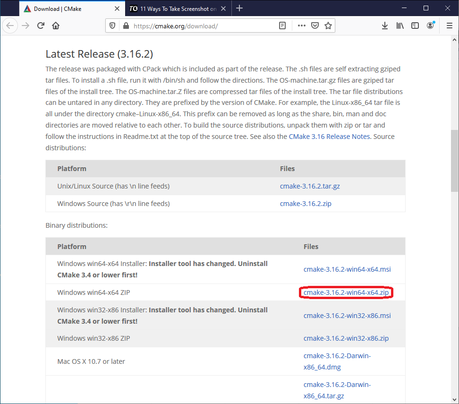 Download CMake. Right-click on following address and select Open Link in New Window https://cmake.org/download/. Scroll down the page (see image above). Under "Latest Release (today is 3.16.2)" on the second "Platform" list, find "Windows win64-x64.ZIP" and click the beside entry (today is cmake-3.16.2-win64-x64.zip > in opening wizard select Save file.
 - Copy and unzip the zip folder.
- In downloading window, click folder > right click > in drop-down menu select Copy.
- Navigate to directory C: > right click > select Paste.
- When copying and unzipping (extracting files) is finished, double click unzip folder cmake-3.16.2-win64-x64 (or latest version) > bin > inside you should see CMake's logo next to file name cmake-gui > double click this file. If wizard "Windows protect your PC" appears, click More information > Run anyway. Now on your screen you have CMake GUI.
- Each time you need CMake, navigate to C: > cmake-3.16.2-win64-x64 (or latest version) > bin > double click file cmake-gui (the one with CMake's logo).
Method 2 of 3:
Processing Source Code
- In directory C, create folder GL. In Windows File Explorer navigate to C: > inside, right click > select New > Folder > type: GL > hit ↵ Enter.
- Download source code.
- As an example we use GLFW. Right-click on following address and select Open Link in New Window https://www.glfw.org/download.html. Select "Source package". In opened wizard select Save File.
- Copy and unzip folder.
- In downloading window click zip folder glfw-3.3 (or latest version) > right click > select Copy.
- Navigate to C: > GL > right click > select Paste.
- Now in directory C:GL, you have unzip folder glfw-3.3. Click twice on its name > delete name > type: glfw > hit ↵ Enter.
-
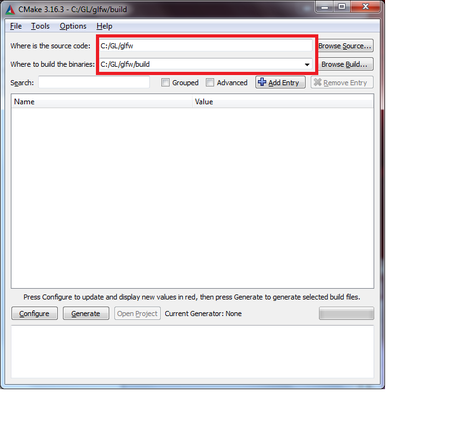 Where is the source code. In CMake GUI first text field. Copy C:/GL/glfw and paste.
 - Where to build the binaries. In second text field. Copy C:/GL/glfw/build and paste.
- Configure and generate. In CMake GUI, click Configure > in wizard Create Directory click Yes > select Visual Studio 16 2019 > click Finish.
- When, in CMake GUI, you read: "Configuring done", click Generate. You should read: "Generating done".
- Close CMake GUI.
- Build your solution.
- Navigate to C: > GL > glfw > build. Double click "GLFW.sln", or "GLFW", or "ALL_BUILD.vcxproj". An instance of Visual Studio appears. Wait until in main menu Build entry appears. Click it > "Build Solution".
- Wait till you read the last line in "Output" window: ========== Build: XX succeeded, 0 failed, 0 up-to-date, 2 skipped" ==========
- Number XX of "succeeded" changes in glfw versions. Today (31-12-2019) is 32.
- Navigate to C: > GL > glfw > build > src > Debug. Inside you should see file glfw3.lib.
Method 3 of 3:
Testing Binaries
- Create empty project. In V.S. main menu click File > New > Project… > Create a new project > Empty project > Next.
- In Project name text box type: Project-0.
- Next to Location text box, click ....
- Navigate to C: > GL > Click Select a folder. The Location is C:GL.
- Check box Place solution and project in the same directory.
- Click Create.
- Add your source file to the Project. In Solution Explorer wizard, right click the Source Files folder (the last one) > click Add > New Item…
- In the Add New Item - Project-0 window, click C++ File (.cpp) (the first one) from the middle of the window. In the Name text box, type Main.cpp.
- The Location is C:GLProject-0.
- Click the Add button. The file will open in the main text editor but leave it blank for now.
- Configure project's Properties. In Solution Explorer wizard, right click Project's name that is Project-0 > select Properties.
- (1) Project-0 Property Pages main menu. In Platform entry select x64 > click Configuration Manager....
- In Active solution platform: select x64.
- In Platform entry, x64 is automatically selected.
- Click Close.
- (2) Additional Include Directories. Click C/C++ > General > In beside menu select the first one, Additional Include Directories > click the down arrow at the end of the field > click Edit... > first icon > three dots ...
- Navigate to C: > GL > glfw > include > click include > click Select a folder > click OK.
- (3) Additional Library Directories. Double click Linker > click General > Additional Library Directories > click the down arrow at the end of the field > click Edit... > first icon > three dots ....
- Navigate to C: > GL > glfw > build > src > Debug > click Select a folder > click OK.
- (4) Additional Dependencies. In Linker drop-down menu select Input > in beside menu select the first one, Additional Dependencies > click the down arrow at the end of the field > Edit... > copy opengl32.lib; glfw3.lib and paste in Additional Dependencies wizard's upper-most text box > click OK.
- (5) Set System to SubSystem CONSOLE. In Linker drop-down menu select System > in beside menu select the first one, SubSystem > click the down arrow at the end of the field > select Console (/SUBSYSTEM:CONSOLE). Click Apply and OK.
- (1) Project-0 Property Pages main menu. In Platform entry select x64 > click Configuration Manager....
- Test code. Right-click on following address and select Open Link in New Window https://www.glfw.org/docs/3.0/quick.html > scroll down the page to last section: Putting it together: A small GLFW application, and copy code > go to Visual studio and paste it in Main.cpp code area. Hit Ctrl+F5. If everything gone well two windows appear: one black and other with a rotating colored triangle in black background. Good job.
- Correct any errors. In "Error List" if you see error about
- file with extension .h go to Method 3, step 3, sub-step (2) and follow instructions.
- file with extension .lib go Method 3, step 3, sub-step (3), and follow instructions. Also to sub-step (4).
- "entry point must be defined" go to Method 3, step 3, sub-step (5), Set "SubSystem" to "CONSOLE", and follow instructions.
- For other errors, if you can't correct them, close Visual Studio > delete project folder Project-0 which lives in C:GL > open Visual Studio > repeat set up from part Method 2.
Was this article helpful?
Your feedback helps us improve.
Related Articles
 What is source code? Learn about Source Code9 minutes read
 Microsoft publicly released MS-DOS source code on GitHub2 minutes read
 Sample prompt for creating source code documentation.8 minutes read
 How to View Source Code3 minutes read
 S Code and VSCodium: Two 'open-source' versions, but how different are they?5 minutes read
 The source code for iOS is revealed on GitHub as 'real goods', this is the time to reveal the biggest information in history3 minutes read
Reader Comments 0
Sign in with email or Google to join the discussion.