How to Set Up and Use Git
Git is one of the most widely used version control systems for software development. Built by Linus Torvalds in 2005, Git focuses on speed, data integrity, and support for distributed, non-linear workflows. With its widespread use even for...
Table of Contents
Part 1 of 3:
Setting Up Your Account
-
 Set up a Github Account. Visit GitHub and create an account. For the purposes of this tutorial a free account will work just fine.
 -
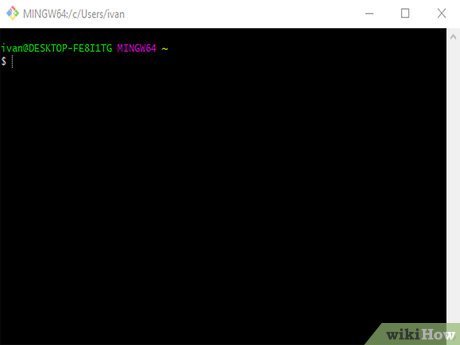 Install Git Bash. In order to get started you must first download and install Git Bash for windows. Go ahead and do that now by following this link: Git Bash.
- Once it's installed, run Git Bash. You should be looking at a black command prompt screen. Git Bash uses Unix commands to operate so some knowledge of Unix is important to have.
-
 Create an SSH Key. In order to establish a secure encrypted connection between your GitHub account and Git Bash on your computer, you must generate and link an SSH key. In Git Bash, paste this code but substitute in the email you used with your GitHub account: ssh-keygen -t rsa -b 4096 -C "your_email@example.com'
- You will then be prompted as to where you want to save the key. The default location will suffice so just hit ↵ Enter. Next, Git Bash will ask you to enter and confirm a passphrase. While you don't have to include one, it's highly recommended that you do.
-
 Add your SSH key to the ssh-agent. This will authorize your computer to use that SSH key. Enter the following command to start the SSH Agent: eval "$(ssh-agent -s)" Then enter in ssh-add ~/.ssh/id_rsa to add your created key.
- If your key has a different name besides id_rsa or you saved it in a different location, make sure you use that instead.
-
 Add your SSH key to your account. You will now need to configure your account to use your newly created key. Copy the ssh key to your clipboard: clip < ~/.ssh/id_rsa.pub. Then, in the top right corner of any GitHub page, click on your profile photo, and then click Settings. In the user settings sidebar, click SSH and GPG keys. Then click New SSH Key. Now you can enter in a descriptive name for your key then paste your key into the key field, and press "Add SSH Key". Confirm it, and you're all set!
Part 2 of 3:
Setting Up a Project
-
 Fork a repository. In order to make changes to a project in GitHub, it must be forked. Go to the repository you want to work on, and fork the repository by pressing fork in the top right part of the page. This will make a copy of that repository on your account.
 -
 Create a local directory. Create a folder somewhere on your computer where you want to house the repository. Then use Git Bash to navigate to that folder. Remember Git Bash accepts UNIX commands, so in order to get into your directory, use the CD command like so: $ cd /path/to/directory
 -
 Clone the fork. In GitHub, navigate to your fork and under the repository name, click Clone or download, and copy the link it gives you.
- Next, in Git Bash, enter in the following command using your copied URL: $ git clone https://github.com/YOUR-USERNAME/REPOSITORY_NAME. Press ↵ Enter, and your local clone will be created.
-
 Sync your fork with the original. You need to be able to propose changes to the original repository. Navigate to the original repository that you forked in GitHub, then hit Clone or download and copy the URL.
- Now navigate into the actual repository folder in GitHub. You'll know you're in the right spot when you see a (master) to the right of your command prompt.
- Now simply run $ git remote add upstream https://github.com/user/repositoryName using the original URL of the repository.
-
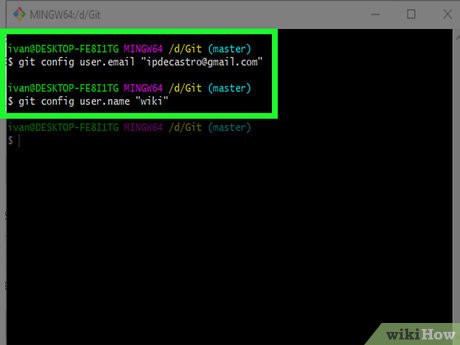 Create a user. Next you should create a user to track who made the changes to the repository. Run the following two commands. $ git config user.email 'you@example.com' and $ git config user.name 'Your Name'. Make sure the email you use is the same one that's on your git hub account.
 -
 Create a new branch. Next you should create a new branch off of our master branch. As an actual branch of a tree. This branch will hold all of the specific changes you will make. You should create a new branch off of the master every time you work on a new problem. Whether it's a bug fix or the addition of a new feature, each task must get its own unique branch.
- In order to make a branch, simply run: $ git branch feature_x. Replace feature_x with a descriptive name of your feature.
- Once you've made your branch use $ git checkout feature_x. This will switch you into the feature_x branch. You are now free to make changes to your code.
Part 3 of 3:
Pushing Your Changes
-
 Commit your changes. Once you've finished making changes, or you want to switch branches and work on something else, your changes must be committed. Run $ git commit --all. This is will automatically commit all the changes you've made to the repository.
- You will get a prompt to enter in a commit message using vim. This message should be short and descriptive. Use the arrow keys to navigate to the top line, and then hit i on your keyboard. You may now type your message. Once it's typed, hit Esc and then hit the colon key, :. Now type in the letters wq and hit ↵ Enter. This will save your commit message and quit the vim editor.
-
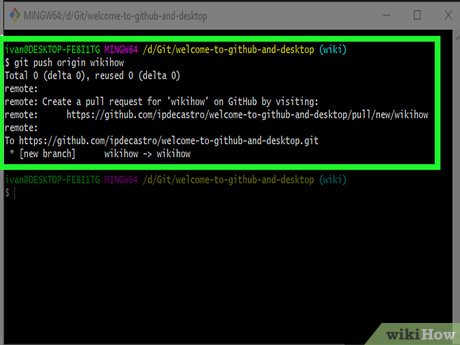 Make a push request. Now that your changes have been committed, you should push them! Enter in $ git push origin .
 -
 Merge with the master branch. Go back to GitHub and you should soon see a message pop up with your push. Hit "Compare & pull request". On this page you will have the opportunity to review your changes, as well as change your commit message and add comments. Once everything looks in order, and GitHub doesn't detect any conflicts, go ahead and make the request. And that's it!
- Now it will be up to your other contributors and the owner of the repository to review your change and then merge it with the master repository.
-
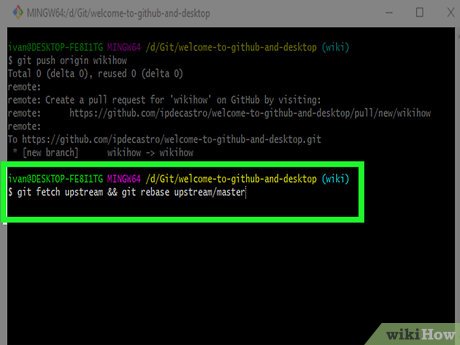 Always remember to fetch and rebase. It's extremely important to always be working on the latest version of a file. Before you make any push requests, or you've just started a new branch or switched to a branch, always run the following command git fetch upstream && git rebase upstream/master.
Was this article helpful?
Your feedback helps us improve.
Reader Comments 0
Sign in with email or Google to join the discussion.