How to Paint Soft Bunny Fur in Watermedia
Many of our favorite animals are soft and cuddly and have fur you can't help but want to touch. A bunny rabbit, a kitty or a puppy are good candidates. Painting the illusion of fur is fun and there are watercolor techniques to facilitate...
Table of Contents
Setting Up
- Begin by drawing some bunnies. Regular pencil with an eraser will be fine. Cut or fold and tear the paper into smaller sizes. For paper, use 140# watercolor paper because the thickness and body of the paper will allow for making corrections and edits as you paint. On each, draw a single bunny. Try to get various poses.
- Set up your paints. Either dry pans in a box or tube watercolors will work, but tubes are easier to work with in general. Squeeze out a small amount of each color onto a white palette or plastic picnic plate. You will also need a fine line sharpie or fine point colored markers.
- Prepare your brushes and water. Set out a rake brush and an array of other standard watercolor brushes. A good sized water bucket, such as a large yogurt or deli container, is a perfect choice. Remember to change the water as it gets dirty.
- Set up additional tools to help you make textures. A free-form natural sponge can be used for gently stamping on color. Probably the most important item to have is a 1" square of white, household eraser pad. It is great for softening and making the effect of cushy fur. Take a hard look after a piece is dry and if the fur needs to be made softer, use the eraser pad.
Trying Different Techniques
-
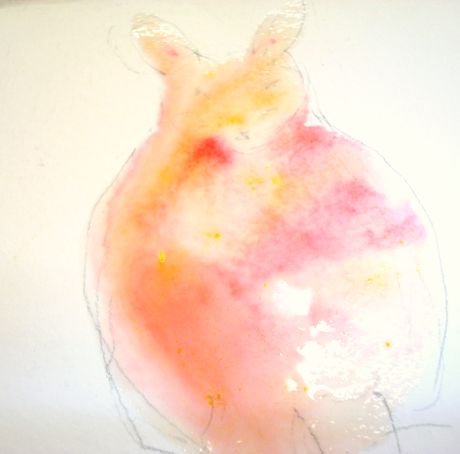
 Try painting on very wet paper. Colors will easily merge and create the illusion of softness. Wet the area within your animal's silhouette with enough water so it stands up from the paper. Let it set for a few minutes to soak into the paper. Touch the tip of your pointed brush into any color you wish, paying no mind as to whether it is the actual color of the animal's fur. It is a painting and imaginary colors are welcomed.
- Touch the thick paint anywhere on the wet area of the animal. Watch as it spreads but remember some colors are better and quicker at spreading than others.

- Nudge the color along with more water on a brush if need be. You will be creating an all-over color as the water causes the paints to mingle.
- Add another color or two and after another minute or two, gently rock the paper to help the colors mix. The color will spread only where the paper is wet and the bunny shape will emerge as a soft color. By letting the water do the work, your final image will have a glow. You might also get a few accidental "water blossoms."
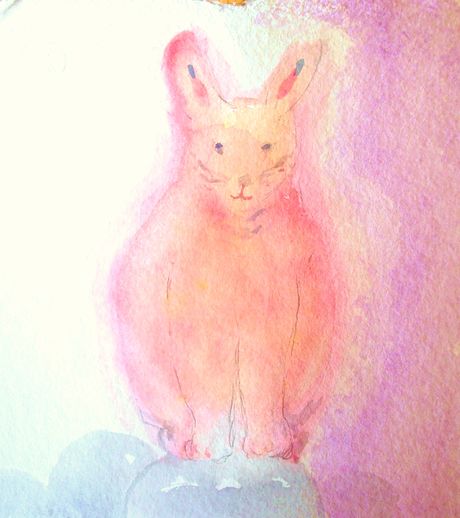
- After the piece dries sitting flat, go back in with a brush and draw the accents you wish; the features, demarcation of where the limbs attach, toes, etc.
- Touch the thick paint anywhere on the wet area of the animal. Watch as it spreads but remember some colors are better and quicker at spreading than others.
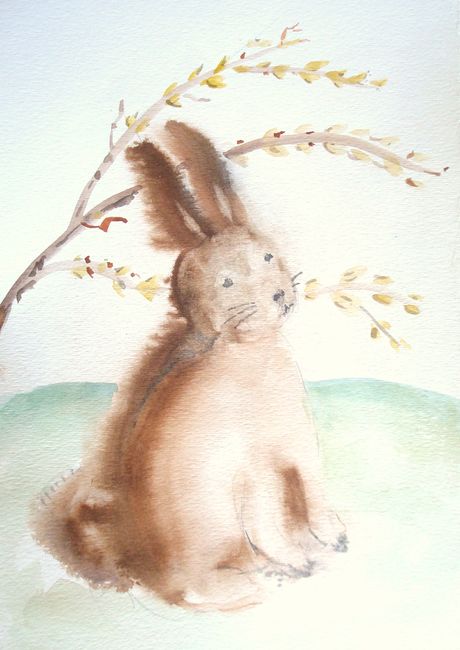
- Suggest fur with a rake brush. This is a brush that resembles a rake and the hairs are long interspersed with short ones. For the fur paint a soft color over the entire shape. Let it dry.
- Use a natural, free-form sponge to dab on some of the same color, only darker.
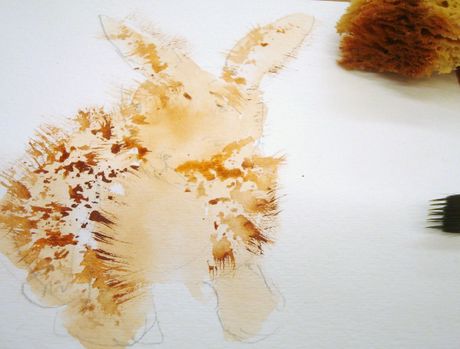
- To make the fur look soft, use the rake brush pull color from the sponged spots.
- Go in different directions, in a single direction, or make wavy strokes, as you wish. Go back after it dries and soften the fur with the eraser pad.
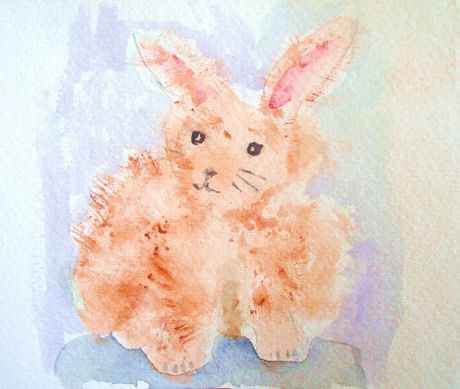
- Allow to dry again and paint the features with a pointed brush.
- Use a natural, free-form sponge to dab on some of the same color, only darker.
- Make gentle and fluffy lines with markers to create soft fur. On another sketch of a bunny, work with markers, both indelible and water soluble. Think airy and fluffy as you draw so your lines are light and sketchy.
- Outline the bunny first in black fine line Sharpie.
- For the fur all over the body, use a combination of cheap colored markers, again, making the strokes short and light. Do this by rapidly stroking and lifting the marker off the page.
- Wet a pointed brush and gently soften areas of the fur with water. If the colored markers are not indelible, the colors will blend and merge giving the look of soft fur.
- Paint with a Q Tip or cotton ball. |Gently dab with cotton to keep the application of paint light and soft.
-
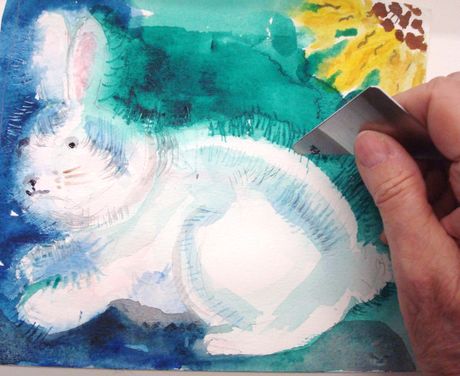
 Scratch into paint with a piece of credit card or other hard plastic. Do this while the paint is wet and the color will seep into the scratches.
 -
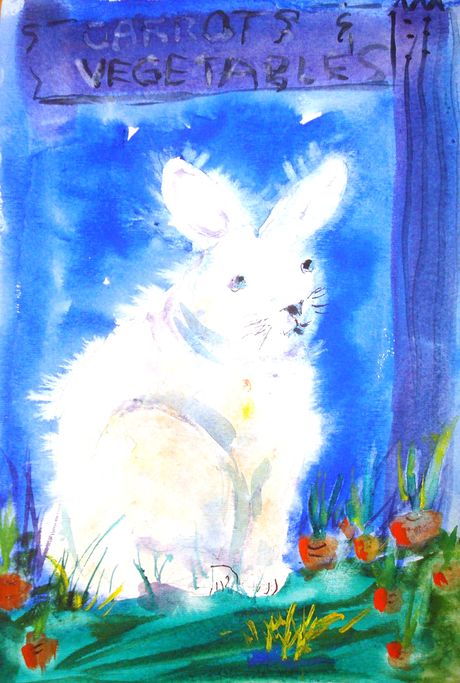
 Apply paint with a crushed tissue. The soft applicator will yield soft fur. Give the bunny a halo of gold. Soften as needed with the eraser pad.
 -
 Try getting the paint to leech into the background to have the bunny's silhouette become outlined in fuzz. This technique is fun and almost non-fail. Test first of a piece scrap watercolor paper. Wet the entire page including the bunny shape generously, allow it to soak in for a few minutes.
 - Go back to all the little paintings and add backgrounds.
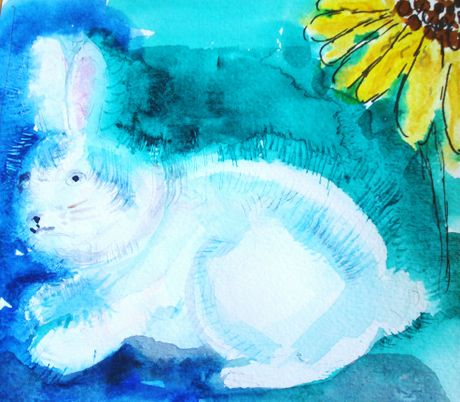
- For a dark background, generously load a flat brush with dark blue, purple or black tube paint diluted to the consistency of heavy cream (to make it flow smoothly from your brush.) Paint a section at a time of the background, working the paint up against the bunny outline. This will create drama and make the bunny look extra soft.
- For scenery background, do a wet wash, let it dry. Take a look at how the background dries and pick out trees, bushes, rocks, flowers, etc. Go back in with a pointed brush or marker and put the background details into focus.
- A soft wash of a neutral color is always a nice background.
-
 Mount the bunnies on a single piece of paper using double sided tape or a glue stick. Hang it for all to admire and to set the tone for spring. Or, keep the bunnies as individual little paintings.
Was this article helpful?
Your feedback helps us improve.
Related Articles
 How to Make a Bunny by Typing Characters on Your Keyboard2 minutes read
 Replace the Paint 3D application with Paint Classic on Windows 102 minutes read
 Top 3 favorite hand-held paint sprayers today3 minutes read
 Learn how to use Paint to edit photos on Windows25 minutes read
 Painter showed off painting with the top paint like Photoshop, who thought the people would show off 'good' equally2 minutes read
 The Restyle tool in Paint turns doodles into masterpieces2 minutes read
Reader Comments 0
Sign in with email or Google to join the discussion.