How to Clear NVIDIA Shader Cache on Windows
Clearing the NVIDIA Shader Cache will reset the system, forcing it to rebuild with new data. Here are instructions for clearing the NVIDIA Shader Cache.
Table of Contents
The NVIDIA Shader Cache stores the graphics that are rendered when you start a game, so that you don't have to re-render them every time you start the game, improving the performance of your games and applications. But sometimes the Shader Cache can become corrupted, leading to graphics errors or slower performance. Clearing the NVIDIA Shader Cache will reset it, forcing the system to rebuild it with new data. Here's how to clear the NVIDIA Shader Cache.
How to Clear NVIDIA Shader Cache on Windows
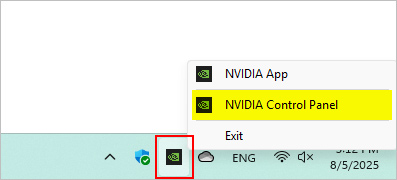
Step 1:
Right -click on the Nvidia icon in the system tray and select NVIDIA Control Panel .
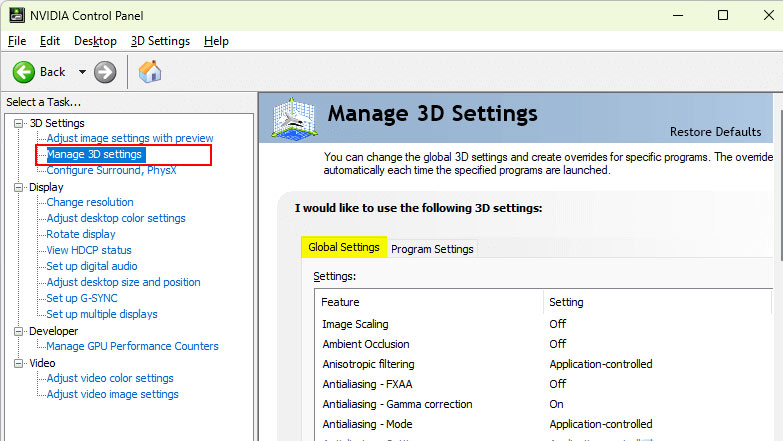
Step 2:
Switch to the new interface, click Manage 3D setting on the left side of the interface and then click Global Settings .
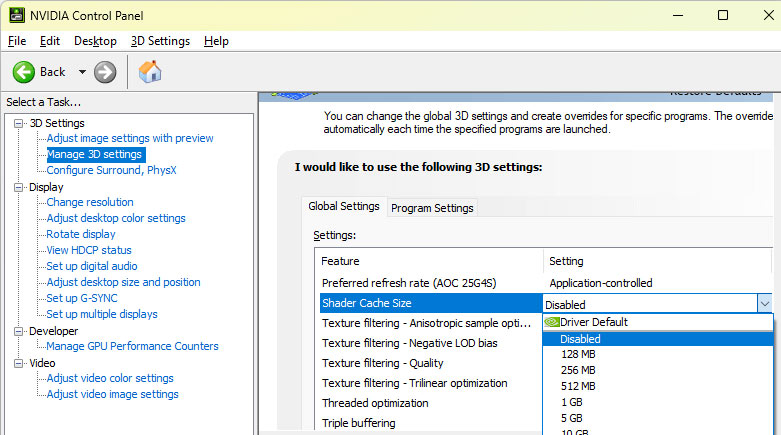
Step 3:
Now scroll down the list and click on the Shader Cache menu , then select Disabled . Shader Cache will be temporarily disabled.
Step 4:
Next, open File Explorer on your computer and access the folders according to the path below.
- C:Users[YourUsername]AppDataLocalNVIDIADXCache
- C:Users[YourUsername]AppDataLocalNVIDIAGLCache
- C:Users[YourUsername]AppDataLocalNVIDIA CorporationNV_Cache
Delete all files inside the folders to remove existing shader cache files.
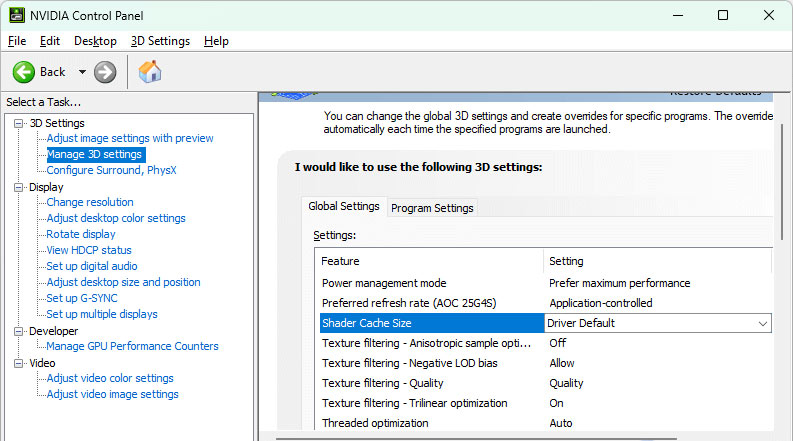
Step 5:
Go back to NVIDIA Control Panel, find Shader Cache and click Driver default to restart Shader Cache on your computer.
Was this article helpful?
Your feedback helps us improve.
Related Articles
 What is cache? How to clear Cache in Windows 104 minutes read
 How to use Cleaner for PC Pro to delete cache, Windows junk files automatically3 minutes read
 What is RAM cache? How do I clear this cache on Windows?5 minutes read
 How to Clear Cache on Mac4 minutes read
 How to clear the Cache in Windows 8?3 minutes read
 Instructions to clear DNS Cache with CMD command on Windows4 minutes read
Reader Comments 0
Sign in with email or Google to join the discussion.