Table of Contents
This practical guide explains how to automatically Display Names When Entering Code in Excel in a clear sequence, including preparation, key settings, common mistakes, and troubleshooting steps.
What This Guide Covers
- Step 1:
- Step 2:
- Step 3:
When working with a list of names in Excel, the number of people in a table will certainly be many and what should you do if you want to find that person's information? Manually searching for each name is not feasible. The method of using the Ctr + F key and entering the name of the employee who wants to find information is also chosen by many people. But this case only applies to tables that do not have the same name. So how to quickly find anyone's information in Excel's nameplate?
In this case, we can combine the IF function and the Vlookup function. We will then assign each person in the table a separate code. And when entering any code, that person's information will automatically appear. So managing employees or students on Excel will be much easier.
We will work with the student table as below. The requirement is to have a student code in Table 2. Entering the code in Table 1 will automatically display the student's name with that code.
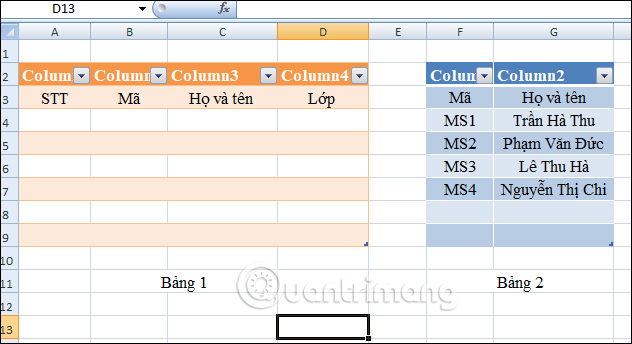
Step 1:
In the Full Name column in Table 1, we will enter the formula as below and press Enter =IF(B4='''','''',VLOOKUP(B4,$F$4:$G$7,2,0 )) .
In there:
- B4 is the student code column in Table No. 1.
- F4 is the student code column in Table No. 2.
- G7 is the Full Name column in Table 2.
- The $ character fixes columns or rows in an Excel table.
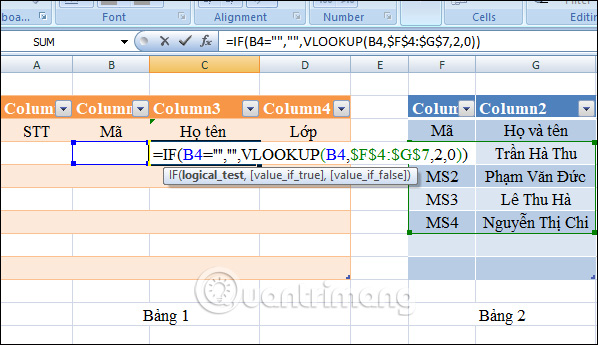
After pressing Enter, we will see the function symbol in the table as shown below.
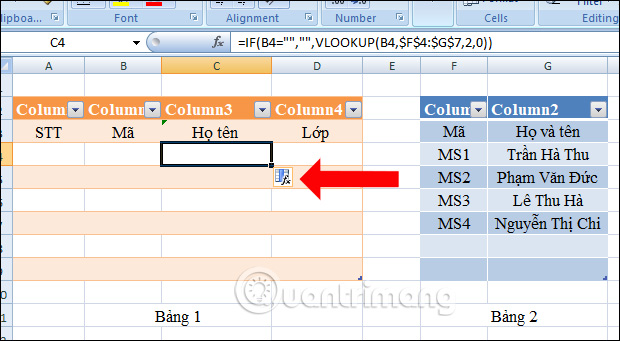
Step 2:
Next, highlight the Code column and Full name column in Table 2 as reference data for the formula. Then, place the mouse pointer in the cell where the formula was entered in Table 1, then drag down to the cell below the correct number of students to copy the Excel formula .
Thus, the formula combining IF with Vlookup has been applied to all cells in the Full Name column in Table 1.
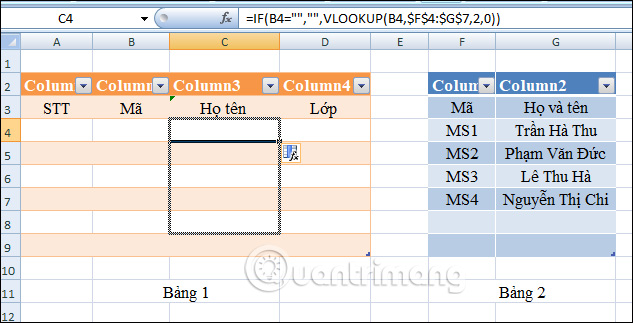
Step 3:
Now in Table 1, you enter code M1 in the Code column and press Enter , immediately the student name associated with that code will be displayed in the Full Name column in Table 1.
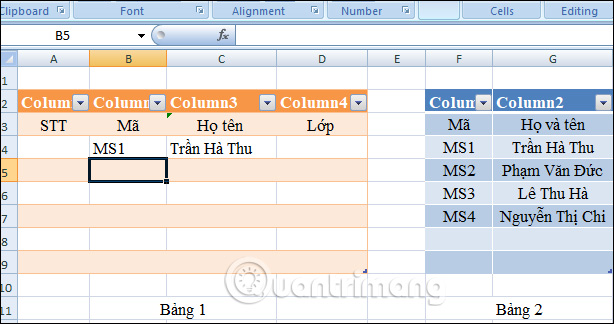
Finally, Start by enter that code, or drag the results down to the remaining cells to complete the nameplate. Student ID and name will also automatically display.
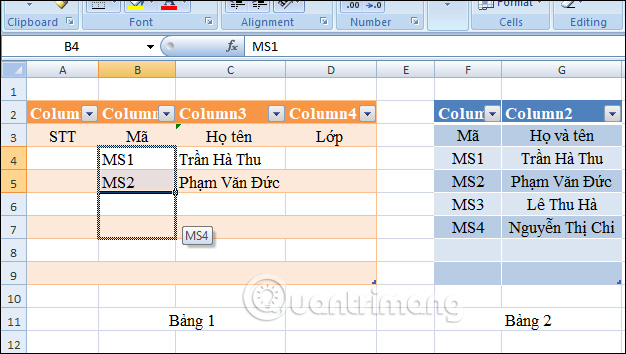
By combining the IF function and Vlookup function like this, displaying information in Excel data tables will be much faster and simpler. We also do not need to search manually, or search again in case of the same name. Student names will automatically be displayed according to the assigned student code.
Wishing you success!
Final Thoughts
Use the instructions and checks above in order, verify the result after each major step, and keep a backup whenever the process changes important files or system settings.
FAQ
What should I check before starting?
Confirm that your device or software version matches the instructions, save important data, and note the original settings before making changes.
What should I do if the steps do not work?
Restart the app or device, install available updates, review any error message, and repeat the steps carefully in the same order.
Can I undo the changes?
Many changes can be reversed, but the exact method depends on the feature. A backup or restore point gives you the safest way to recover.
Related Articles
 How to Automatically Display Names When Entering Code in Excel5 minutes read
 How to Automate Vlookup with Excel VBA8 minutes read
 How to Combine Vlookup Function with If Function in Excel5 minutes read
 VLOOKUP Function: How to Use It and Specific Examples20 minutes read
 Vlookup Function to Use and Specific Examples10 minutes read
 How to Combine Sumif and Vlookup Functions in Excel7 minutes read
Reader Comments 0
Sign in with email or Google to join the discussion.