Follow this checklist before 'clean' installing Windows 11!
When you're planning a fresh Windows 11 install, a little preparation can save you time and effort later.
Table of Contents
When you're planning a fresh Windows 11 install, a little preparation can save you time and effort later. From backing up important files to downloading drivers, having everything ready will make the process go much more smoothly.
5. Back up important data
Backing up your data is the most important part of a clean install. When you format your computer, everything on your primary storage drive is permanently erased. That's the whole idea – starting from scratch. But of course you still need your important data.
Files to prioritize
Start by identifying what needs to be backed up. Most of us accumulate gigabytes of unnecessary files over time, and there's no point in transferring these junk files to your new Windows installation.
First, let's focus on these important items:
- Documents folder contents : Work files, tax documents, resumes, and anything else you've created.
- Photos and videos : Family photos, screenshots, recorded videos, and downloaded images that you want to keep.
- Desktop Files : If you use your desktop as a temporary storage space, you'll probably find some important files here.
- Downloads Folder : Organize and save installers, PDFs , and other important downloaded files.
- Browser data : Chrome, Edge, and Firefox can sync with your respective accounts, but only if you have this feature enabled.
- Application data : Saved games, custom settings for programs, and license keys.
Select backup method
Now that you know what you need to save, it's time to choose the right backup method. Each of the methods below has its own considerations regarding speed, cost, convenience, and security. Choose the method that best suits your needs; for maximum protection, it's okay to use both methods.
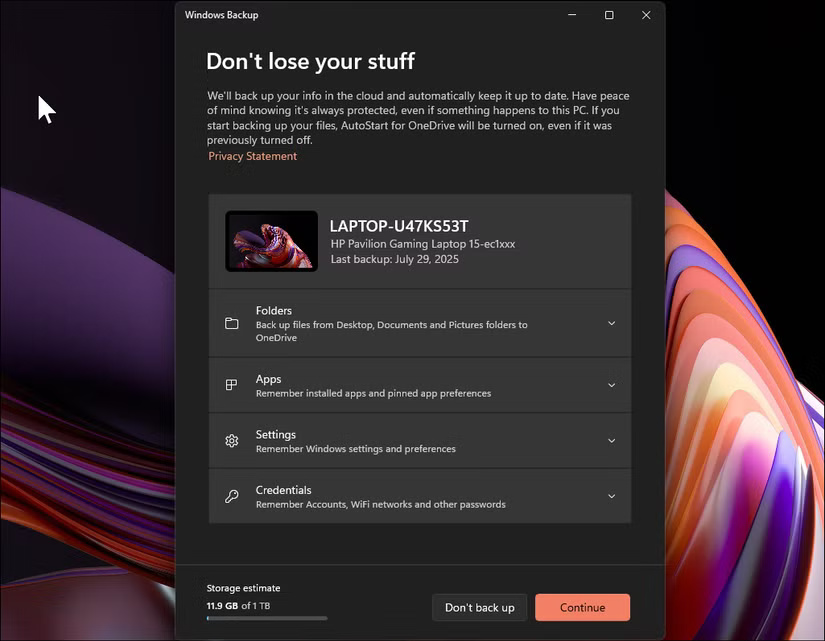
Windows Backup : Windows 11's built-in Backup app is the easiest way to back up your files, folders, and settings. To open the app, press the Win key , type Windows Backup , and then open the app from the search results.
Third-party backup software : Dedicated backup applications like Macrium Reflect , Acronis True Image , or EaseUS Todo Backup offer comprehensive solutions. These applications can create complete system images, allowing you to restore your entire PC to a previous state if needed. They also support incremental backups, encryption, and cloud storage integration.
Manually transfer files : Sometimes the simplest solution is the most effective. Connect an external hard drive or a large USB drive with enough free space, then manually copy the important folders to create a backup. This method gives you complete control over what gets backed up and makes it easy to access your files on a fresh Windows installation.
Cloud storage services : OneDrive, Google Drive, Dropbox, and similar cloud storage services are also great backup options. If you already use a cloud storage service, make sure all your important files are fully synced before proceeding with the fresh install.
4. Record the key information
Once you've backed up, make a note of all your product licenses, application information, and account credentials.
Drive encryption recovery key
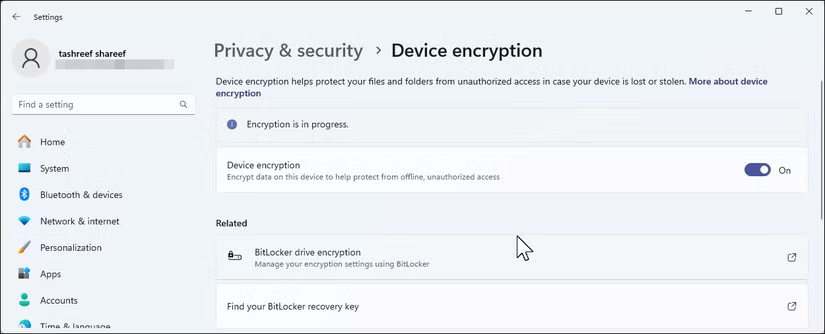
Windows 11 includes two types of drive encryption: Device encryption (available on Windows Home) and BitLocker (on Pro and above). If you previously performed a clean install using a Microsoft account, encryption may have been turned on automatically.
To check if Device encryption is enabled on Windows 11 Home, go to Settings > Privacy & Security > Device encryption . On Pro, check Control Panel > System and Security > BitLocker Drive Encryption .
Product key and software license
While Windows 11 automatically reactivates on the same hardware, other software may require manual reactivation. If you have unregistered software that requires a product key, collect it before doing a complete reinstall. Common product keys include:
- Microsoft Office (unregistered version)
- Adobe Creative Suite Applications
- Antivirus software
- Any purchased software requires activation.
Magical Jelly Bean Keyfinder is a free application that can retrieve product keys, which you may find useful.
Record installed applications
You can easily generate this list using a free third-party tool. Download UninstallView from NirSoft to see all the applications installed on your PC. Once opened, go to View > HTML Report - All Items to export the complete list. Save this file to a USB drive or cloud storage account.
You can then use the list to quickly reinstall Windows apps with the Winget command, or visit Ninite to create custom installers for popular software.
3. Prepare for installation
Once a full backup is made and important information is recorded, it's time to prepare the installation media and download the necessary files.
Create installation media
Your installation media is a bootable USB containing Windows 11, which allows you to install the operating system from scratch. You will need this media to perform a clean installation, as you are wiping your current Windows installation.
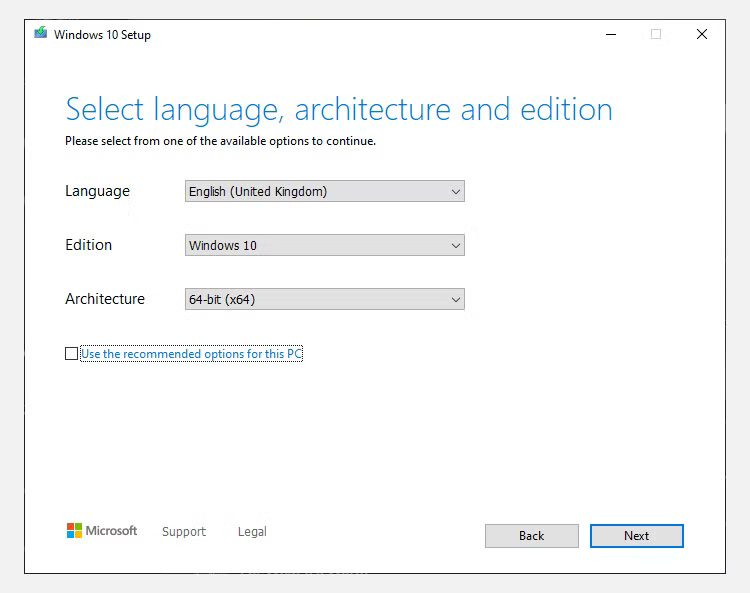
There are two main methods you can use to create a Windows 11 bootable USB. The easiest is Microsoft's Media Creation Tool , which will automatically download the latest version of Windows 11. If you want to get more advanced, try Rufus , which offers more options and control over the installation process.
Download essential drivers
Although Windows 11 includes basic drivers, downloading the latest versions beforehand will prevent connection issues after installation. Windows often installs generic drivers that work but may not provide the best performance.
Downloading the latest graphics card drivers is especially important here. The latest drivers can significantly improve gaming performance and display quality compared to the generic drivers that Windows automatically installs. Download these important drivers from your computer manufacturer's website:
- Network adapter driver
- Graphics Driver: For best performance, download the latest graphics drivers from NVIDIA , AMD or Intel
Prepare the installation files
Create a folder after installation on the USB drive containing:
- Install your favorite web browser
- Installer for antivirus software, if you use software other than Microsoft Defender
- Installers for essential apps you use every day (consider using Ninite to create custom installers or prepare Winget scripts)
- Backup your browser bookmarks and passwords
- Any custom fonts or themes you have installed
This preparation significantly speeds up the setup process after installing Windows.
2. Before starting a clean install
These final steps help prevent common installation problems and ensure a smooth transition to the new Windows 11 system.
Sign out of all accounts
To avoid activation and sync issues, sign out of all apps and online accounts. Some services limit the number of devices you can use at once, so signing out properly will ensure you don't hit this limit with a fresh install. Specifically, consider:
- Microsoft Store Apps
- Adobe Creative Cloud Applications
- Steam and other gaming platforms
- Cloud storage application
- Any other software has device limitations
Verify Internet access
Make sure you have a stable Internet connection. Windows 11 requires Internet access during installation to:
- Download important updates
- Activate Windows
- Install driver via Windows Update
- Sign in to your Microsoft account
Always carry your phone
Two-factor authentication has become standard for many services. During a clean install, you may need to:
- Receive SMS verification code
- Approve logins via authenticator app
- Access backup codes stored on your phone
1. Final Checklist
Before starting the installation:
- Verify that all important data has been backed up
- Confirm that the backup files are accessible on the external storage media.
- Check if you can boot from the installation USB
- Double check that you have all the necessary passwords and recovery keys.
- Do this when you are not busy, as it may take a few hours to complete the entire process.
After a clean installation is complete, save your new BitLocker recovery key immediately. The clean installation process will generate new encryption keys, rendering your old recovery key useless.
Was this article helpful?
Your feedback helps us improve.
Related Articles
 10 tasks to clean up your Windows computer should not be ignored9 minutes read
 How to do checklist in Excel3 minutes read
 6 Important Steps to Take After a 'Clean' Install of Windows 117 minutes read
 How to create a checklist in Microsoft Excel4 minutes read
 How to use Clean Master to clean up, speed up Windows6 minutes read
 How to implement Clean Boot on Windows 10/8/73 minutes read
Reader Comments 0
Sign in with email or Google to join the discussion.