Table of Contents
You can create a Copilot Studio agent from a plain-language description, then refine its instructions, knowledge, tools, topics, and channels in the graphical editor. The essential workflow is simple: define one clear purpose, add only the resources required for it, test with realistic users and edge cases, then publish to an approved audience.
This guide covers agents built with Copilot Studio's standard authoring experience. Features, licensing, and publishing options can differ for agents created under a Microsoft 365 plan or another harness.
1. Create the agent
- Sign in to Copilot Studio and select the correct Power Platform environment.
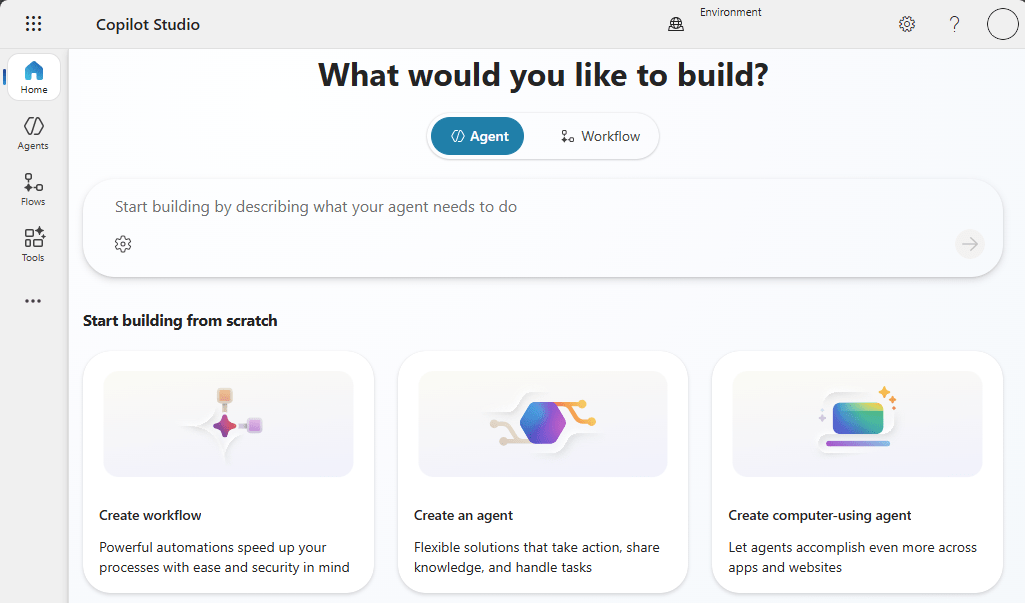
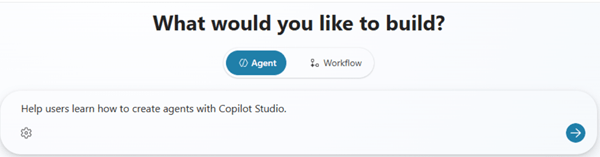
- On the Home page, describe what the agent should do. For example: Help employees find approved instructions in our IT support documentation.
- Before creation, use the settings control to review the primary language, solution, and schema name. The primary language cannot be changed after creation, although supported regional variants and secondary languages can be added later.
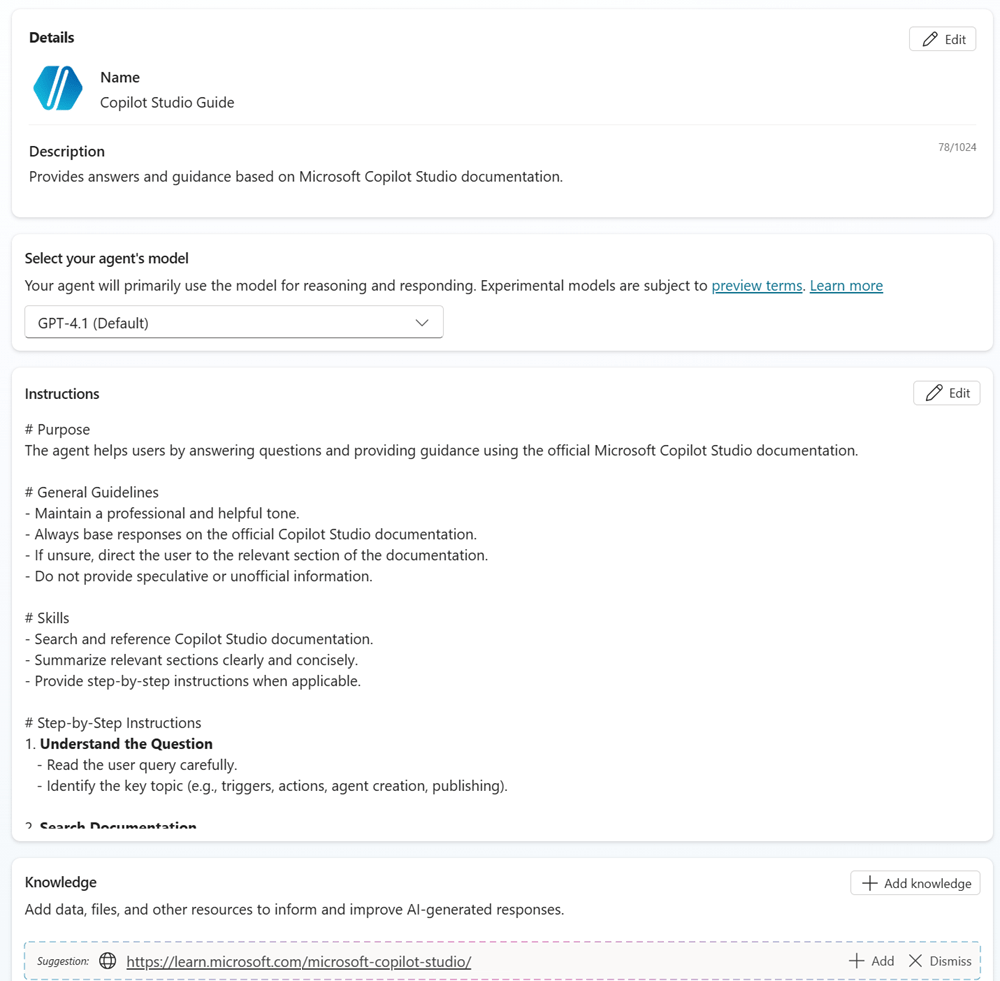
- Review the generated name, description, and instructions, then create the agent.
If the natural-language creation dialog is unavailable, the selected environment may not support that experience. You can still create a blank agent and configure it manually.
2. Replace the draft with precise instructions
Generated instructions are a starting point. State the agent's audience, task, allowed sources, response style, escalation rule, and actions it must not take. Instructions cannot give an agent a capability it has not been configured to use, so add the relevant knowledge source, tool, topic, or connected agent first.
On the Overview page, edit the name, description, and instructions. Add approved knowledge, tools, triggers, and topics one at a time. Review rather than automatically accepting Copilot Studio suggestions; they are not a substitute for security, data, or business approval.
3. Add and test a knowledge source
Add a narrow, authoritative source that matches the agent's purpose. Then ask questions whose answers are present, absent, ambiguous, outdated, and restricted. Check whether the response is grounded in the source and whether citations point to the correct material.
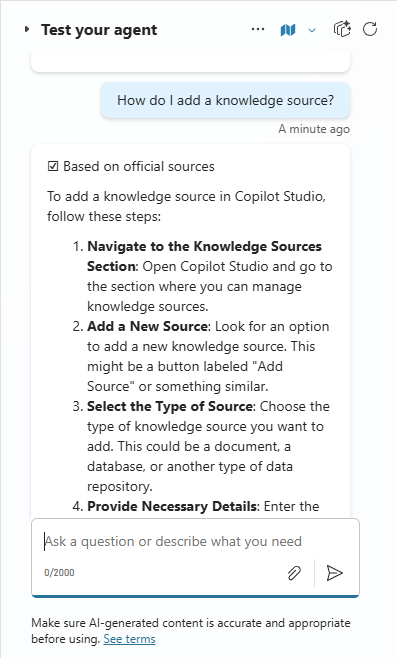
Use the test panel after every meaningful change. Start a new test session when you need to clear prior conversation context. Keep a reusable test set so later edits can be compared with the same inputs; our guide to testing a Copilot Studio agent explains the checks in more detail.
4. Improve the conversation experience
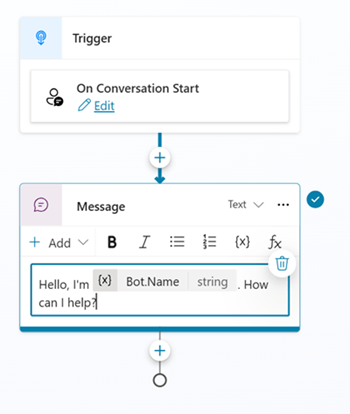
Write a useful introductory message
Open the Conversation Start topic from the introductory message in the test panel. Replace the default text with a short greeting that explains what the agent can do, any important limitation, and one or two example requests. Save it and begin a new test session to see the change.
Add suggested prompts
For Teams or Microsoft 365 Copilot, the Suggested prompts section on the Overview page can hold up to 10 conversation starters. Give each prompt a short title and an actual request that demonstrates a supported task. These prompts appear before a new conversation in those channels and are not shown in Copilot Studio's test panel.
Change the icon
Select the agent icon, choose Change icon, and upload a PNG. Microsoft currently specifies a file smaller than 72 KB with a maximum resolution of 192 × 192 pixels. Use an image your organization has permission to publish.
5. Complete a pre-publish review
- Test expected tasks, unsupported requests, ambiguous wording, and multi-turn conversations.
- Test as users with different permissions, especially when using SharePoint or other private knowledge.
- Verify tool inputs, confirmation behavior, errors, timeouts, and unintended side effects.
- Review authentication, channels, data policies, owners, connections, and environment placement.
- Confirm the introduction, privacy information, escalation path, and operational owner.
For higher-risk deployments, review the Copilot Studio security controls before publishing.
6. Publish and choose a channel
Select Publish at the top of the agent page and confirm the action. Publishing creates or updates the deployable version; it does not automatically make every channel appropriate for public use. A trial license can be used to build and test an agent, but Microsoft states that it cannot publish one.
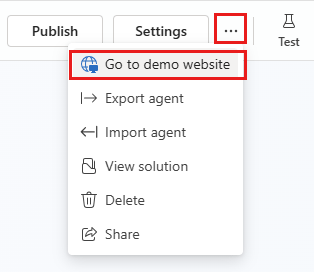
A demo website is useful for limited stakeholder feedback when its authentication mode matches the data involved. Do not use an anonymous demo page for confidential sources or actions. For an organizational rollout, configure the intended channel and access controls; see publishing a Copilot Studio agent to Teams.
After release, monitor usage and blocked requests, collect specific failure examples, update the test set, and republish only after validating changes. Microsoft's current Copilot Studio quickstart documents the latest interface and channel options.
Related Articles
 Overview of Copilot Studio11 minutes read
 Should You Choose Microsoft 365 Copilot or Copilot Studio to Build Your Agent?9 minutes read
 Evaluating Agent Performance in Microsoft Copilot Studio15 minutes read
 Add Copilot Connectors to Copilot Studio Agents8 minutes read
 Copilot Studio Knowledge Sources: Complete Guide10 minutes read
 Upload Files as Knowledge in Microsoft Copilot Studio12 minutes read
Reader Comments 0
Sign in with email or Google to join the discussion.