Change these settings on your iPhone for stunning nighttime photos!
iPhone cameras have gotten a lot better over the years. These days, iPhones take great night photos — but not by default. If your low-light shots look grainy or blurry, it's time to tweak your settings.
Table of Contents
iPhone cameras have gotten a lot better over the years. These days, iPhones take great night photos — but not by default. If your low-light shots look grainy or blurry, it's time to tweak your settings.
- 4 best night photography apps
4. Set Night Mode to maximum duration
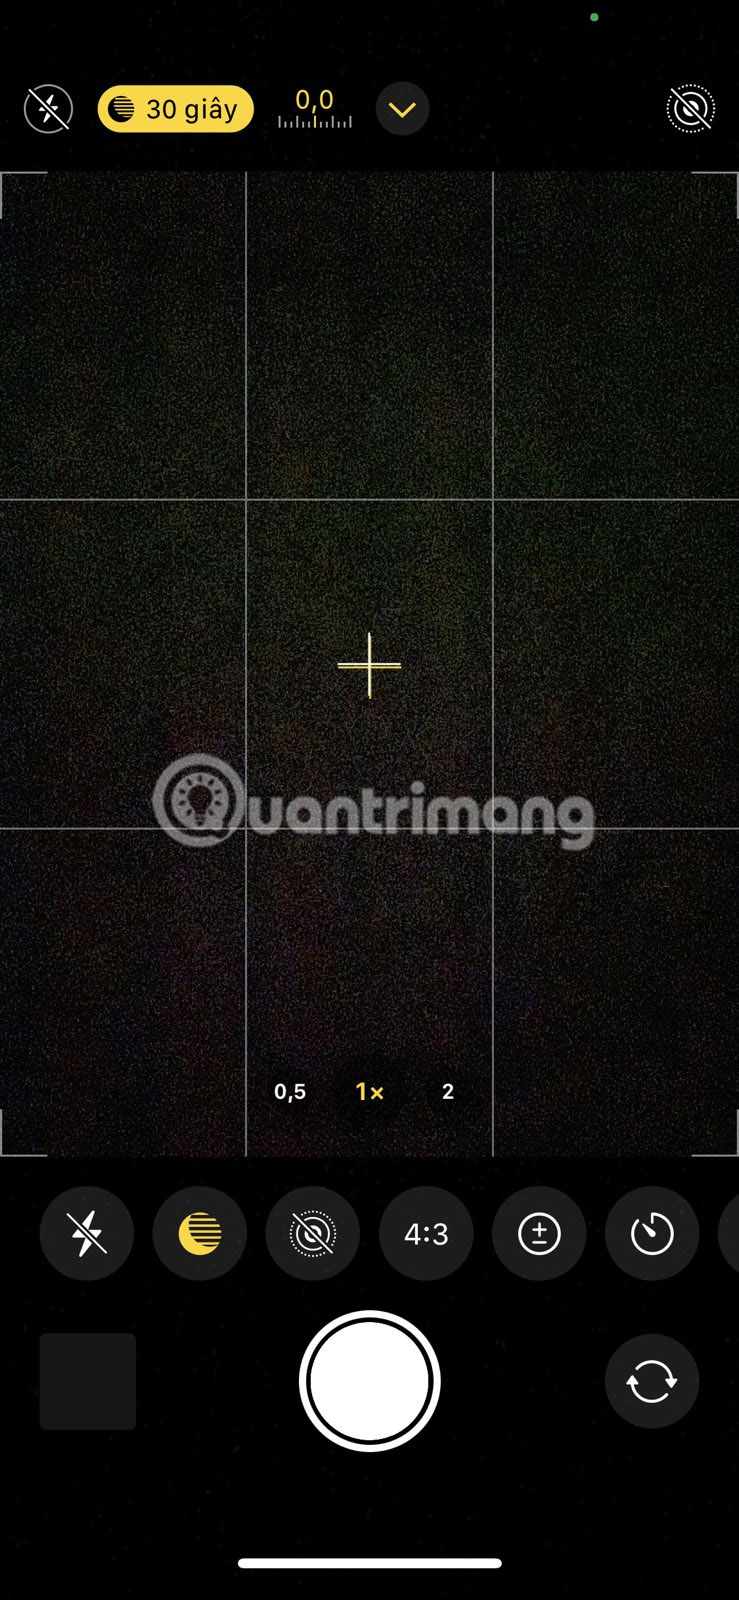
When you turn on Night Mode on your iPhone, the camera will take anywhere from 1 to 30 seconds to take a photo. By default, your iPhone will automatically choose the appropriate exposure time based on the lighting conditions.
However, you can manually extend the shooting time to Maximum for even better results. Increasing the duration allows the camera to collect more data and produce photos with sharper details, less noise, and richer colors.
To set Night Mode capture duration to maximum on iPhone:
- Open the Camera app and tap the arrow at the top of the screen.
- Tap the Night Mode icon (crescent moon) at the bottom.
- Use the slider to set the duration to Maximum .
- Hold your iPhone steady and take a photo.
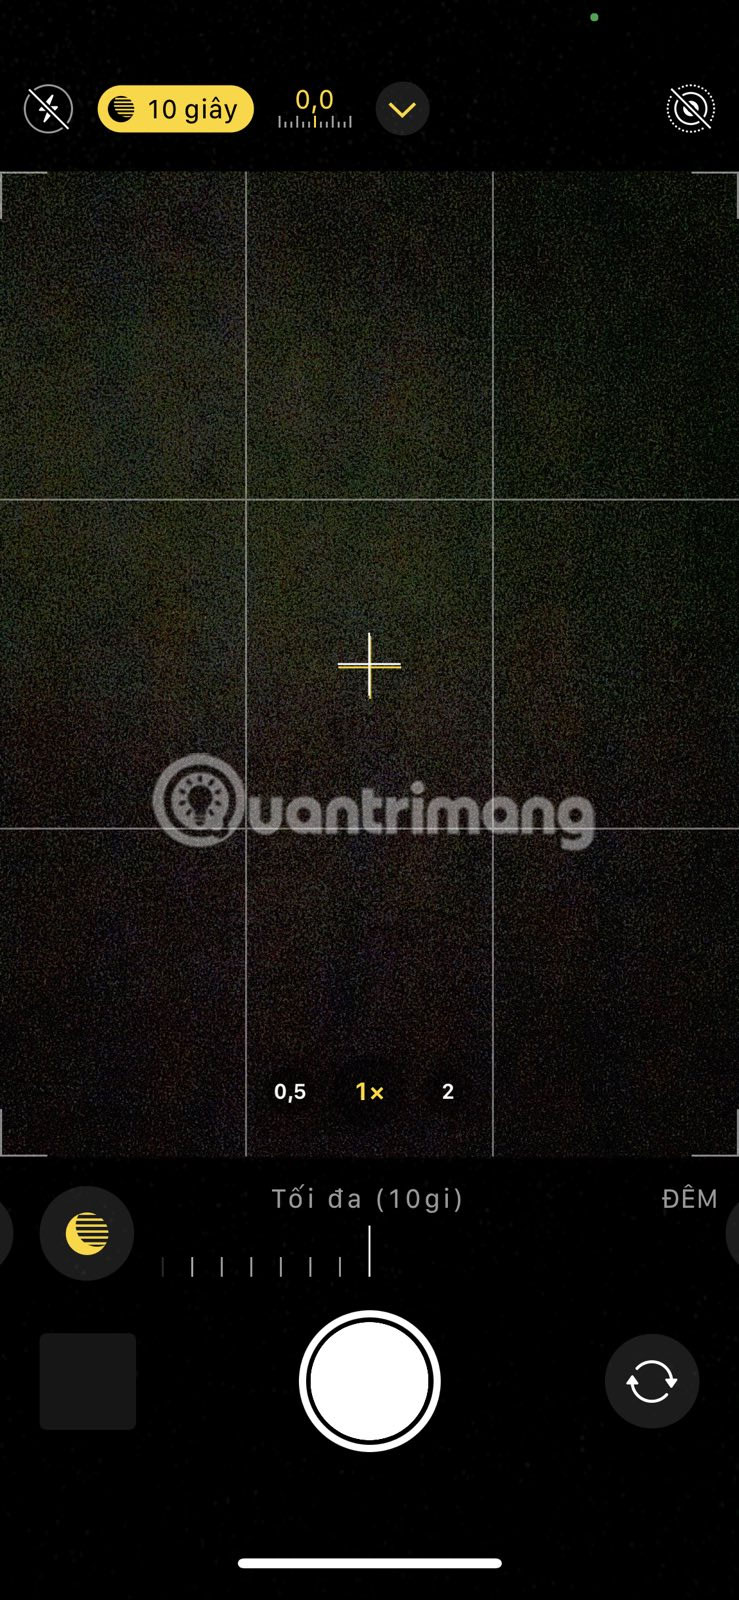
Note that maximum exposure times may vary depending on lighting conditions and camera stability. Using a tripod can unlock longer exposure times for more detailed nighttime shots.
3. Adjust exposure manually
While the iPhone's Night Mode does a great job of automatically brightening dark scenes, it can sometimes overcompensate. When this happens, you may notice that grays and blacks appear grainy and bright areas look too washed out.
Luckily, you can fix this by manually reducing the exposure. This reduces the amount of light captured, which can help reduce noise and improve contrast.
To do this, tap on the part of the scene you want to focus on. This will bring up the exposure controls (the little sun icon next to the focus box). Just swipe down to darken the image, giving you richer blacks and deeper shadows.
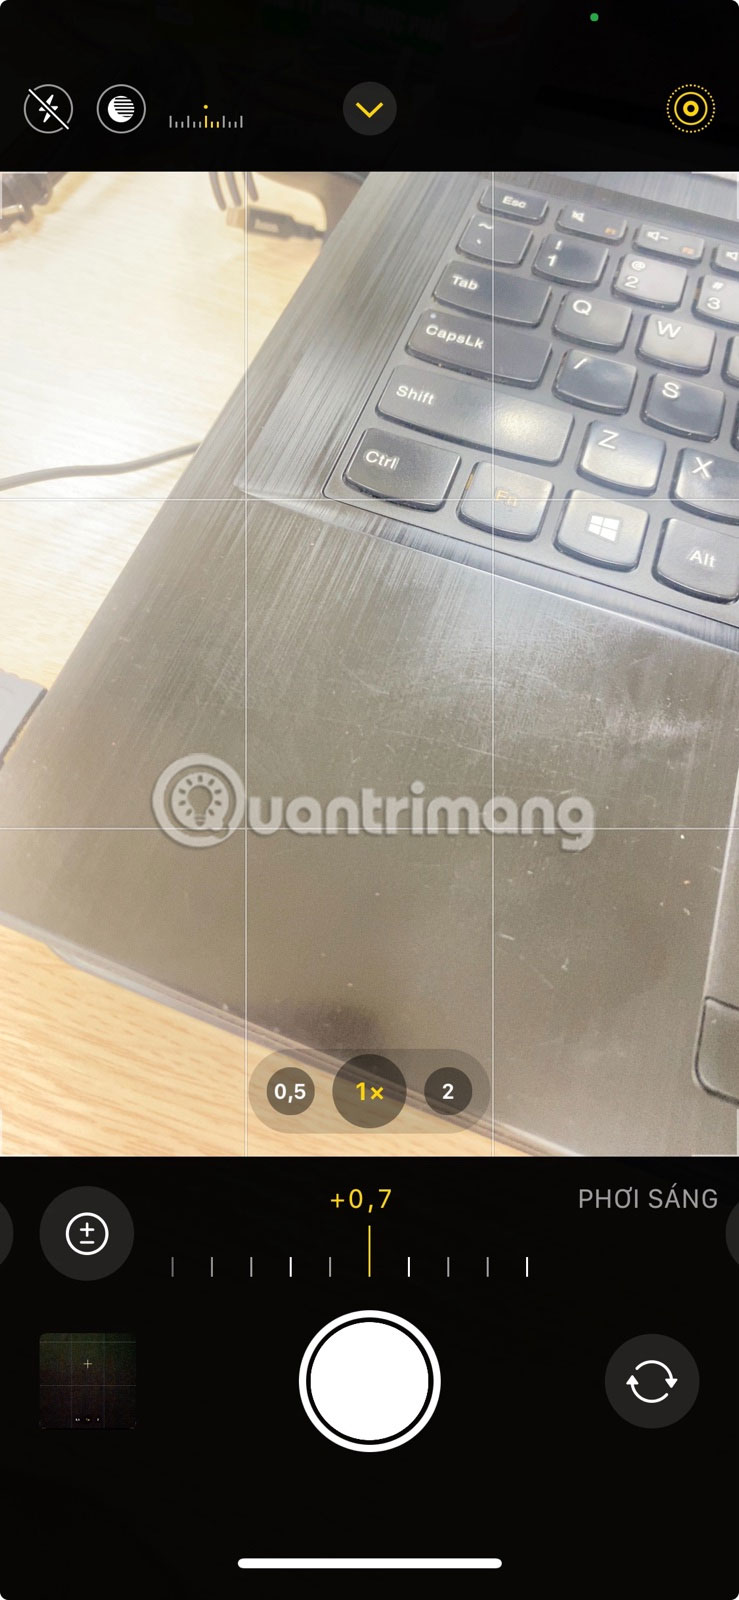
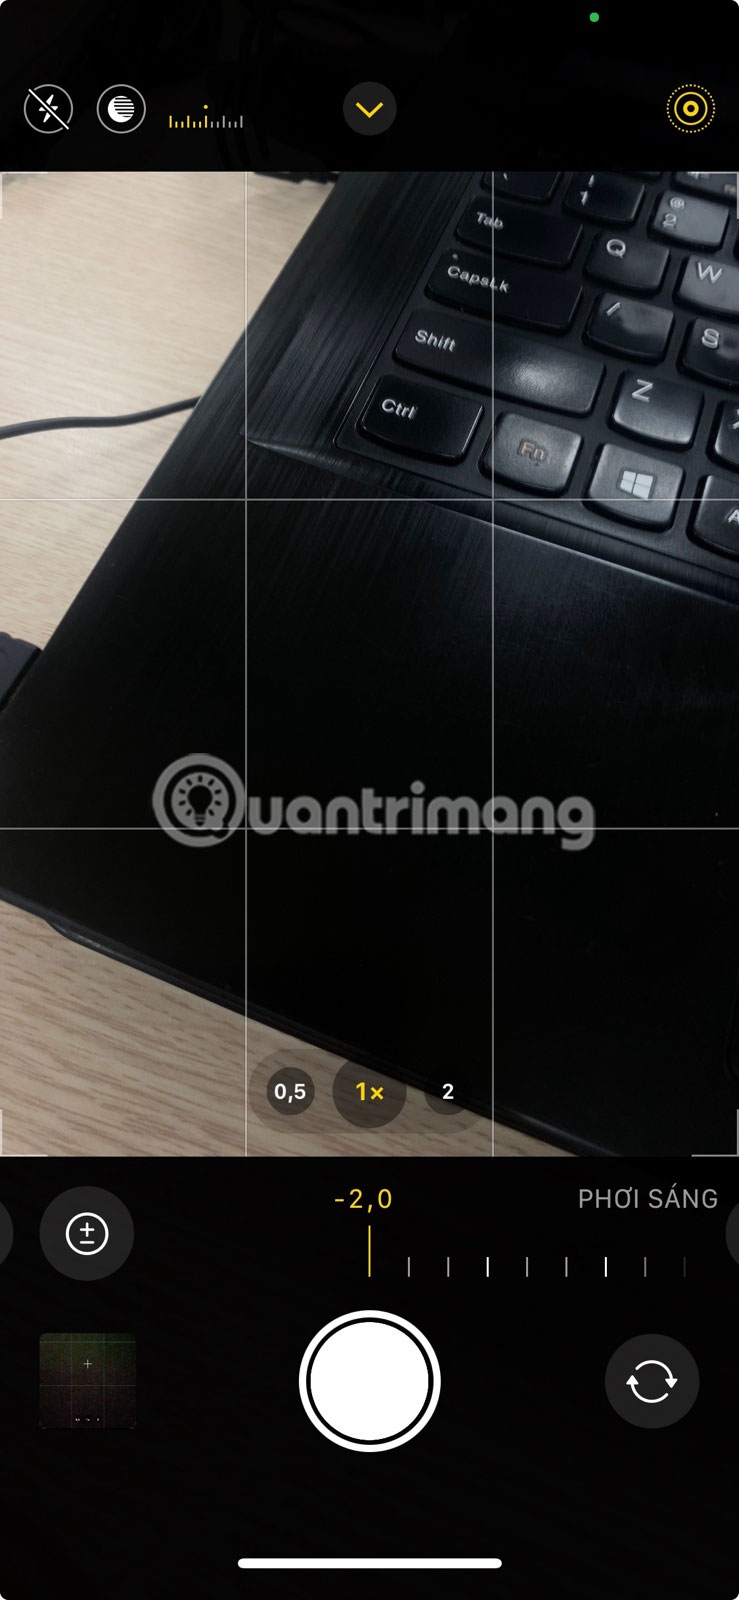
Tip : Reducing your exposure a little is a great way to prevent blown highlights and preserve detail in bright areas, such as street lights or neon signs. However, be careful not to reduce it too much, as this can darken your photo and cause loss of shadow detail.
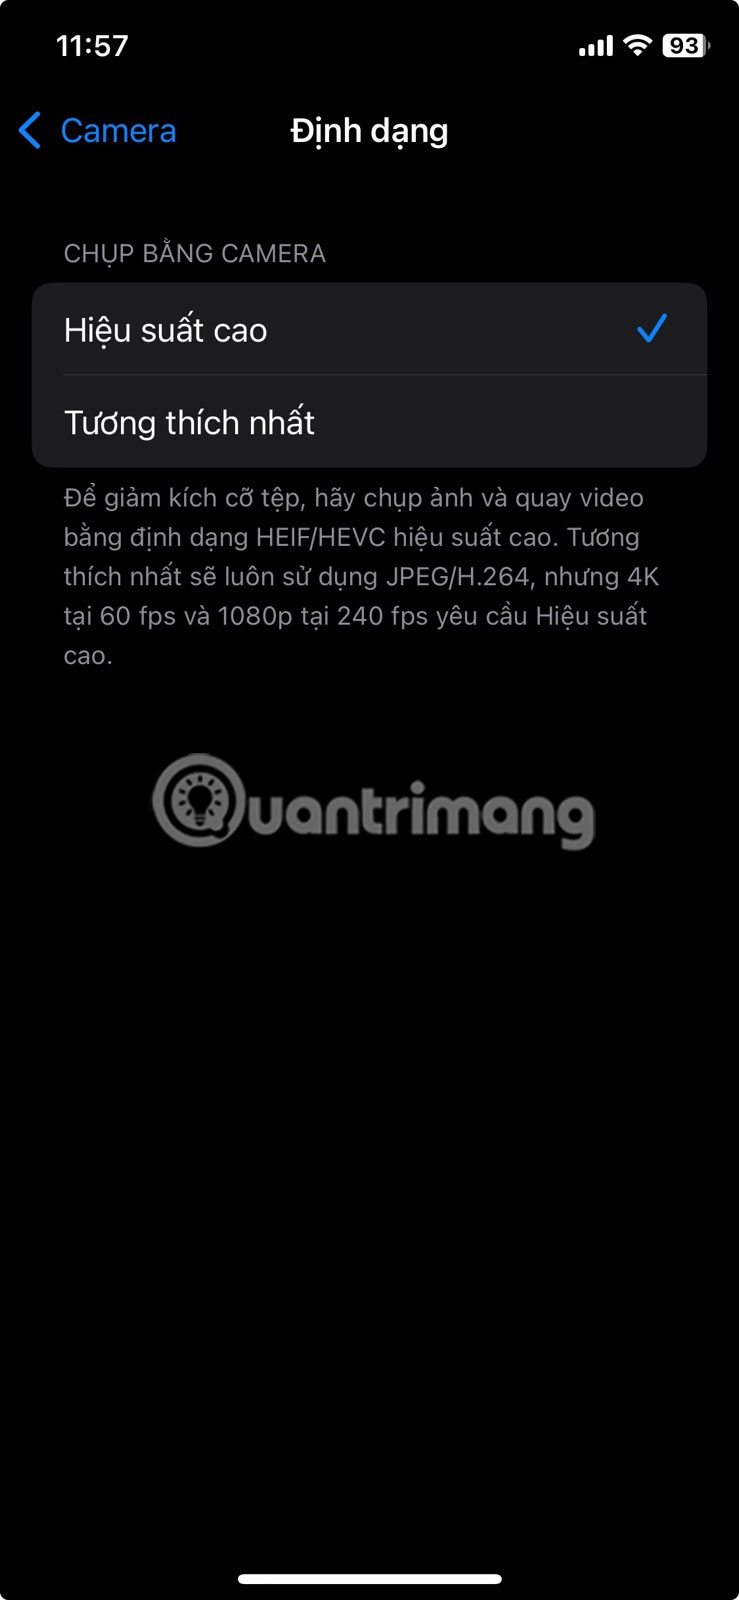
2. Turn on Apple ProRAW
If you have an iPhone 12 Pro or a newer Pro or Pro Max model, enabling Apple ProRAW format can improve your night shots. This format combines the extra detail of RAW photos with Apple's intelligent image processing, so you get more control over exposure, color, and noise reduction.
Unlike standard JPEG or HEIC photos, ProRAW captures more image data, like details in shadows and highlights. This extra data is especially useful in low-light conditions. You can enable Apple ProRAW by going to Settings > Camera > Formats . If you have an iPhone 14 Pro or newer Pro or Pro Max models, set the resolution to 48 MP.
Once enabled, you'll see a RAW button at the top of the Camera app. Tap it to enable ProRAW before taking a night shot. You can then use an app like Lightroom to edit your night shots and make them look even better.

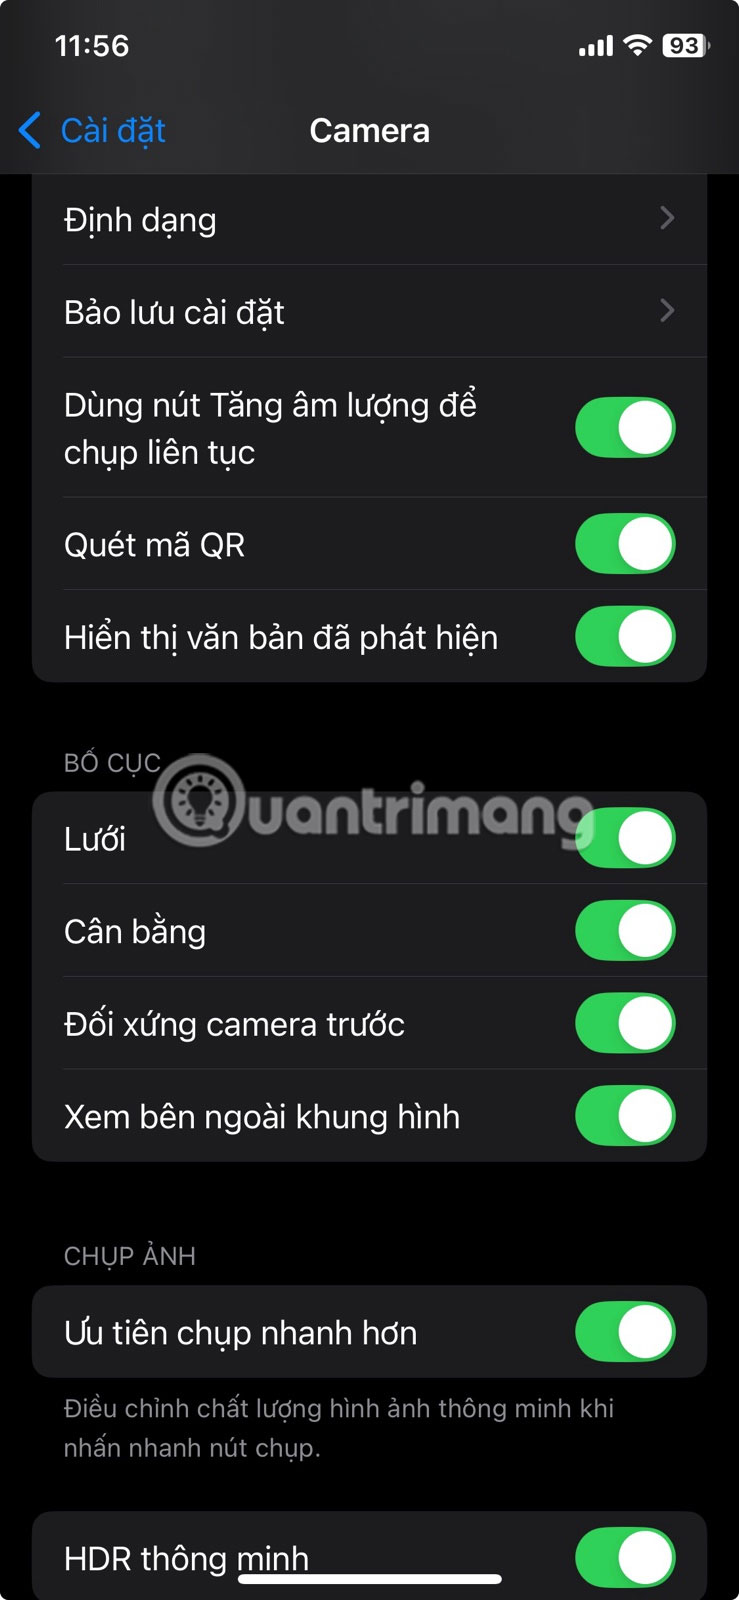
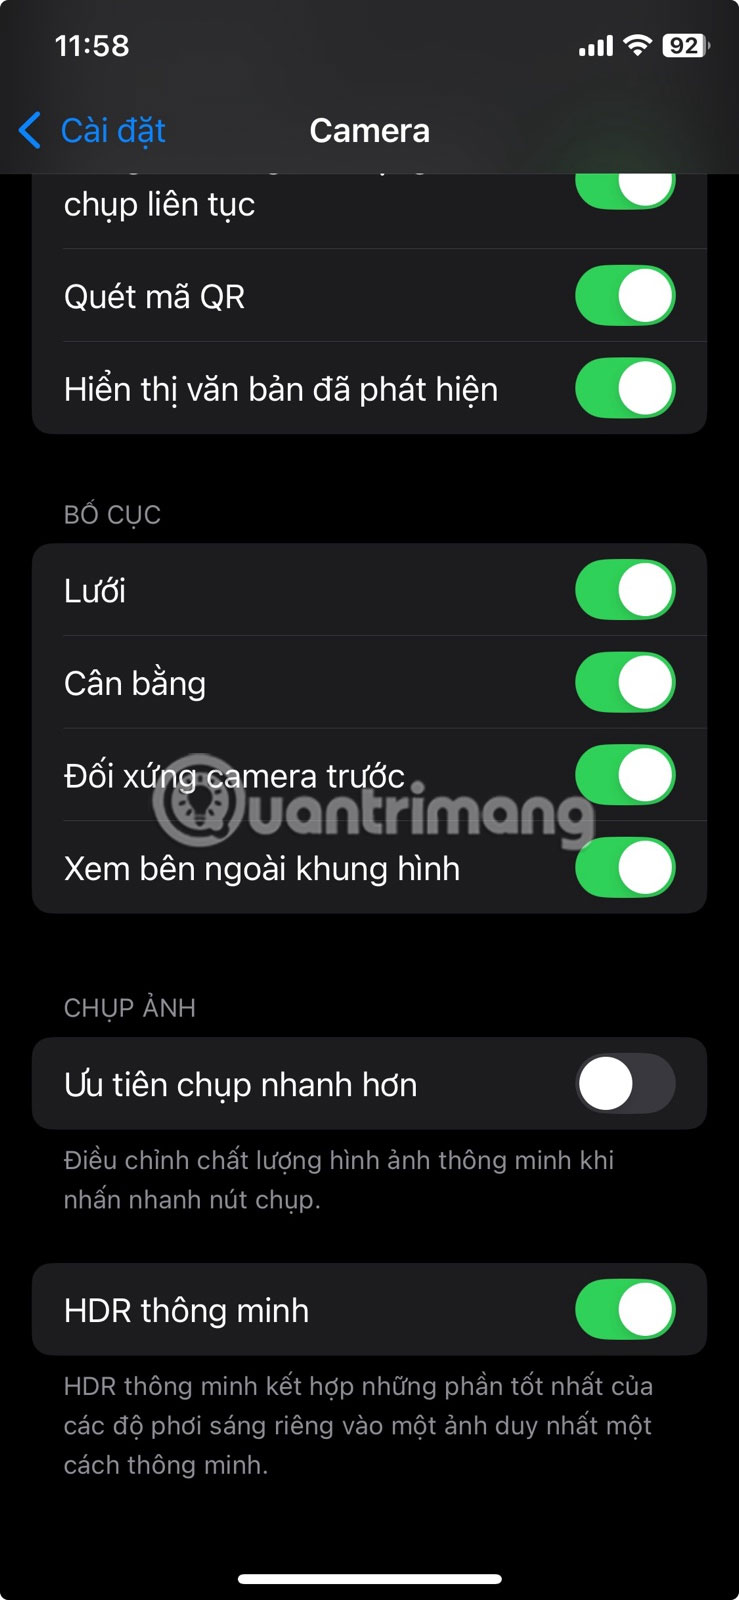
1. Turn off Priority Capture Faster
In most cases, you'll want your iPhone to take a photo as soon as you tap the shutter button. That's why the Prioritize Faster Shooting setting is enabled by default on all iPhones.
However, this feature isn't ideal for night photography because it prevents the iPhone from capturing more detail, so it's best to turn it off by going to Settings > Camera and turning off the Prioritize Faster Shot toggle . Turning this setting off can also improve photos overall.

Adjusting these iPhone settings will help you take better night photos. But settings alone aren't enough — you also need to keep general night photography tips in mind, like using a tripod, cleaning your lens, and more.
Was this article helpful?
Your feedback helps us improve.
Related Articles
 7 Annoying iPhone Settings to Change6 minutes read
 10 changes the best settings that Siri can make on iPhone4 minutes read
 These are some hidden iPhone settings changes you should make right now.5 minutes read
 The first 6 One UI 8 settings you should change on every Samsung phone4 minutes read
 How to Change Fonts on iPhone5 minutes read
 Instructions for changing featured photos on iPhone2 minutes read
Reader Comments 0
Sign in with email or Google to join the discussion.