Building backup disk system (RAID)
David A. Karp
Backing up data is always an essential and urgent task for businesses, organizations or any individual. Whenever your hard drive can be corrupted or bad without warning and attached, the data is also 'gone'. So why not instead of "waiting" for a failed hard drive, you don't set up a simple backup system yourself without losing too much effort to backup every day and every hour (even if you've already have support program). Today's hard drives are no longer too expensive and too expensive, so make your organization professional with a basic backup backup system (RAID). This tutorial will show you how to create, install and maintain this system step by step.
To set up a RAID system, you need two identical hard drives (if they are the same type and capacity, the better) and a RAID controller. Most newer PCs attach RAID to the motherboard, otherwise you can add a PCI or PCI controller for about $ 50.
Tools and components used
Hard drive : Two Samsung HD160 JJ drives
Cable : Two SATA cables
RAID controller (if needed) : SATA PCIe dual card Adaptec 1220SA ports
RAID levels
RAID system is divided into different levels. RAID 1 protects the computer by duplicating data on multiple drives. RAID 0 works differently, it uses multiple drives to increase performance, but there is no data backup solution. RAID 5 works similarly to RAID 0 but is added to parity (parity) for data protection; It needs 3 drives. Finally, RAID 10 is a combination of two versions: data replication (such as RAID 1) and data block division (RAID 0), it requires up to 4 drives. RAID 1 is a good choice for most computers. For a better understanding of these levels, you can refer to the article Understanding RAID which was previously TipsMake.com.
Build a RAID system
1. Install two hard drives
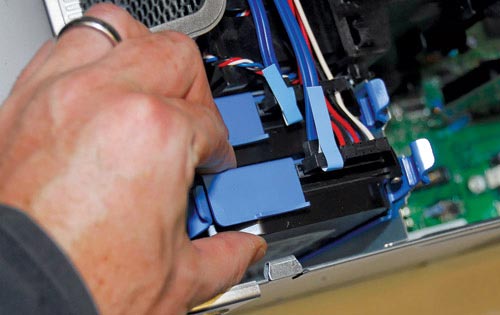
Some computers do not require any tools for installing the drive: just insert the drive into the slot. For those machines with wide-range mounting positions, you should install the drive so that there is no problem with heat dissipation.
2. Connect the drives with SATA ports
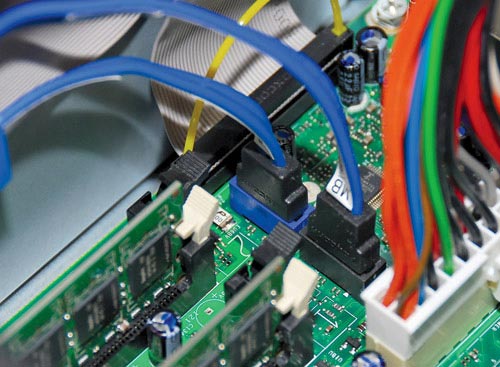
Connect the drive with SATA (Serial ATA) ports 0 and 1, unless your documentation is expressed in a different way. (Some controllers have a RAID plug-in design on the motherboard side). If there are other SATA devices like DVD drives, you need to split them to higher numbered ports. Plug in the power cable after you have finished connecting SATA.
3. Check the BIOS settings
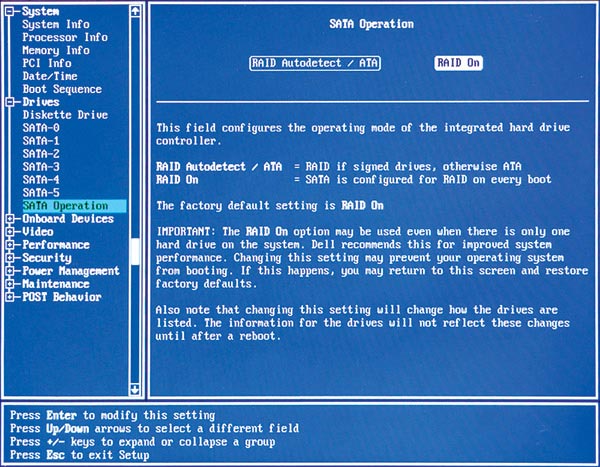
To get to the BIOS setup screen usually press the Del, F2 keys or whatever keys your system requires, maybe this command before the Windows download process starts. In the BIOS setup screen you must make sure all the SATA ports to use are enabled. Next, disable any unused SATA ports (some RAID controllers may fail for ports that do not have a drive), and enable the RAID feature if it is not turned on. Save the settings and reboot the machine when you have completed the above operations. (The BIOS screen may be different on each system, so please refer to the instructions carefully if you're not sure how to change the settings).
4. Open the RAID configuration utility
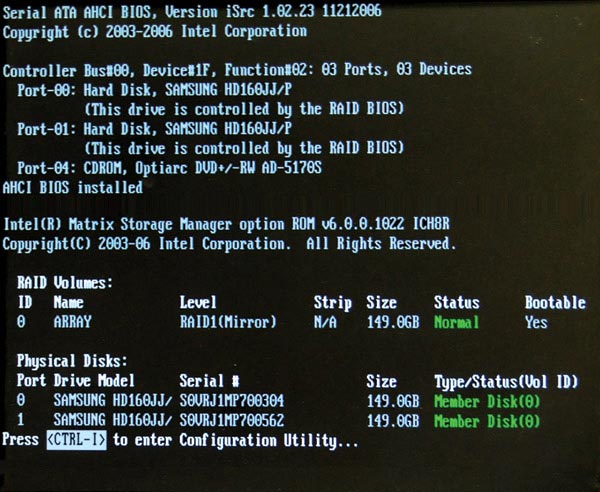
When restarting the computer, after the setup prompt enters the BIOS, but before Windows starts, you will find a message from the RAID controller. The Intel controller in this example requires pressing Ctrl + I to access the utility, but your system may be different.
5. Assign the drives to the system
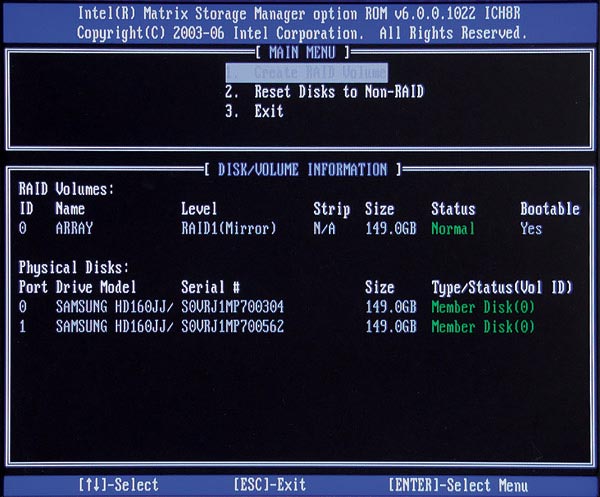
Use the RAID configuration utility to select which drives to use in the RAID system and set RAID Level to 1. This effect will erase the data on the drive so if you are upgrading the hard drive, be sure to There is a backup of the entire system on the drive. After you have created the system, you can install Windows and restore the backup.
6. Use software RAID to manage drive systems
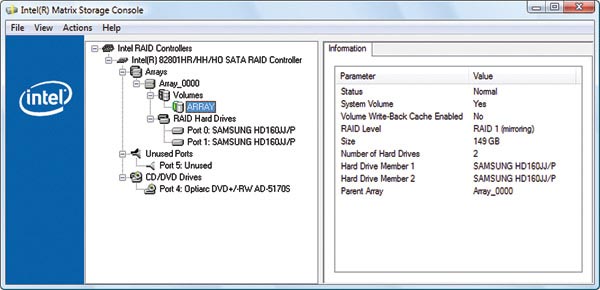
Intel's Matrix Storage Console software (used to control RAID) will help you manage the drives in the RAID system, check their status and even install new drives into the system - all done in Windows. If you don't see all the drives in this window, open the Device Manager section (go to Run enter devmgmt.msc command) and from the Action menu, select Scan for hardware changes. Note that using RAID, Device Manager and Disk Manager will only see a primary drive.