Table of Contents
This updated guide compares most annoying features of Windows 11 and highlights the details that matter most. Windows 11 offers a great overall computing experience, but there are a few quirks that can really test your patience. Thankfully, it only takes a few minutes to smooth out the rough edges and get Windows 11 working the way you want it to.
9. Solve Notification Overload
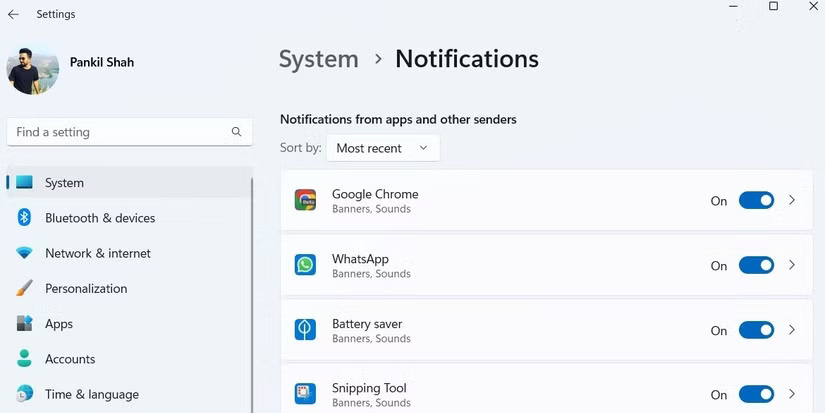
That feeling when you're trying to get something done and the buzzer—another pop-up in the corner—is annoying. Maybe it is the weather app telling you it might rain. Or, it is a random app you completely forgot you had installed and now wants your attention. it is distracting, unnecessary, and happens way too often.
Luckily, controlling everything is easier than you might think. All you have to do is open the Settings app and open System > Notifications . There, you'll see a list of apps with toggle switches. Just turn off notifications for the apps you never want to see again. If you do not want to disable them completely, it is best to just mute them.
8. Turn Off Microsoft Tips and Pop - ups
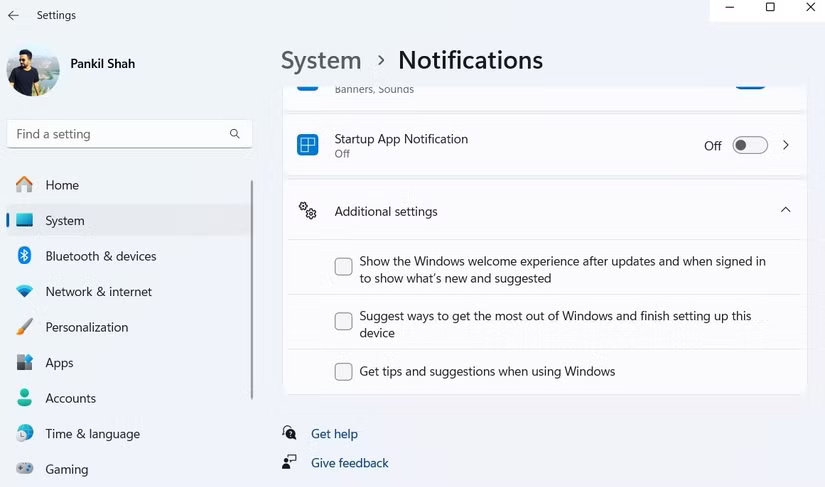
it is not just new apps that can be distracting. If you've spent more than five minutes doing a clean install of Windows 11, chances are you've been bombarded with 'helpful tips,' setup suggestions, and pop-ups urging you to use Edge. While some of these tips may be helpful to new users, for the rest of us, they're just plain annoying.
To fix this, open Settings > System > Notifications and scroll down to expand Additional settings . Then, simply uncheck the three boxes for tips and suggestions related to optimizing your Windows experience.
7. Set Default Applications
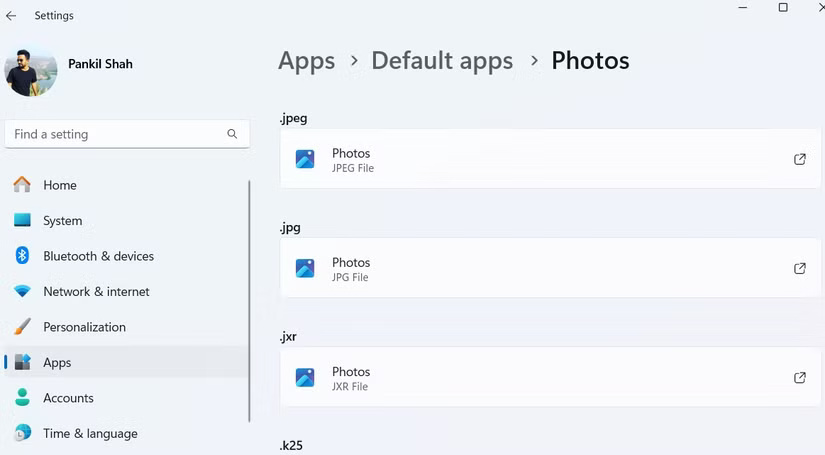
Remember when changing your default browser or photo viewer in Windows 10 was as easy as a single choose? In Windows 11, Microsoft has made it a process more like filing taxes.
Instead of just letting you pick a default app, Windows 11 asks you to set that app for each individual file type. for instance, to change the default photo viewer, you'll need to adjust the settings for JPG, PNG, TIFF, and more. To make these changes, open Settings > Apps > Default Apps .
6. Speed Up by Disabling Startup Applications
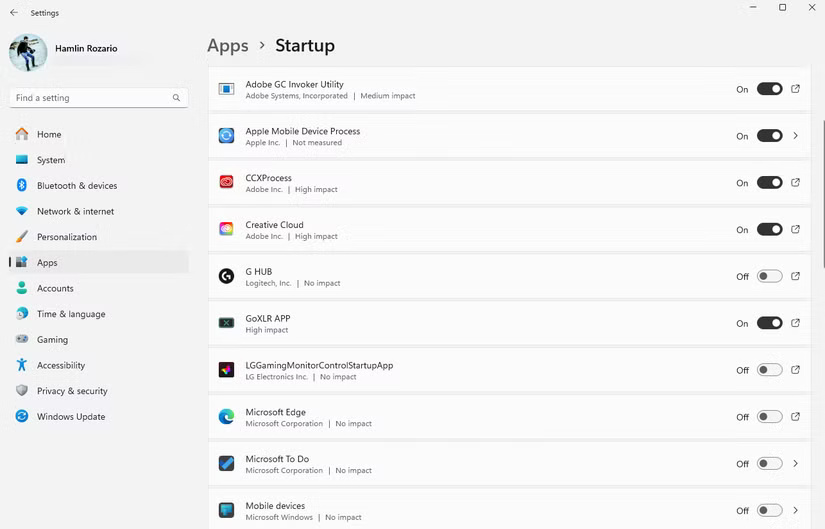
Even a brand new Windows 11 PC can start to slow down strangely after a few days. The main cause is often too many startup applications.
By default, Windows tends to let a bunch of apps launch automatically when you log in—some of which you probably do not need to run right away (or ever). Apps like Microsoft Teams, OneDrive, Spotify, or other random apps sneak into the startup list and silently eat up system resources in the background. All of this can add up and significantly slow down your computer's boot time.
5. Clean Up the Start Menu and Taskbar
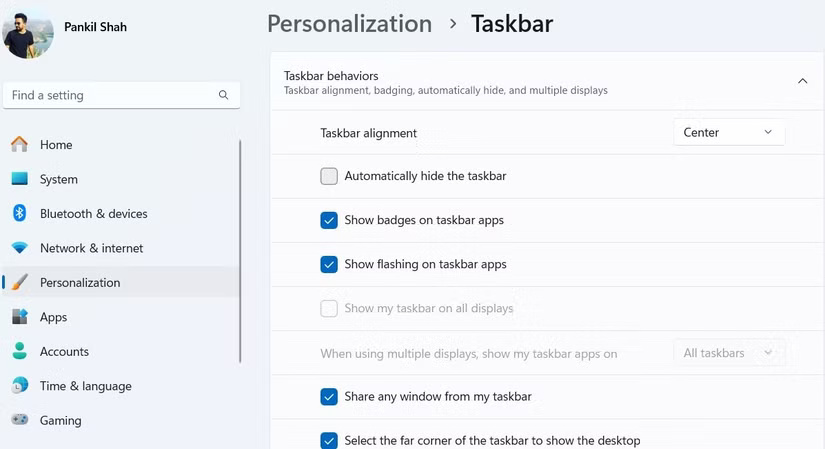
Windows 11's Start menu and Taskbar look great, but when you actually start using them, you'll realize how cluttered and distracting they can be. Luckily, you can tame the chaos in just a few minutes.
Start with the Start menu. open Settings > Personalization > Start . From here, you can prevent it from showing recently added apps or suggested content (which is basically advertising). You can go into the Folders section to pin useful shortcuts, like File Explorer or Downloads, right below the power button.
Now for the Taskbar. open Settings > Personalization > Taskbar and start toggling those toggles. You can hide things like the search box, the Chat icon, and even Copilot. For a more hands-on setup, scroll down to Taskbar behaviors and choose to ungroup taskbar buttons. This makes each window appear separately on the Taskbar, like in older versions of Windows.
4. Remove Ads on Lock Screen Permanently
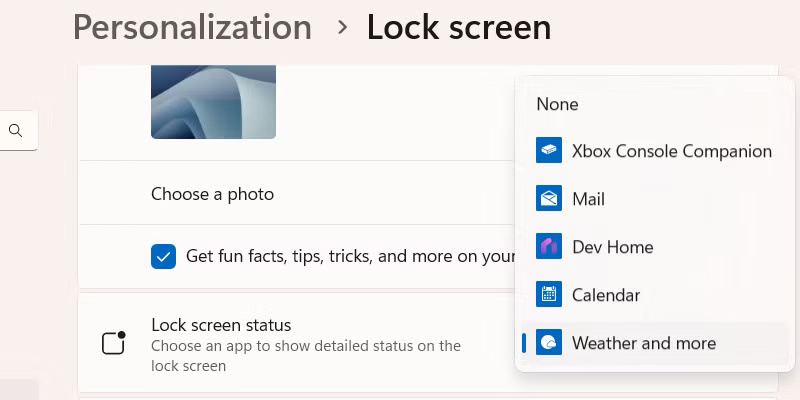
There's nothing more annoying than turning on your computer, only to be greeted by an ad for a Microsoft product you didn't ask for. Windows 11 has a habit of sneaking "suggestions" and promotions onto the lock screen, dressing them up as helpful tips or pretty images. But in reality, they're just ads.
Getting rid of these lock screen ads is pretty easy. Just open Settings > Personalization > Lock screen , tap Personalize your lock screen menu and select Picture or Slideshow . Then, uncheck the Get fun facts, tips, tricks, and more on your lock screen box.
3. Disable Widgets Panel You Never Use
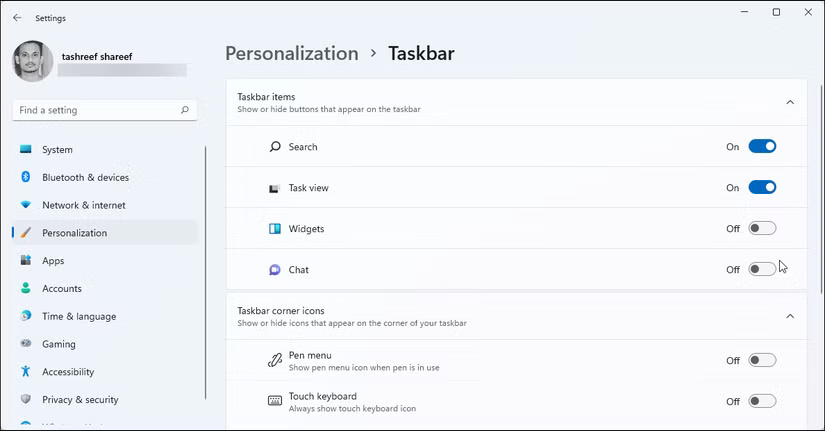
Windows 11 has a built-in Widgets panel that slides out from the left side of the screen. It shows information like weather, news, traffic updates, stocks, and sports scores. If you get tired of accidentally activating the Widgets panel or seeing news headlines you didn't ask for, you can hide it. Right-choose the Taskbar and select Taskbar settings. Then, find the Widgets toggle and turn it off.
2. Remove Web Results and Featured Items from Search
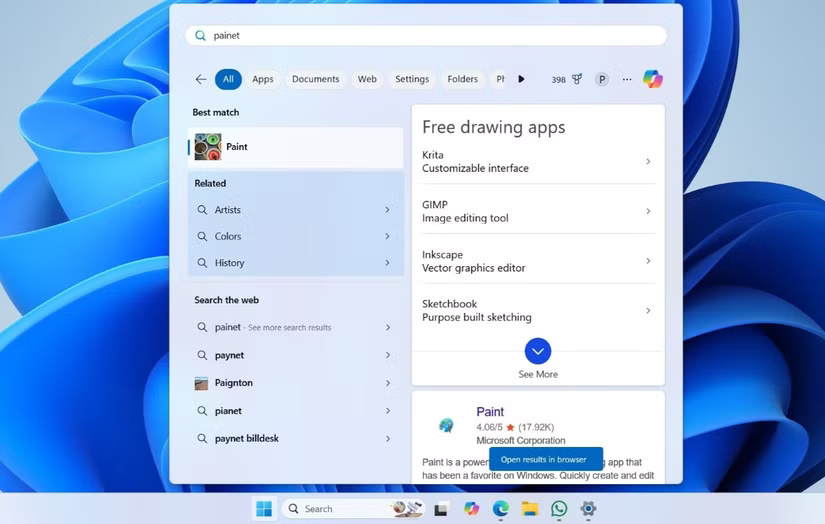
Windows 11's search bar is something you probably use every day to launch apps, locate files, or search through settings. But here's the thing: Instead of just showing you what's on your PC, it also likes to include web results. So when you accidentally type 'word' as 'wrd' or 'paint' as 'painet,' it'll try to help out and open a Bing search in Edge.
Worse still, Microsoft does not provide a simple toggle to turn this feature off. Still, if you're comfortable editing the Windows Registry, you can disable Bing search in Windows 11. Otherwise, you can use a third-party tool like Winaero Tweaker to do the same thing.
1. Restore Classic Right - choose Menu
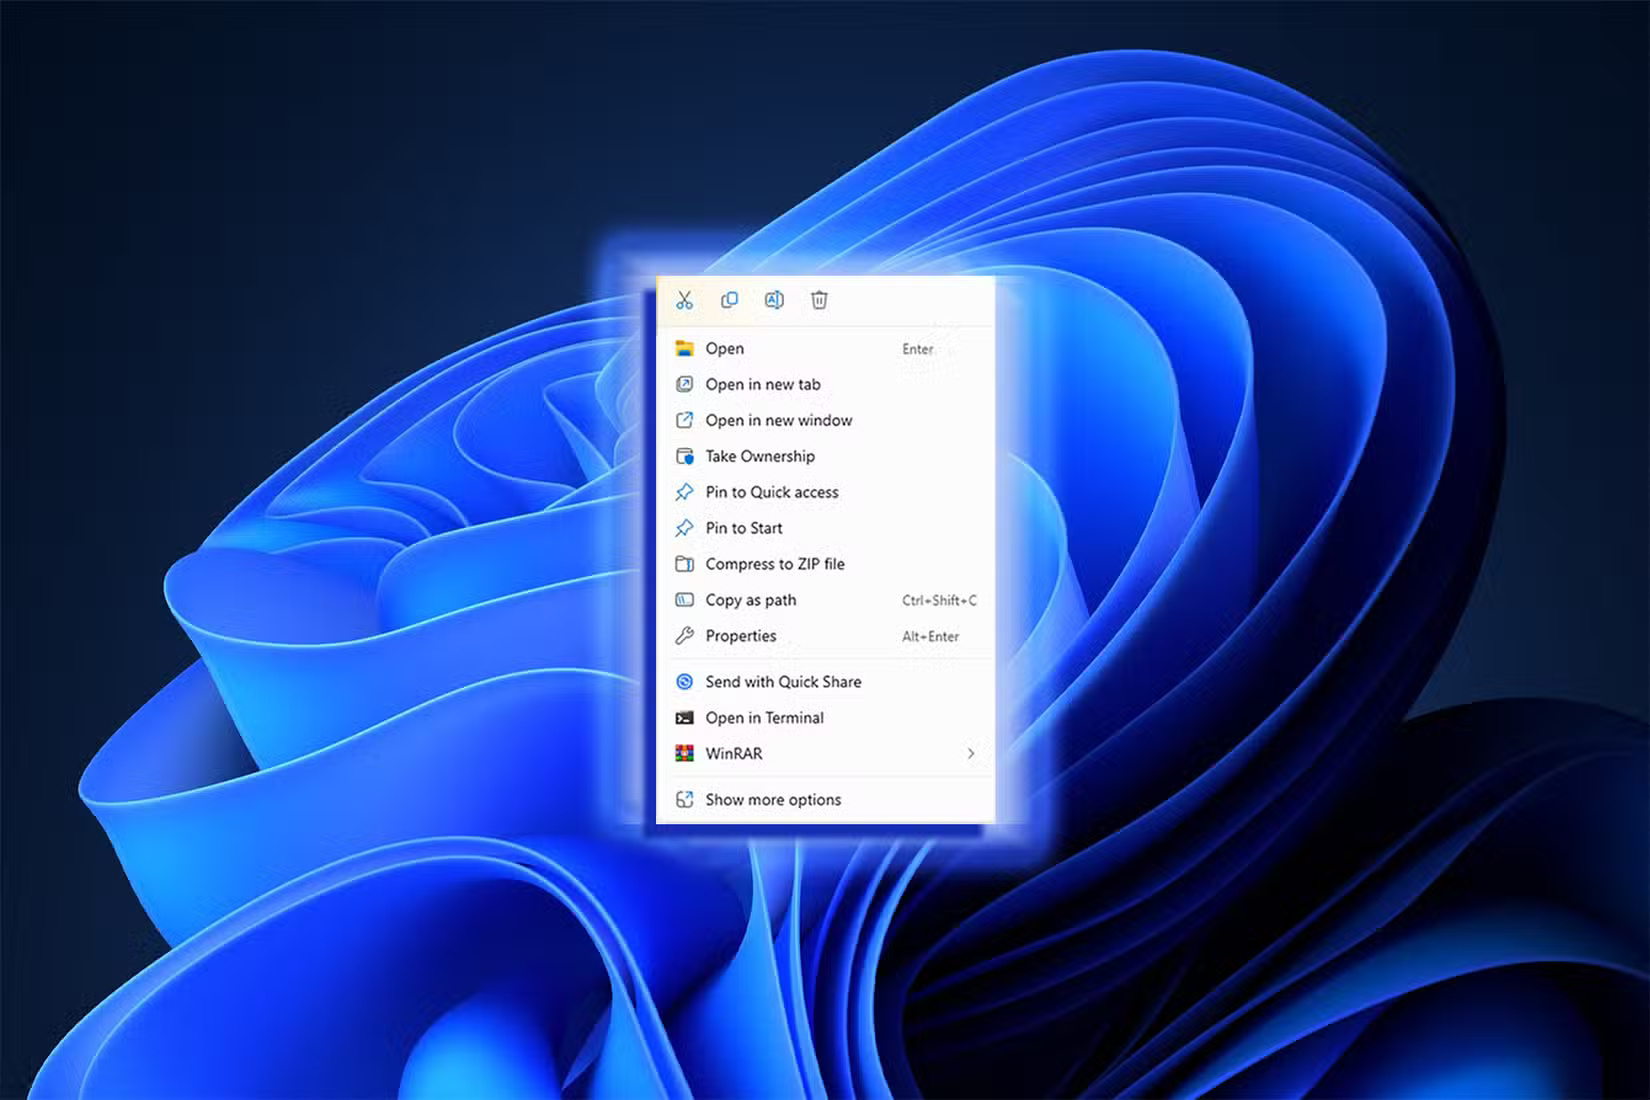
With Windows 11, Microsoft tried to clean up the right-choose menu by hiding a bunch of options behind a "Show more options" button. But it also added an unnecessary choose every time you wanted to access familiar options or integrate third-party apps.
If this drives you crazy, you can restore the classic right-choose menu. Again, this requires you to modify the registry file. Before you do this, ensure to create a restore point, just in case. It only takes a minute and can save you many trouble if something goes wrong.
FAQ
How were the most annoying features of windows 11 options evaluated?
The comparison focuses on practical features, ease of use, limitations, compatibility, and the type of user each option is most likely to help.
Which option is best for beginners?
Beginners should prioritize a clear interface, useful documentation, reliable support, and the core features needed for their first project.
Should I choose a free or paid option?
Start with a free option when it covers your needs. A paid plan may be worthwhile when you need advanced tools, commercial rights, collaboration, or professional support.
Related Articles
 Turn Off These Annoying Features Immediately on iOS 107 minutes read
 15 Most Annoying Features in Windows5 minutes read
 6 Annoying Google Photos Features You Should Turn Off5 minutes read
 5 ''annoying'' Features You Can Turn Off on Samsung Phones5 minutes read
 30+ Most Annoying and Annoying Things in the World6 minutes read
 How to Get Rid of 10 Annoying Things on Windows 105 minutes read
Reader Comments 0
Sign in with email or Google to join the discussion.