6 fastest and most accurate ways to check your video card
All computers have graphics hardware that handles everything from video decoding to rendering PC games. Most modern computers have graphics processing units (GPUs) made by Intel, NVIDIA, or AMD.
Although a computer's CPU and RAM are also important, the GPU is the most important component when playing PC games. Without a powerful enough GPU, you can't play new PC games or have to play them with lower graphics settings. Some computers have low-power integrated and dedicated graphics, while others have powerful discrete graphics cards (sometimes called video cards). Here's how to review graphics hardware on a Windows computer.
Why is it necessary to learn information about GPU?
The best thing with Windows is that you can choose almost every component of your computer. When it's time to upgrade something important like the GPU, it's important to know the exact GPU brand name and model number. Although there are only two GPU brands, Nvidia & AMD, knowing the exact brand and model number allows you to choose compatible products.
Not only that, some features are exclusive to certain types of GPUs. Finding GPU information is also important to install compatible drivers and other necessary software.
How to check the video card using Task Manager DirectX Diagnostic Tool
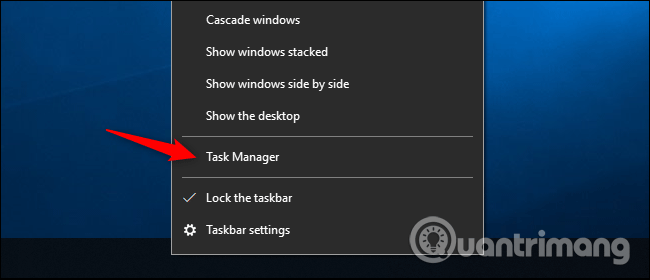
On Windows 10, you can check GPU information right in Task Manager by right-clicking on the taskbar, selecting Task Manager or pressing Windows+ Escto open it.
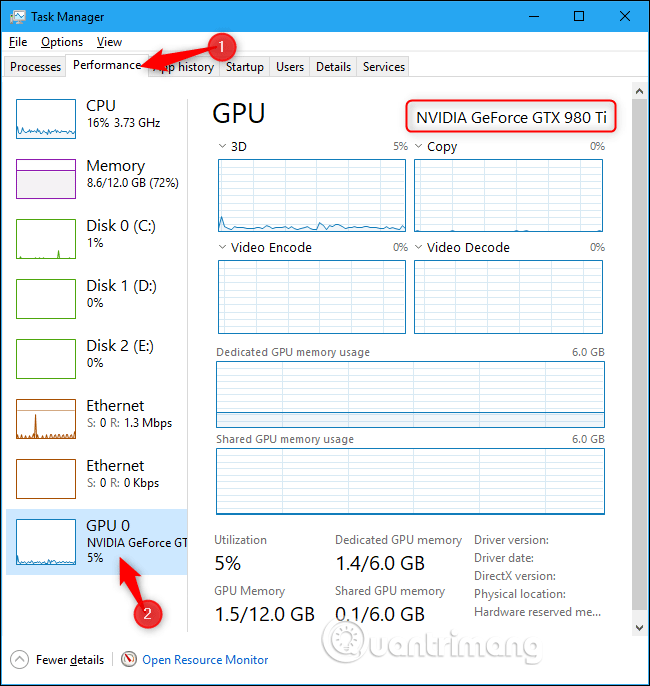
Click the Performance tab at the top of the window (if you don't see this tab, click More Info ), select GPU 0 in the sidebar. You will see the GPU manufacturer name and model name displayed in the top right corner of the window.
You also see other information such as GPU memory capacity and GPU usage by each application. If your system has multiple GPUs, you will see GPUs numbered 1, 2, etc. Each of these numbers represents a different physical GPU.
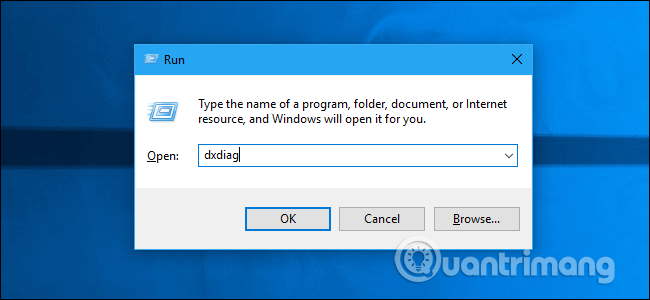
On older versions of Windows, such as Windows 7, you can find this information in the DirectX Diagnostic Tool. To open it, press Windows+ R, type dxdiag in the Run dialog box that appears, and press Enter.
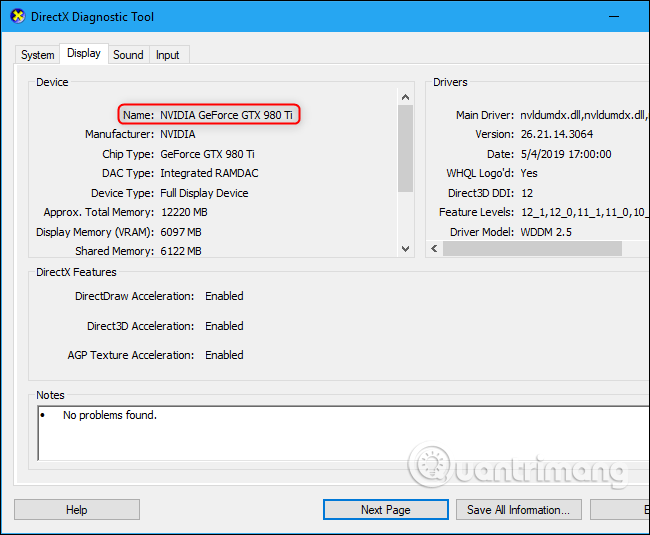
Click on the Display tab and look at the Name field in the Device section . You also see other information here like the amount of video memory (VRAM) built into the GPU.
If there are multiple GPUs in the system, for example on a laptop with a low-power Intel GPU used for battery and a high-power NVIDIA GPU used for gaming, you can control which application uses which GPU in Windows Settings . 10. These controls are integrated in the NVIDIA Control Panel.
Check the video card using Device Manager
1. Type Device manager in the search box in the lower left corner of the screen and click the icon to open.
2. Find Display adapters in the list and click the arrow next to it to expand the list.
3. Your GPU name is listed there.
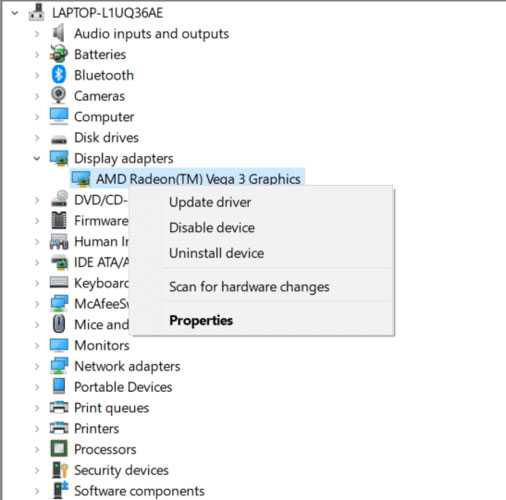
You can see that the computer in the example has an AMD Radeon Vega 3.
If you're not sure which company manufactured your chip, right-click the device name and select Properties. In the window that opens, you will see the manufacturer listed there.
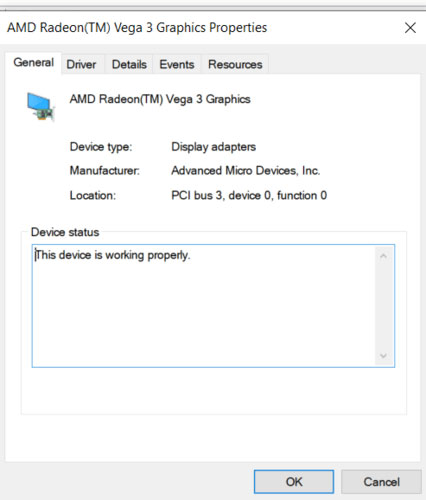
Check the video card via System Info
Information about the GPU is also available in the System Info tool. In fact, the System Info tool provides a large amount of information about your computer. Whenever you want to know something about your computer, this is the tool you should open.
1. Open the Run box with the Windows + R key combination .
2. Enter msinfo32 in the blank field and click OK.
3. In the System Info window , select System Summary on the left panel.
4. You will see the CPU model number and name next to Processor on the right panel.
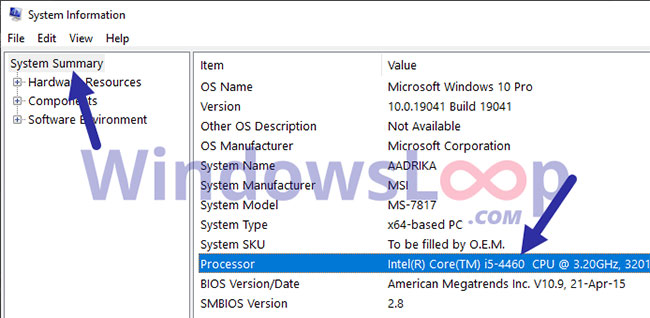
5. Next, expand the Components tree and select Display on the left panel.
6. The GPU name and model number will be next to the Name section on the right panel.
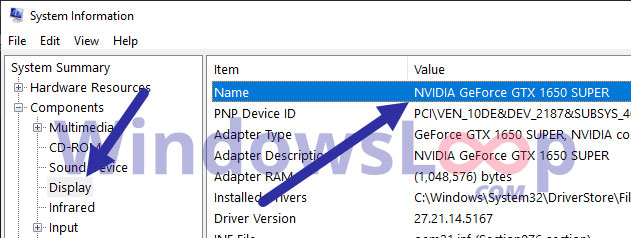
Once you have the necessary details, you can close the System Info tool.
Use graphics card testing software
If you want to know the exact model of your graphics card, you can use a third-party application like CPU-Z to find that information.
To use CPU-Z:
1. Download CPU-Z.
2. Open the file you just downloaded
3. Accept the agreement and complete the program installation.
4. Start the program.
5. Click the Graphics tab to learn more about your graphics card.
GPU-Z from TechPowerUp is another small and simple application that allows you to quickly identify your graphics card in Windows 10.
No installation required. Just download the application and double-click the .exe file to run it. The tool will immediately display information about your graphics card.
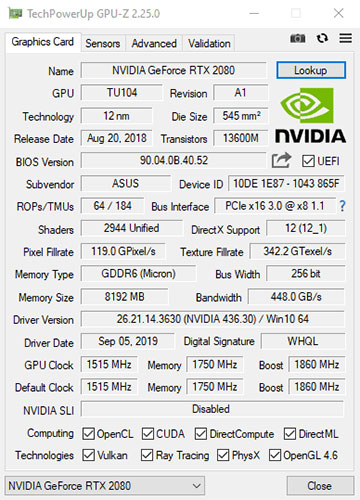
Once you've found the information you need about your graphics card, you can Google its name to learn more and see if it's powerful enough to use in your situation.
Use TechPowerUp GPU-Z to check the graphics card
First, download TechPowerUp GPU-Z. This is a free app that is very good at determining the exact name and model number of a video card. When you run TechPowerUp GPU-Z, a UAC prompt will display and you need to press Yes. Here you can choose to install the TechPowerUp GPU-Z application (if you press Yes ) or you can run the standalone version. For example, select No or Not now to be able to run the standalone version without installing anything.
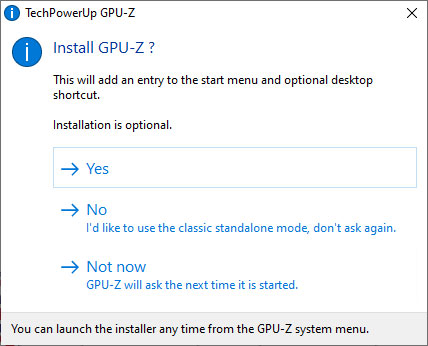
The TechPowerUp GPU-Z application will scan your system and display information about your graphics card. You see the name of your GPU, the technology used to manufacture it, the card's BIOS version, memory, clock speed, etc. However, regarding the name of the graphics card, you will still only see the information generic that Windows displays. To find the exact model name of your video card, click the Lookup button at the top right.
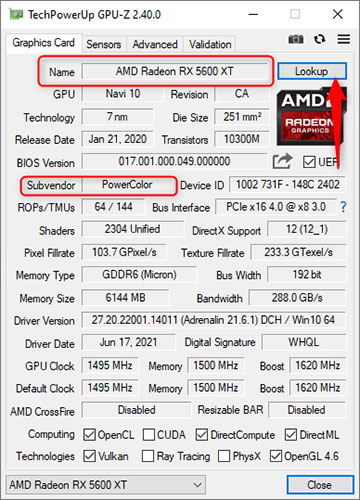
The default web browser will open and load the TechPowerUp website, where you are shown the exact model name of the graphics card, along with an image of the device and detailed information about its specifications.
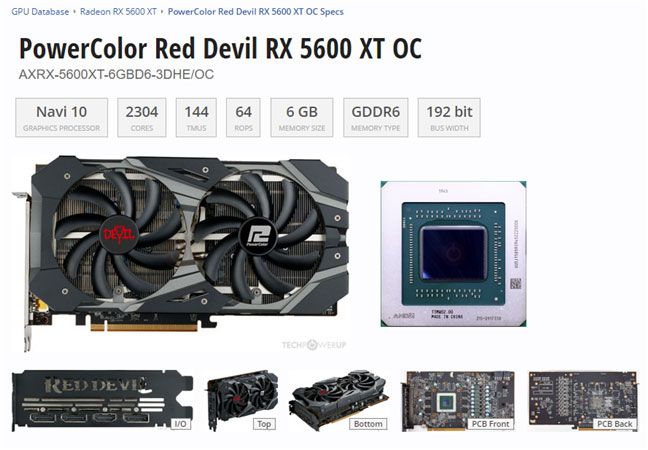
For example, the exact graphics card found inside the example gaming PC is the PowerColor Radeon RX 5600 XT Red Devil. This is the type of information looking for.
How to use HWiNFO to check the video card
First, download HWiNFO and choose between the installer or portable version of the application. Depending on the selected version, you can download an executable file or an archive file. If you downloaded the archive, extract it somewhere on your computer and then run the HWiNFO executable.
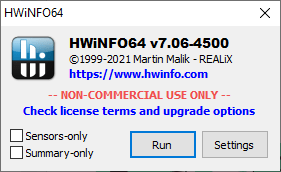
Next, a UAC prompt is displayed and you need to press Yes. Next, you'll see a welcome screen to choose whether you want to see the sensors inside your PC and the information they provide, just a summary, or run the entire application. To find the information you need, select 'Summary-only' and press Run, or press Run without selecting any options.
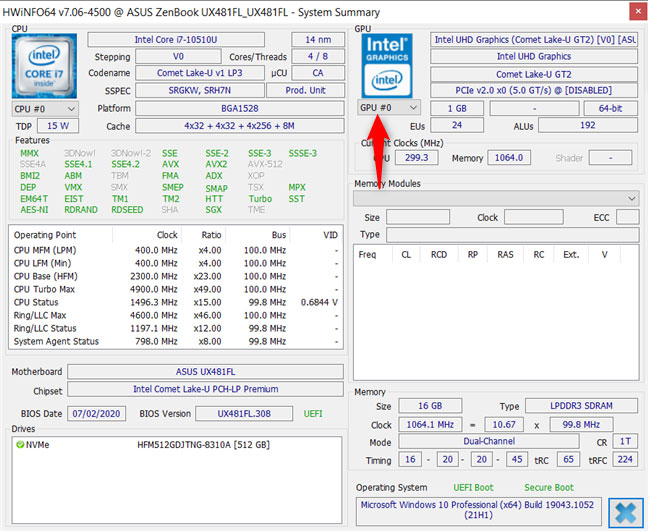
HWiNFO displays a summary of CPU and GPU information. The exact name of the graphics card is found in the GPU section on the right. For example, the information found said there was an Intel UHD graphics card on the test laptop, which is correct. However, there are two video cards, so there's a small drop-down box below the main GPU's logo. If you click or tap on it and select GPU #1 , we will get information about the second graphics card.
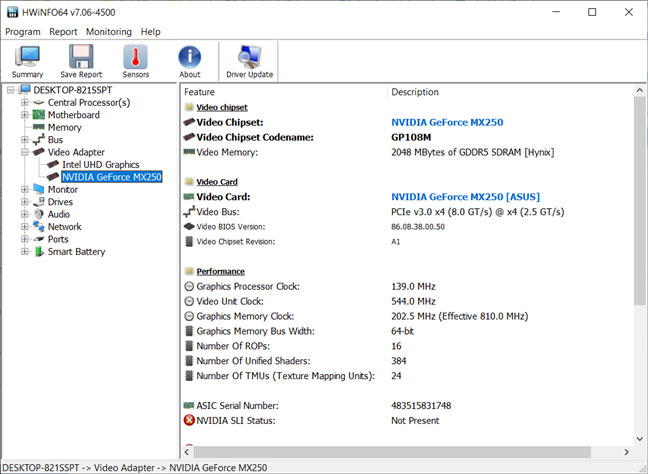
If you do not select 'Summary-only' , HWiNFO also displays another window with detailed information about the hardware inside the Windows computer. For example, to learn more about graphics cards, double-click Video Adapter and then click the graphics card name. Now, you can see complete information about the graphics card, including exact model name, manufacturer, memory, etc.
Wishing you success!
 How to improve the sound quality of your speakers
 The 5 best SSDs for Steam Deck
 The 5 best iPad accessories of 2024
 The first laptop models use the Snapdragon X Elite chip
 History of computers: Overview of the formation and development of computers
 Website Test Keyboard computer keyboard online, free