5 Wrong Settings on Smart TV That Need to Be Adjusted
As soon as you open the Smart TV box and start setting it up, you'll be faced with a confusing array of menus, prompts, pop-ups, and default settings.
Table of Contents
As soon as you open your Smart TV box and start setting it up, you'll be faced with a confusing array of menus, prompts, pop-ups, and default settings. While you may be tempted to clear these menus, take a moment to check what they're asking for – they can make a big difference to your Smart TV experience.
5. You're letting your Smart TV track you
Most Smart TVs are set up to collect as much data as possible as soon as they connect to Wi-Fi . They track what you watch, when you watch it, and sometimes even what devices you connect to. That information is aggregated and sent to advertisers, content providers, or whoever else is buying the data behind the scenes. It's easy to miss the extent to which this is happening unless you dig into the settings yourself.
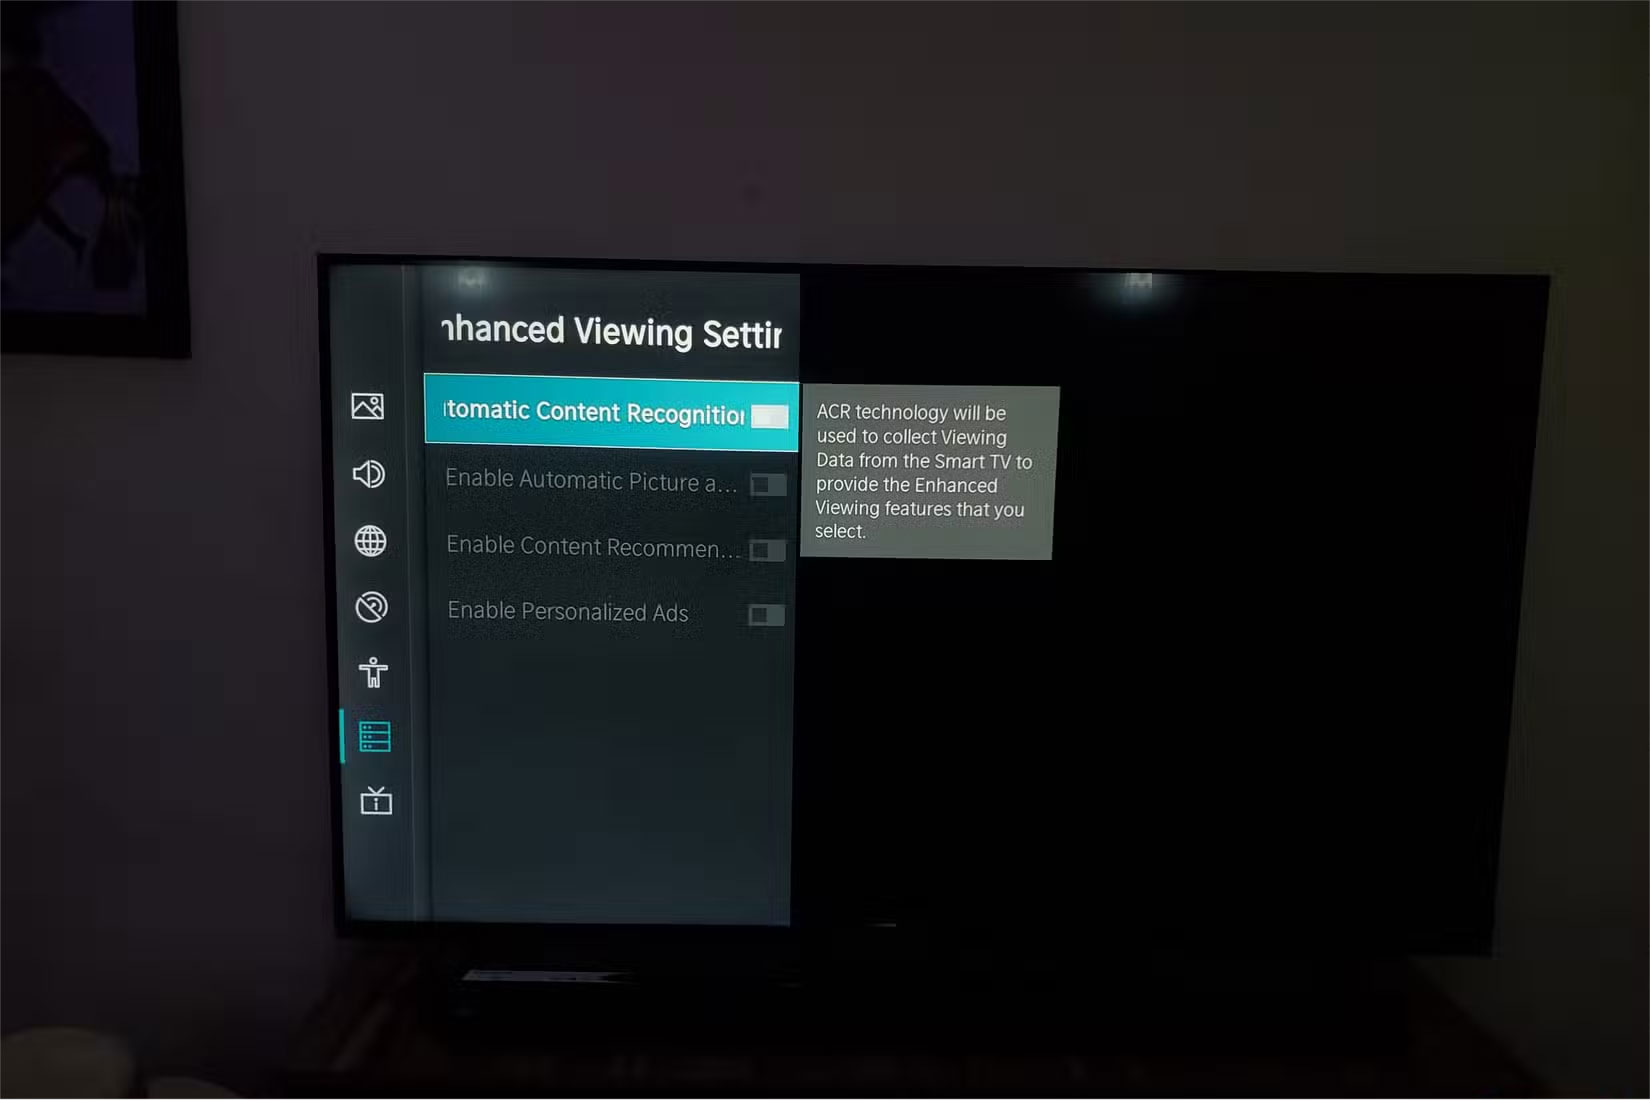
So first, start by turning off ACR , or Automatic Content Recognition . This feature scans the shows and movies you watch, even through HDMI devices like game consoles or streaming boxes, and sends that data out. Depending on your TV brand, you can usually find this feature under Privacy , Enhanced Viewing Settings , or something similarly obscure. You should also turn off anything related to Automatic Picture and Audio Quality , Content Recommendation , Personalized Ads , or Sports Mode Auto Detection .
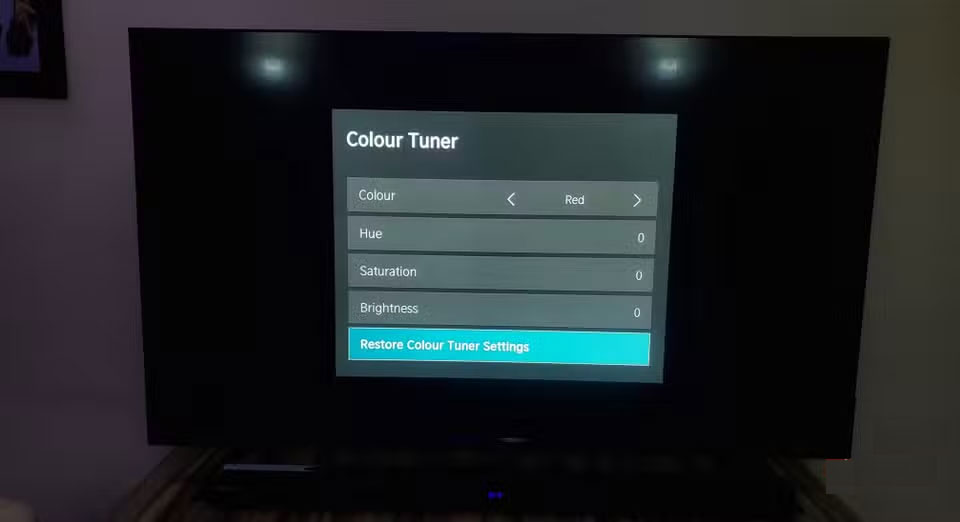
4. Image settings need attention
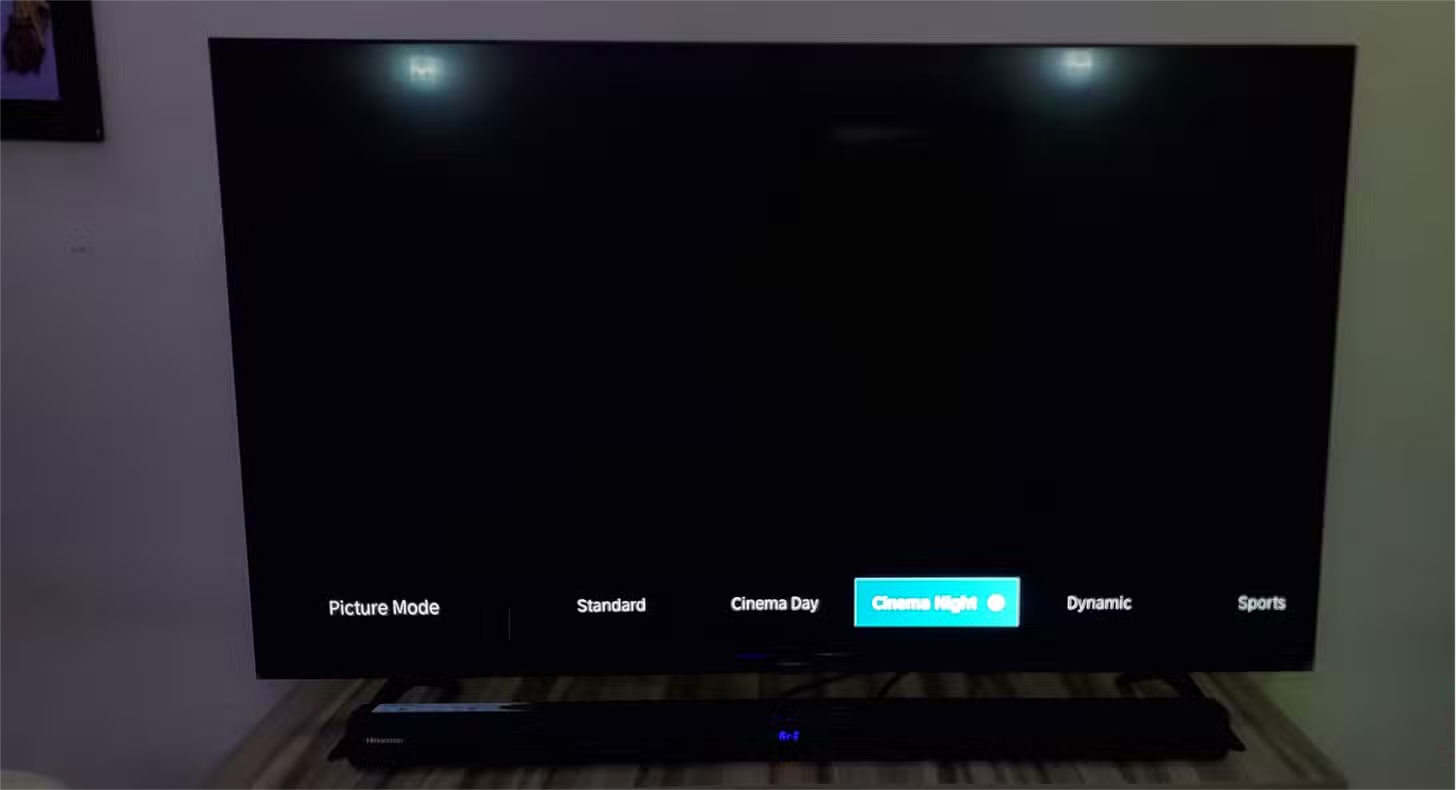
The most drastic change you can make here is to switch the picture mode from whatever default setting the TV came with (probably Standard ) to a more cinema-friendly mode.
To fix this, you'll want to dig deeper into your TV's picture settings and make a few meaningful changes:
- Switch to the appropriate Picture Mode : Select Cinema , Movie , or Filmmaker Mode , depending on your TV's terminology. These modes will reduce the exaggerated processing of the default mode and bring you closer to the director's intention.
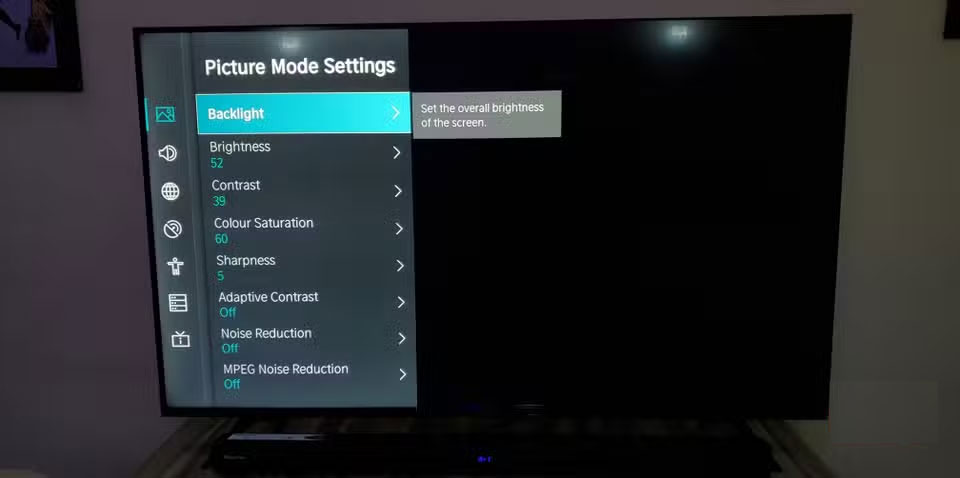
- Adjust Brightness, Contrast, and Backlight Individually : Adjust the Brightness setting to control the visibility of details in dark areas (if it's too low, shadows can appear as indistinct black patches, so increasing it slightly can reveal more of the shadows). Contrast adjusts the brightness of the brightest parts of the image, so increasing the contrast can help maintain sharpness in highlights so bright scenes don't look washed out.
- Set Sharpness lower : High sharpness settings do not improve image clarity because they add artificial edges. Typically, you should reduce it to near zero to preserve fine details without distortion.
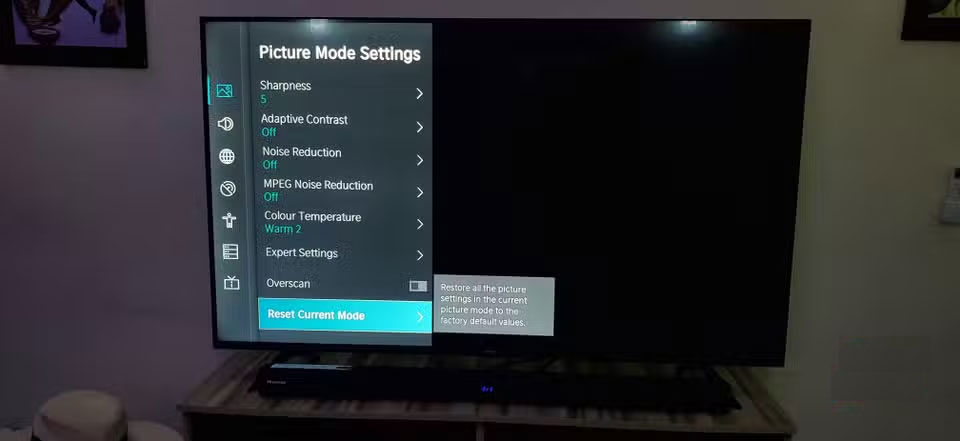
- Color and Tint : When adjusting color and tint settings, it's best to start with the color temperature. Choose Warm to avoid whites that are too blue. Next, tweak the tint or hue so that skin tones look natural, not too red or green. Typically, keeping the slider somewhere around the middle (0) will do the trick.
- Remove 'enhancements' : Turn off Motion Smoothing , Dynamic Contrast , Noise Reduction , Intelligent/Smart Scene , and any features called Eco or Adaptive . They often do more harm than good by trying to override what you're watching.
Most importantly, understand that no one setting is right for everyone. A dark movie night requires different adjustments than a sunny afternoon sports game. So adjust accordingly.
3. Sound settings do not bring out the full potential of the speakers
TipsMake.com has put together a comprehensive guide to getting the best sound from your Smart TV before spending money on a soundbar . First and foremost, you should switch your audio output to PCM instead of Bitstream if you're using your TV's built-in speakers or a basic soundbar. That way, your TV handles the audio processing directly, which often produces cleaner results than letting external devices do the work. But if you have a dedicated home theater system, the opposite is true; use Bitstream to send uncompressed audio to your receiver.
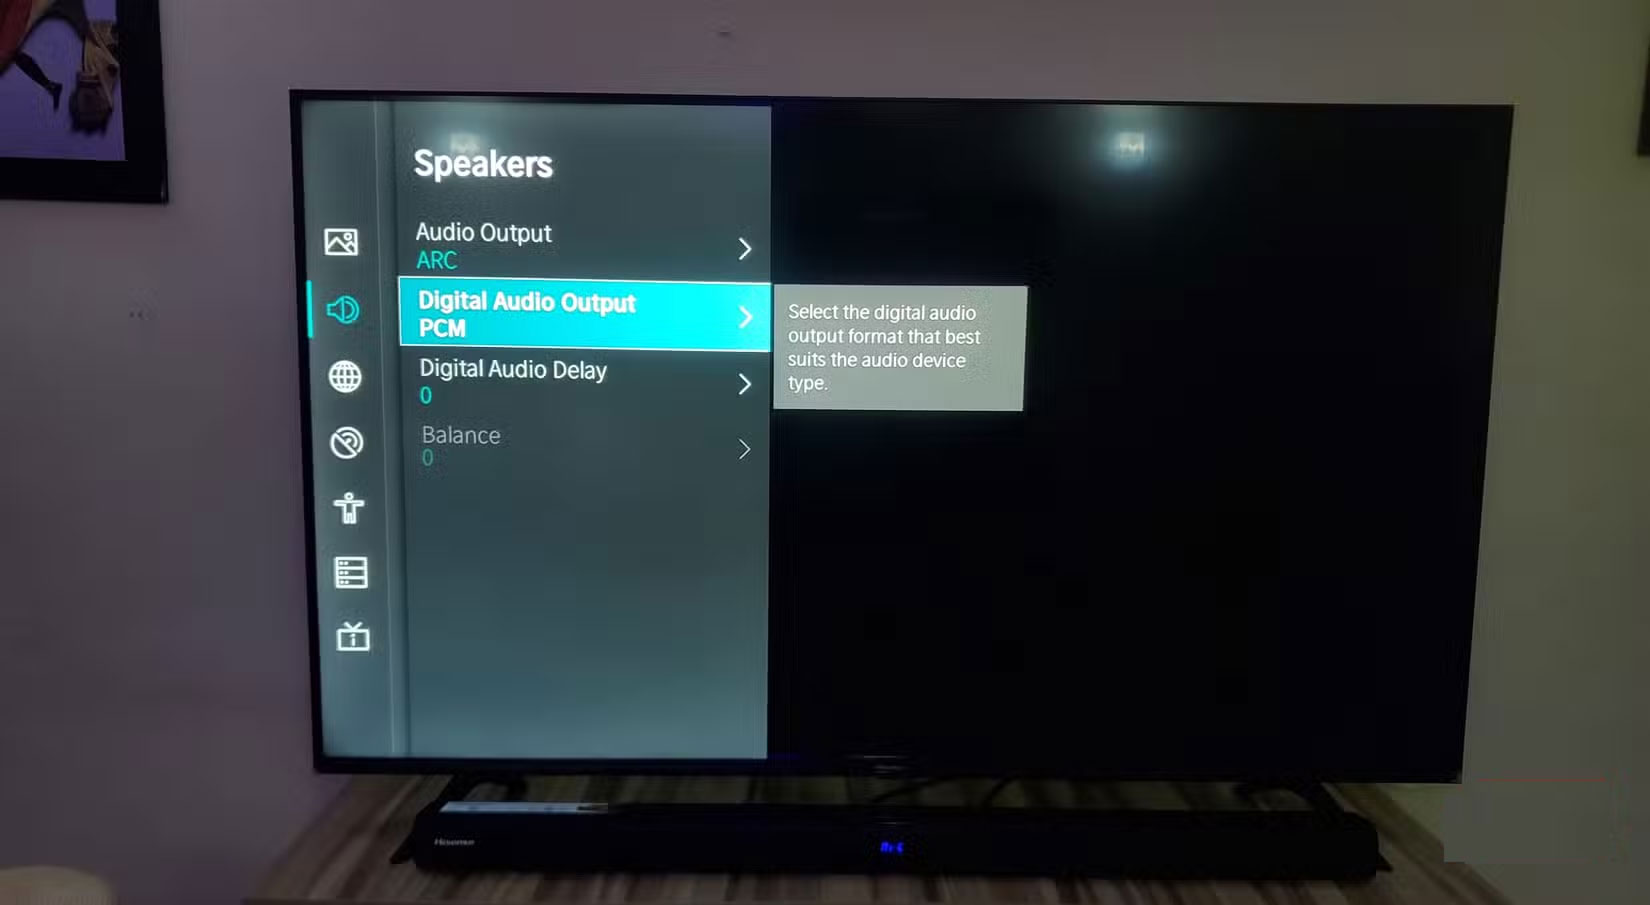
You should also disable virtual surround sound or 3D audio processing unless you're using a proper surround sound setup. These features attempt to simulate spatial sound through stereo speakers, but often make the sound worse.
2. TV is connected to the wrong network band
Smart TVs can support both 2.4GHz and 5GHz Wi-Fi bands. To confirm this, go into your TV's network settings and search for available Wi-Fi networks. If it lists both 2.4GHz and 5GHz networks separately (e.g. "DemiWiFi_2.4" and "DemiWiFi_5G") and you can connect to the 5GHz network, then your TV supports dual-band Wi-Fi.
The improvements that come with the 5GHz band are immediately noticeable with high-resolution content. 4K streams typically require 25 Mbps, and HDR content requires even more bandwidth. The 2.4GHz band, thankfully, is often congested, especially if it's juggling your neighbor's phones, laptops, and smart fridges. The move to 5GHz provides the space needed for consistent, high-quality streaming without annoying pauses that interrupt your viewing experience.
1. Enable automatic firmware updates

Most Smart TVs have automatic firmware updates enabled by default, and while this may seem convenient, it can cause some problems that you might not have considered. These updates often come at the worst possible times, interrupting your viewing experience with lengthy installation processes that can take 30 minutes or more. Your TV might suddenly reboot during a crucial scene or force you to wait through an update screen when you just want to relax.
Turning off automatic updates allows you to research each update before installing it. You can read user reviews, check forums for reported issues, and choose when to update based on your schedule rather than the manufacturer's timeline. Navigate to your TV's system settings, find Software Update , System Update , or similar options, and select whichever option suggests turning off automatic updates. You can set the system to notify you when an update is available instead.
Was this article helpful?
Your feedback helps us improve.
Related Articles
 Fix 'Something went wrong, Try to reopen Settings later' error on Windows 103 minutes read
 How to Change HDR Settings on Smart TV for Better Picture Quality6 minutes read
 How to Change DNS Settings on Smart TV5 minutes read
 Change these 5 settings to make your Smart TV more private instantly!5 minutes read
 Settings to tweak for better gaming on Smart TV6 minutes read
 Change these 4 settings to increase your Smart TV's performance4 minutes read
Reader Comments 0
Sign in with email or Google to join the discussion.