Table of Contents
Hiren’s BootCD PE is a bootable Windows recovery environment, not the discontinued DOS/Windows utility collection commonly called the original Hiren’s BootCD. The current official release listed by the project is Hiren’s BootCD PE x64 v1.0.8, based on Windows 11 PE x64, with support for UEFI-era computers and a stated minimum of 4GB RAM.
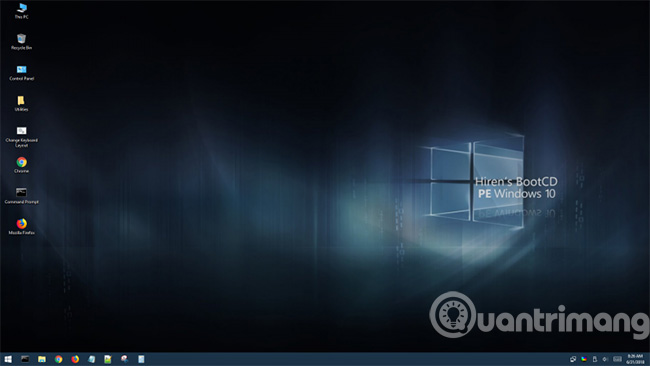
What Hiren’s BootCD PE is for
Booting from the USB starts a temporary Windows PE session without relying on the installed copy of Windows. This makes it useful for:
- copying files from a Windows installation that will not start;
- checking drive health and file systems;
- recovering deleted files or lost partitions;
- imaging or cloning storage before repair;
- editing boot configuration and diagnosing startup problems;
- running hardware-information and network utilities;
- scanning an offline Windows installation for malware.
It is not a general-purpose operating system and it does not automatically repair a PC. Several included tools can erase partitions, overwrite data, reset local credentials, or change boot records. Use them only on systems you own or administer and only after identifying the correct disk.
How it differs from the original Hiren’s BootCD
| Original Hiren’s BootCD | Hiren’s BootCD PE |
|---|---|
| Official updates stopped in November 2012 | Fan-maintained restored edition |
| Built around older DOS and mini-Windows environments | Based on 64-bit Windows 11 PE |
| Designed for legacy PC hardware | Designed for modern UEFI-capable systems |
| Old releases included licensing concerns | Project states the PE image contains free or legally usable tools, including limited trial editions where noted |
What is included in version 1.0.8
The official image groups tools by task. Notable examples include:
- Partitions and boot: BootIce, EasyBCD, AOMEI Partition Assistant, DiskGenius, EaseUS Partition Master, and Macrorit tools.
- Data recovery: Recuva, PhotoRec, TestDisk, DMDE, ReclaiMe, Puran recovery tools, and Unstoppable Copier.
- Disk health: CrystalDiskInfo, GSmartControl, HDDScan, HD Tune, and Victoria.
- Imaging and restore: AOMEI Backupper, Macrium Reflect PE, Drive Snapshot, DriveImage XML, and restoration-only or limited trial tools noted by the project.
- Security: ESET Online Scanner, McAfee Stinger, VeraCrypt, and secure-erasure tools.
- System and network: Sysinternals Suite, PowerShell Core, HWiNFO, CPU-Z, GPU-Z, WinSCP, PuTTY, browsers, remote-support clients, text editors, and archive utilities.
Versions in the old article were from a much earlier build. Use the official download page for the current inventory and checksums. Tool inclusion and licensing can change between releases.
Download and verify the ISO
- Open the project’s official domain,
hirensbootcd.org, and download the current x64 ISO from its mirrors. - Compare the downloaded file’s SHA-256 hash with the value printed on the official download page.
- On Windows PowerShell, calculate it with:
Get-FileHash .HBCD_PE_x64.iso -Algorithm SHA256For v1.0.8, the official page lists a 3.06GB ISO and SHA-256 8c4c670c9c84d6c4b5a9c32e0aa5a55d8c23de851d259207d54679ea774c2498. If the site publishes a newer release, use that release’s hash instead.
Create the bootable USB with Rufus
This process erases the selected USB drive. Copy its files elsewhere and unplug other removable drives to reduce the risk of selecting the wrong device.
- Download Rufus from its official site or the link on Hiren’s USB Booting page.
- Insert the USB drive and open Rufus.
- Select the correct USB under Device.
- Follow the project’s current compatibility recommendation: enable Rufus Dual UEFI/BIOS mode with Alt + E before selecting the ISO, then choose the HBCD PE ISO.
- Select MBR as the partition scheme and FAT32 as the file system. For a USB of 32GB or larger, the project recommends Large FAT32; Rufus may expose it with Alt + L.
- Click Start, read the erase warning, and proceed only after verifying the device.
The project notes that Rufus versions 4.6 and later may show a revoked-UEFI-bootloader warning for this image and instructs users to acknowledge it. Because boot-security status can evolve, read the current official USB instructions at creation time.
About the older ISO2USB method
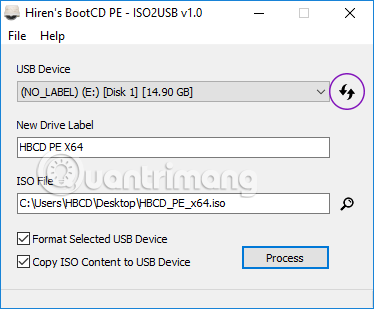
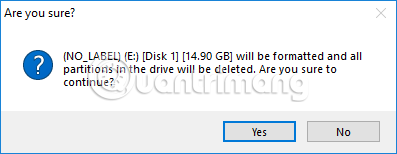
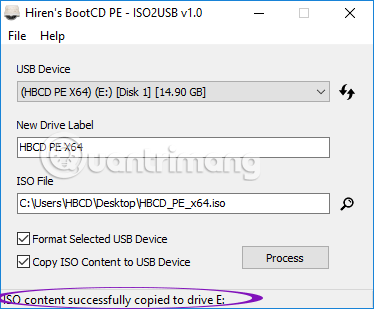
The original guide used the project’s ISO2USB utility. The screenshots below remain useful for recognizing that workflow, but the current official USB page recommends Rufus. In either tool, the selected USB is reformatted.
Boot and use the rescue environment
- Shut down the target PC and insert the USB.
- Open the firmware one-time boot menu and choose the USB’s UEFI entry when appropriate.
- Wait for Windows PE to load and detect hardware. Some Wi-Fi, storage, or network adapters may need additional drivers.
- Before a disk operation, confirm each drive by model, capacity, partitions, and contents.
- For a failing disk, image it to healthy storage before running repeated scans.
- Save recovered files and logs to a different physical drive.
TipsMake’s data-recovery guide explains the stop-writing rule, while the Windows installation and recovery section covers other boot-media methods.
Safety and limitations
- Do not download unofficial modified ISOs; you are booting them with extensive access to the computer.
- Disable Secure Boot only if the verified image and the PC require it, and restore the original setting afterward.
- Password-reset tools can cause loss of access to encrypted data and do not bypass online Microsoft-account authentication safely.
- A network connection in a rescue environment is convenient but increases exposure; connect only when needed.
- Back up BitLocker recovery keys. An offline environment cannot read a protected volume without authorization.
- Commercial tools in the image may be trial or restore-only editions; check their displayed license and functions.
Hiren’s BootCD PE is most valuable as a controlled recovery workspace. Its effectiveness depends on choosing the right tool, verifying the disk, and preserving the original data before making changes.
Related Articles
 Hiren's Bootcd PE: A Practical Guide8 minutes read
 How to Create a Multi-Purpose Hiren's BootCD USB for Computer Rescue4 minutes read
 How to Create Hiren's Bootcd PE Using ISO2USB9 minutes read
 How to Create USB Boot Using Hiren's Boot, Ghost Win 106 minutes read
 Instructions on How to Ghost Windows 7 Using USB6 minutes read
 How to Create a Hiren's BootCD Bootable USB Drive for Windows Rescue4 minutes read
Reader Comments 0
Sign in with email or Google to join the discussion.