How to enable G-Sync on Windows 11
On Windows 11 if your computer has an Nvidia graphics card you can enable G-Sync to solve screen tearing and any stuttering issues that may occur.
Table of Contents
On Windows 11, if your computer has an Nvidia graphics card, you can enable G-Sync to solve screen tearing and any stuttering issues that may occur. This helps gamers have a smoother, better gaming experience. The article below will guide you on how to enable G-Sync on Windows 11 .
How to enable G-Sync on Windows 11
You need to make sure your monitor is G-Sync compatible. Look for G-Sync, G-Sync Ultimate, or G-Sync Compatible on the monitor or its packaging. Nvidia also keeps an updated list of supported monitors.
You will then need to enable G-Sync on the monitor itself. Some monitors have a setting in the display menu that needs to be enabled before you can enable G-Sync on Windows 11. This setting may be Adaptive Sync or G-Sync. Once this feature is confirmed and enabled on your monitor, continue with the steps below.
Step 1:
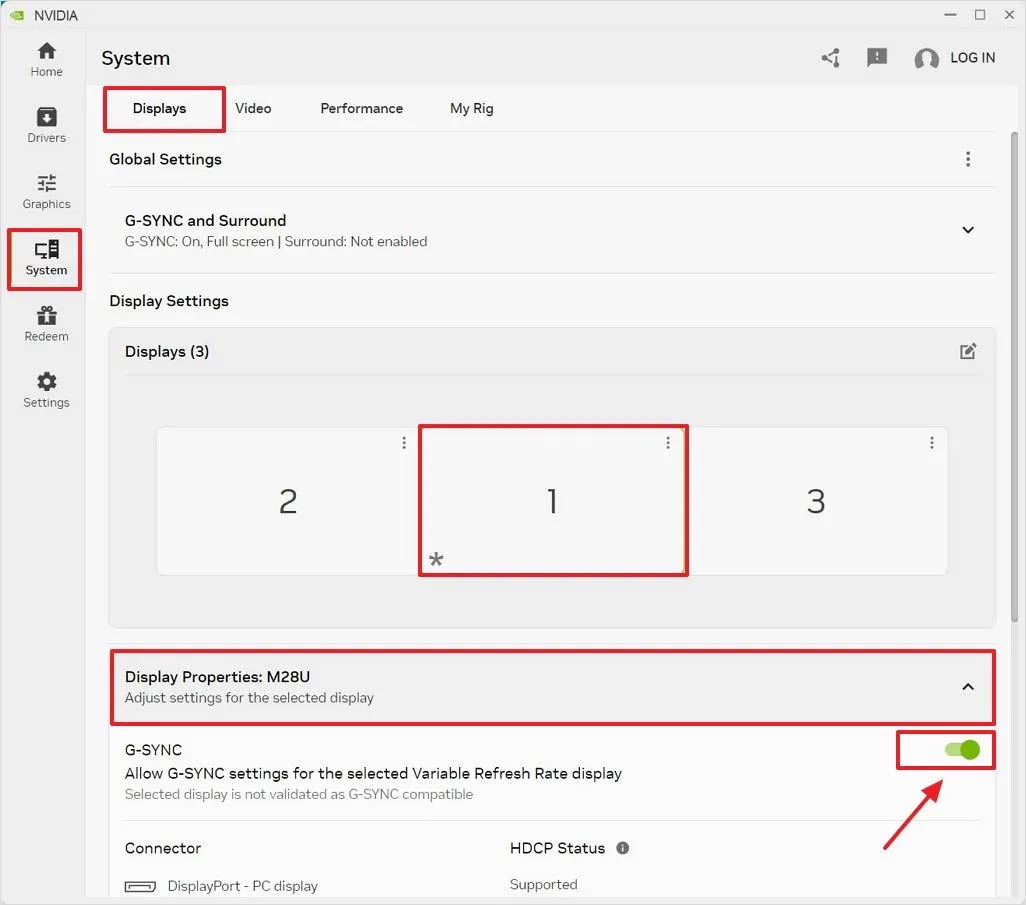
We open Start on Windows 11 then, search for Nvidia and click on the first result to open the application. You continue to click System then look to the side and click Displays.
Step 2:
We select the screen in Display and then click Display Properties to adjust the screen properties. Now you just need to turn on G-Sync.
Once you complete the steps, G-Sync will be enabled on your computer and this will also enable the Variable Refresh Rate feature available on Windows 11, under Settings > System > Display > Graphics > Advanced graphics settings
Was this article helpful?
Your feedback helps us improve.
Related Articles
 How to sync Windows 11 clipboard across multiple computers2 minutes read
 2 ways to enable / disable clipboard sync on Windows 103 minutes read
 How to enable / disable the sync feature works from PC to cloud in Windows 103 minutes read
 How to sync settings on Windows 102 minutes read
 Steps to enable Clipboard data synchronization feature on Windows 108 minutes read
 How to use Musical.ly - extreme lip sync application6 minutes read
Reader Comments 0
Sign in with email or Google to join the discussion.