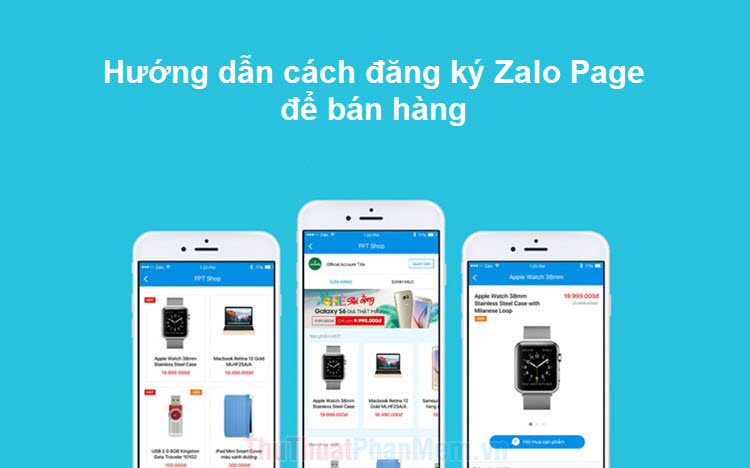
Instructions on how to register Zalo Page to sell
The current Zalo Page is still in Beta (experimental), but we can still register and sell it. In this article, Software Tips will guide you how to register Zalo Page to sell.
Table of Contents
The current Zalo Page is still in Beta (experimental), but we can still register and sell it. In this article, Software Tips will guide you how to register Zalo Page to sell.
1. How to register an account Zalo Page
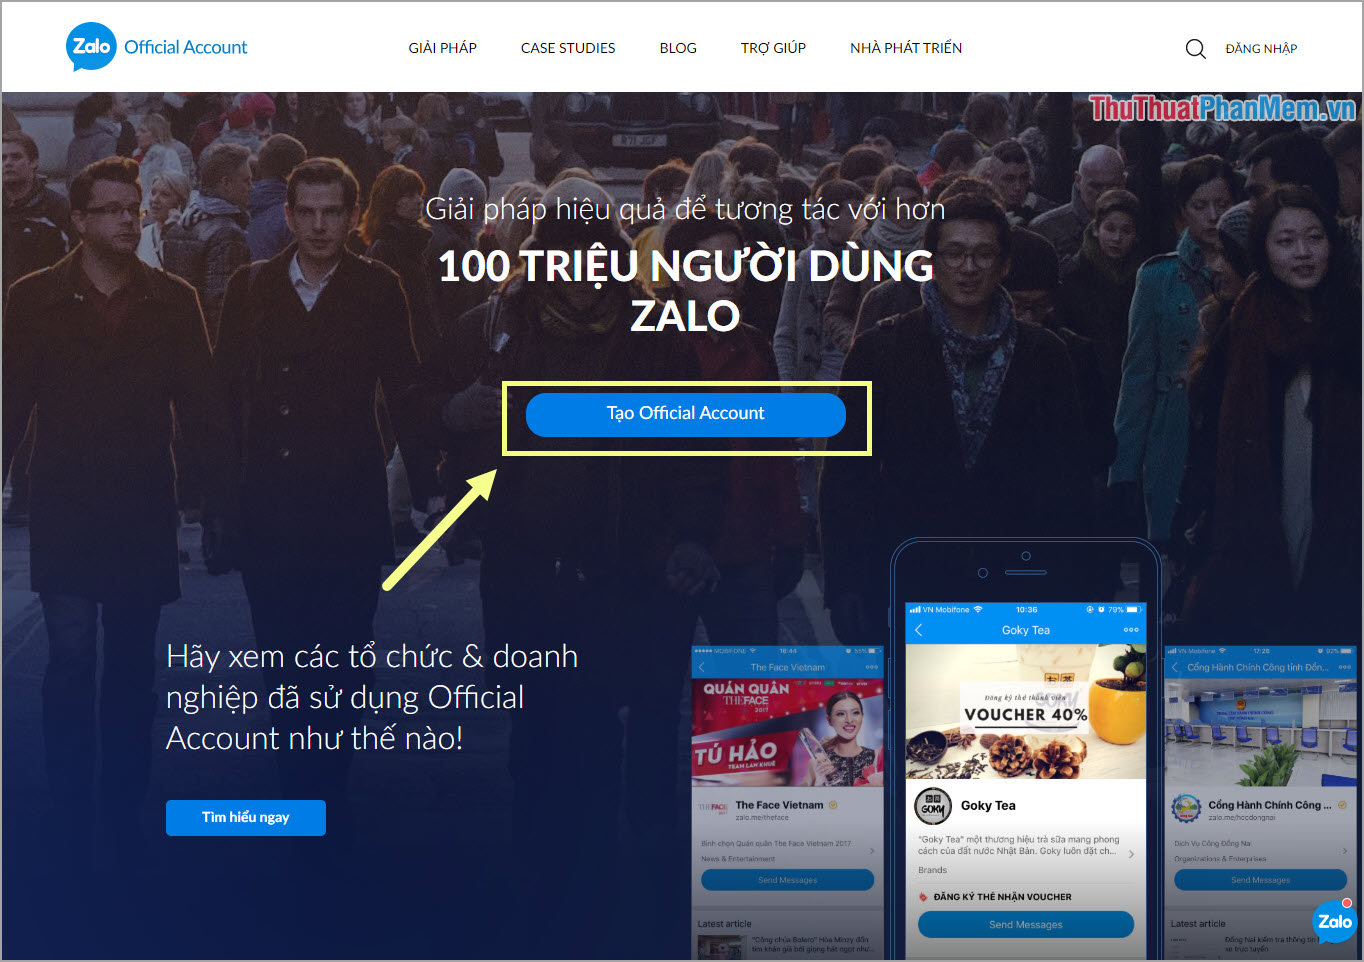
Step 1: You proceed to visit https://oa.zalo.me/ to register
Next, you select Create Official Account .
Step 2: If you do not have a Zalo account, please register. And you already have an account Zalo, please login directly always.

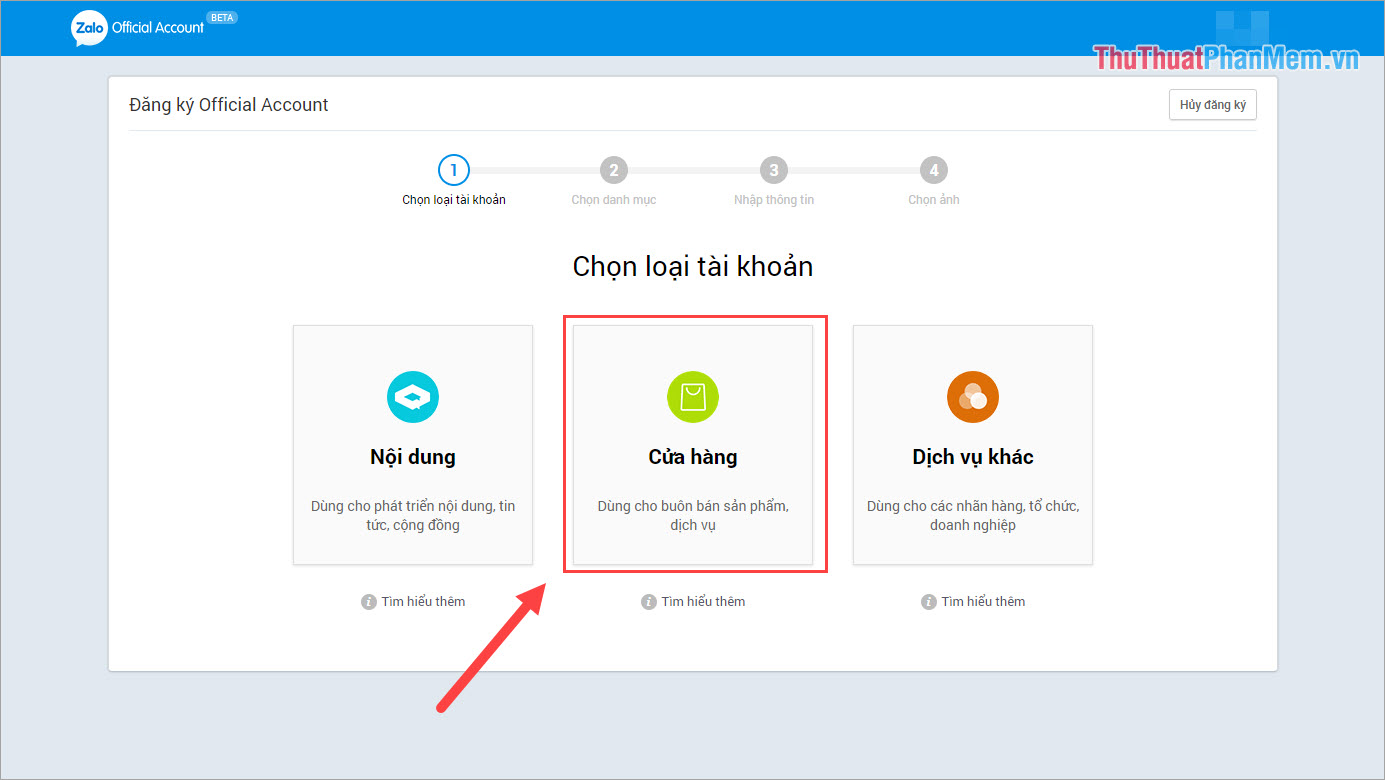
Step 3: Once you have logged in, you will be able to choose the type of content for your Page. Because we create Zalo Page sales, we will choose Store .
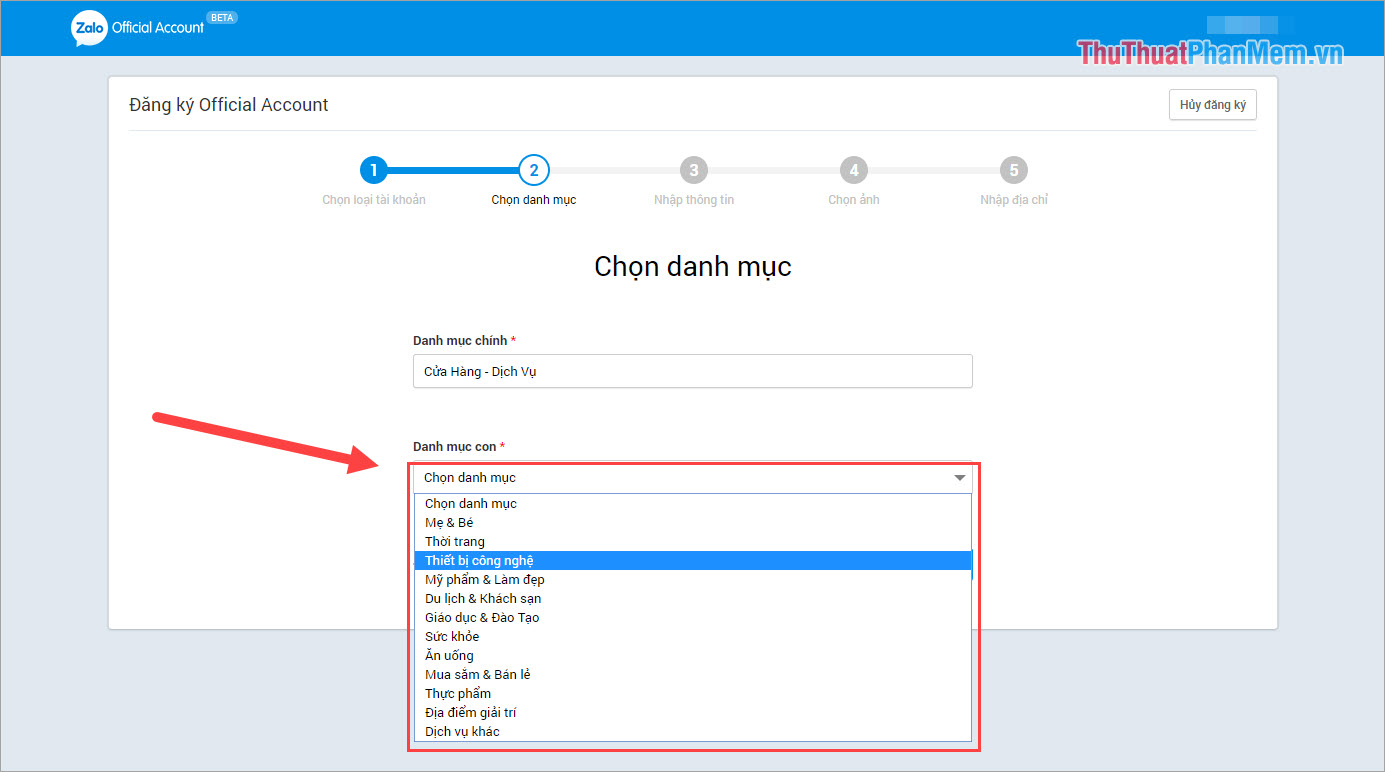
Step 4: In the Store - The service has a lot of subcategories, you need to choose a category that suits the products you sell to avoid being locked out of your account.
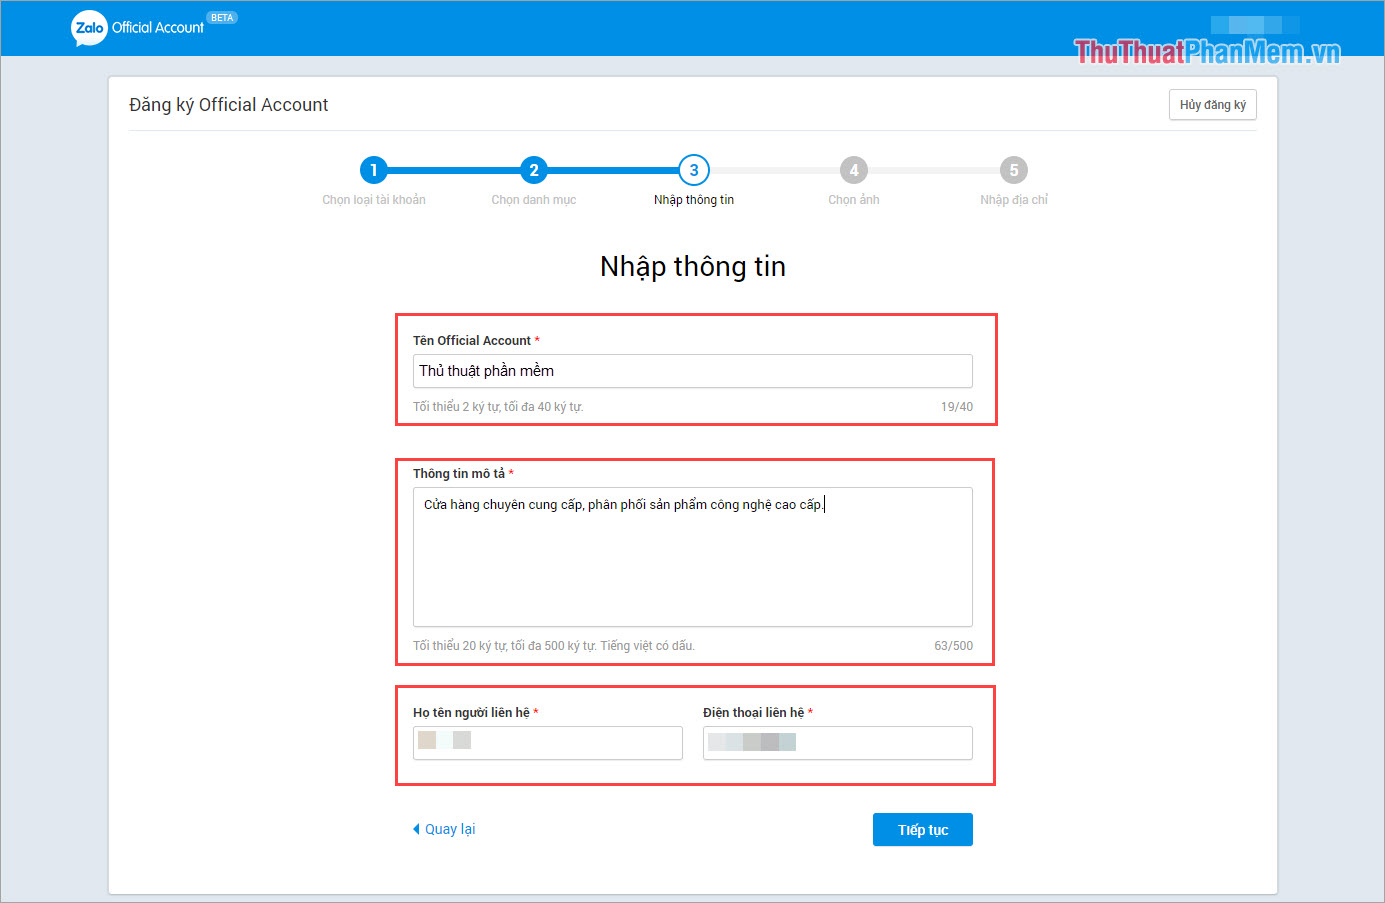
Step 5: Next, you enter the store name, description information, introduction and contact information . The contact information section is very important, it will help you solve the dispute later (if any) so please enter it carefully.
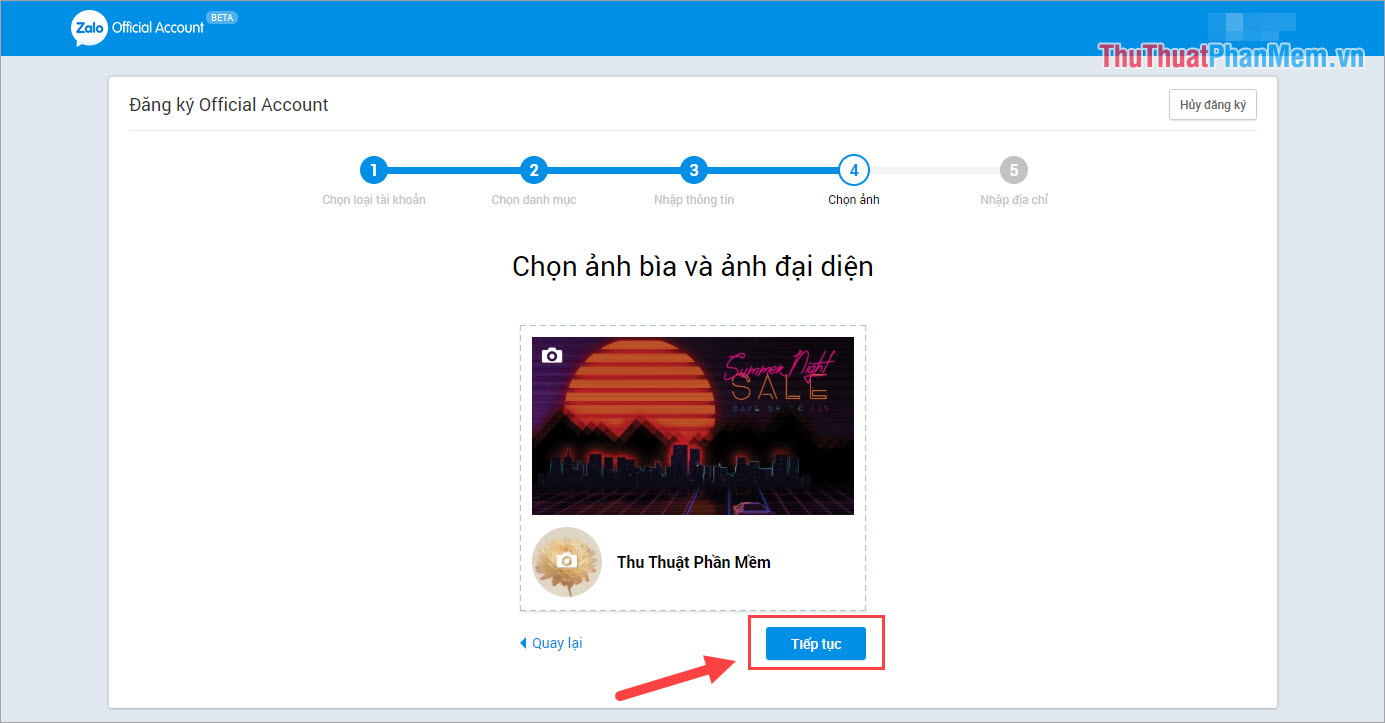
Step 6: Then, you proceed to add the avatar image and cover to make the page more lively.
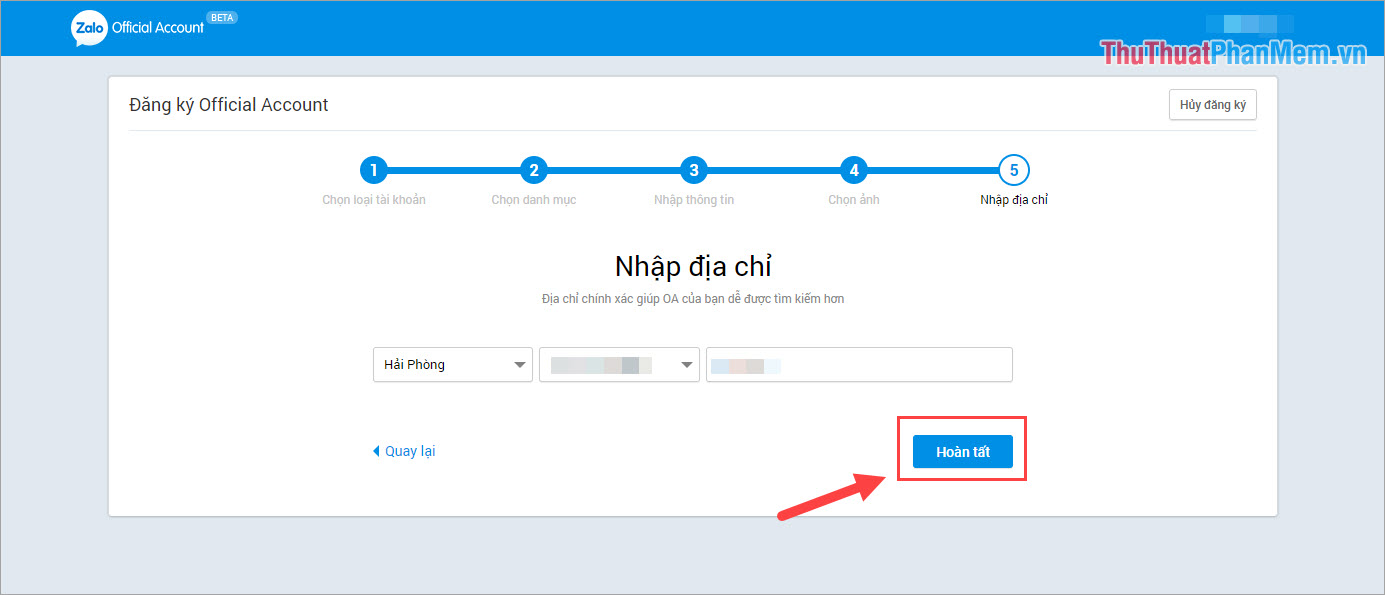
Step 7: You proceed to add address information and click Finish to complete all the settings for Zalo Page.
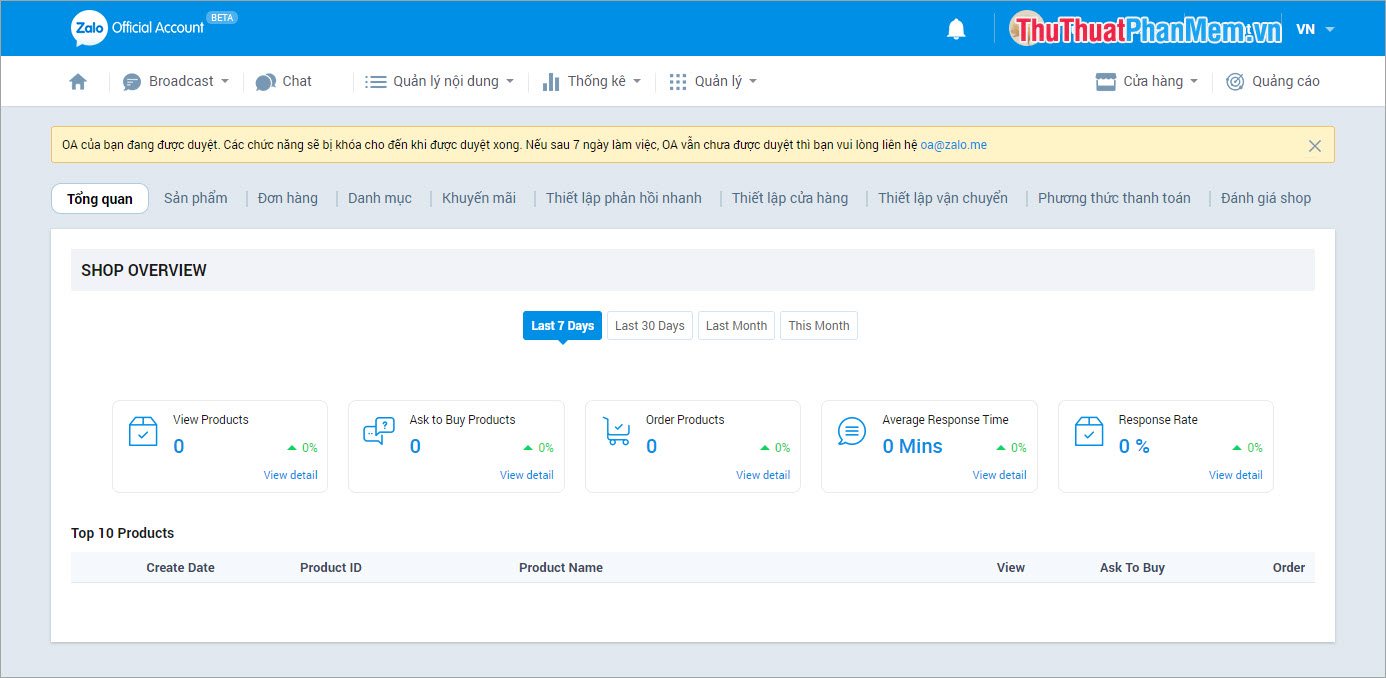
Note: After we have registered the booth on Zalo Page, your account will not be confirmed immediately. This means that only you (the admin) can see that Zalo Page and cannot be seen by others. The Zalo Page management will review and send notice to you that your Zalo Page is eligible to join the community or not. If not eligible you need to change some information according to their instructions to review again. Zalo Page browsing time will range from 1 to 7 days, if there is no notice please contact directly oa@zalo.me
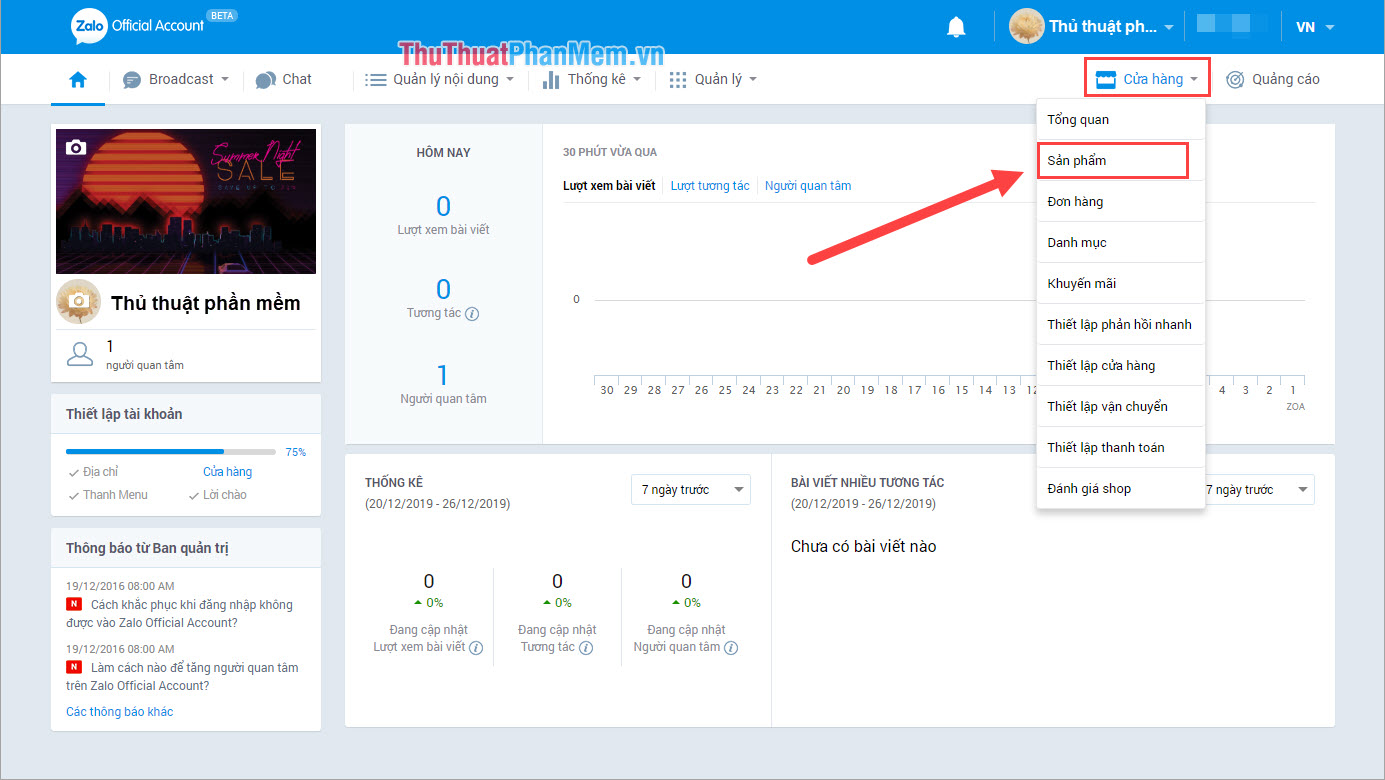
2 . How to add products to Zalo Page
After registration is complete, you will automatically be transferred to Zalo Page management interface. Here, you can adjust all information of Page.
Step 1: You choose the Store and choose Products .
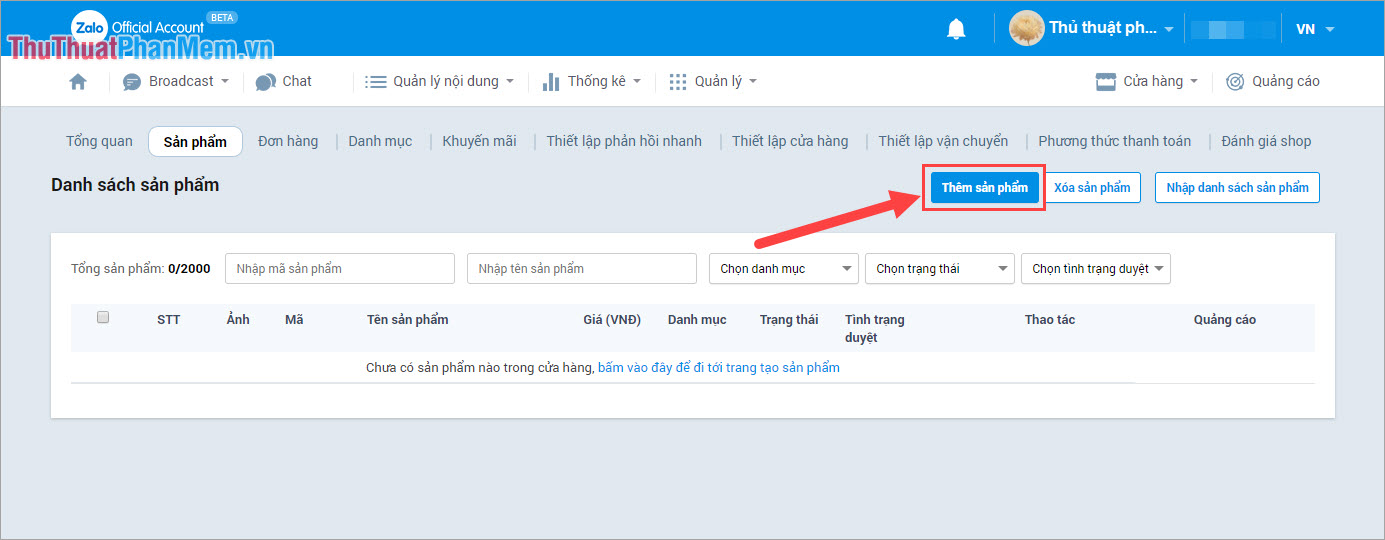
Step 2: Here, you can see all the products that are available in your store. To add products, select Add products .
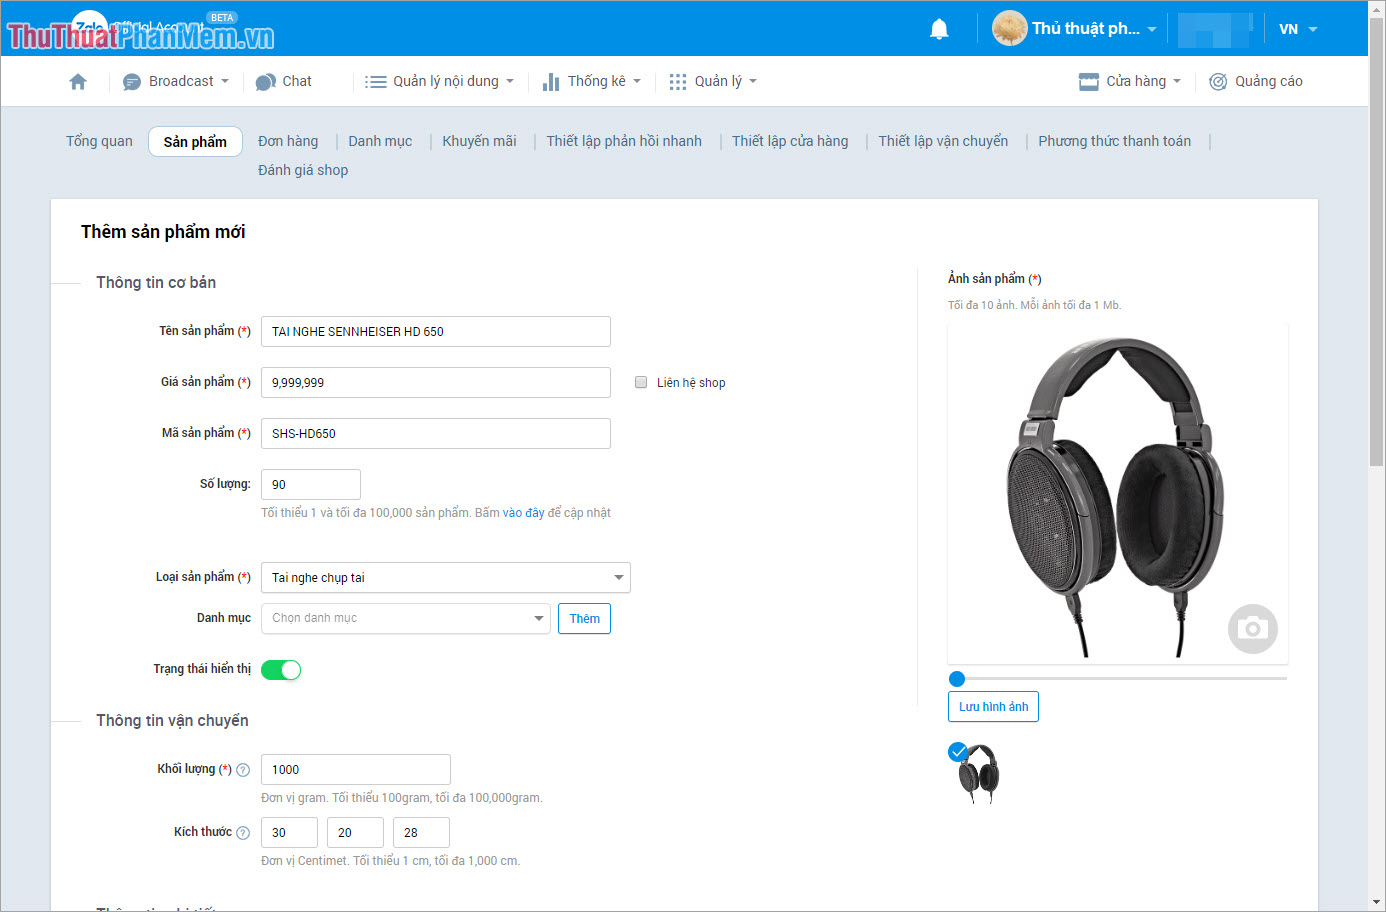
Step 3: You proceed to fill out the product information in the form of Zalo Page and click Confirm when completed.
Step 4: When adding the product, we must also wait for the Zalo team to review the product. After the review is complete, people can see your product and can buy, sell and order.

In this article, Software Tips have shown you how to register a Zalo Page account for business and sales. Have a nice day!
Was this article helpful?
Your feedback helps us improve.
Related Articles
 Instructions to retrieve password Zalo Pay2 minutes read
 Register Zalo, how to create a Zalo account on your computer5 minutes read
 Tips for using Zalo are useful for users7 minutes read
 Zalo could not access it again, the entire VNG system collapsed2 minutes read
 Instructions for creating online business shops on Zalo6 minutes read
 How to read newspapers on mobile using Zalo Channel3 minutes read
Reader Comments 0
Sign in with email or Google to join the discussion.