Table of Contents
Canva can generate a new background for a photo from a written description. The basic workflow is to upload an image, open the background-generation tool, describe the scene you want, compare the results, and continue editing the best version.
The screenshots below show Canva’s Background Maker. Tool names and account availability can change, so if you do not see that label, check the photo-editing tools or Apps panel. For related options, review these AI tools available in Canva or compare broader AI photo editors and their best uses.
Change a photo background in Canva
1. Upload the source photo
Open a Canva design and upload the photo whose background you want to replace. Select the image, open its editing options, and choose Background Maker as shown below. If the feature is unavailable, it may not be included with your current account or plan.
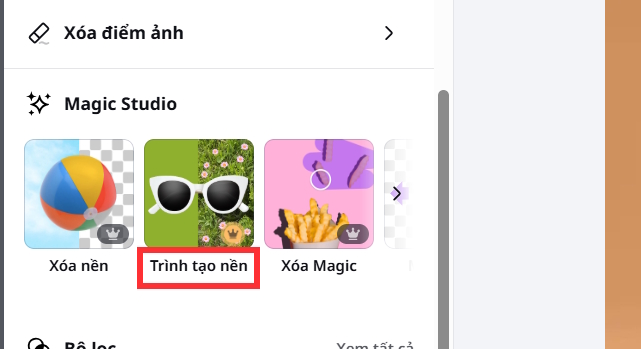
2. Describe the new background
Enter a direct description of the scene you want behind the subject. Include only details that affect the result, such as:
- the location or setting;
- the main colors and visual style;
- the time of day or type of lighting;
- important nearby objects; and
- the intended composition, such as a clean product backdrop or a wide outdoor scene.
A useful prompt connects the background to the subject. For example, a product photo may need a neutral studio surface and soft lighting, while a portrait may need a believable setting with depth. Avoid conflicting instructions. When the description is ready, select Create.

3. Compare the generated results
Canva displays several generated backgrounds. Compare more than the overall scene: check the edges around hair or the product, the direction of the light, shadows, perspective, and any warped details. If none of the choices works, revise the description to fix the specific problem and generate another set.
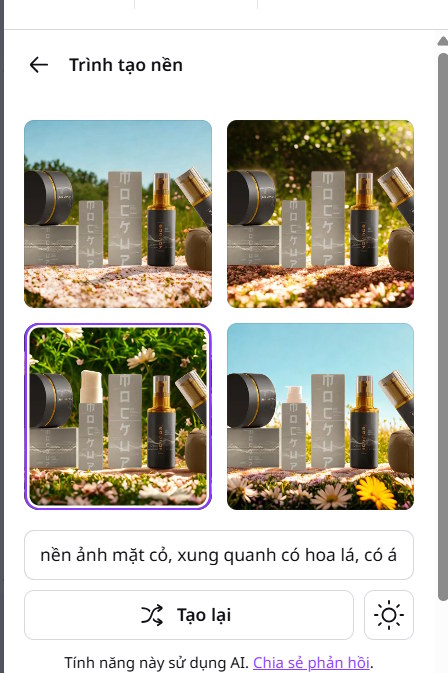
4. Save or continue editing
Select the result that best fits the original subject. Choose Create design to continue working with it in the Canva editor, or use the available save option to place the result in Uploads for later use.
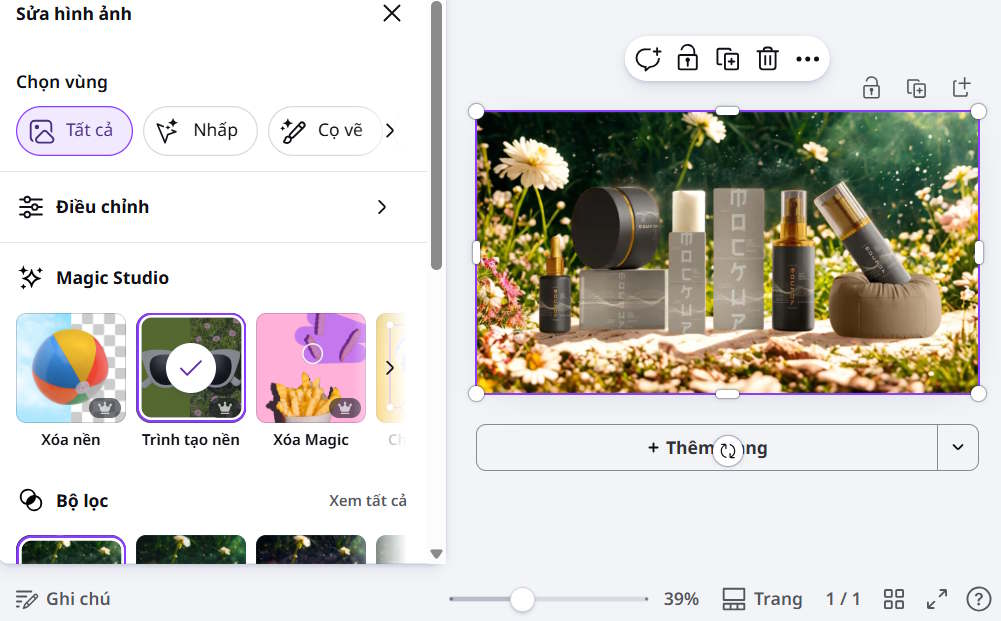
Check the result before exporting
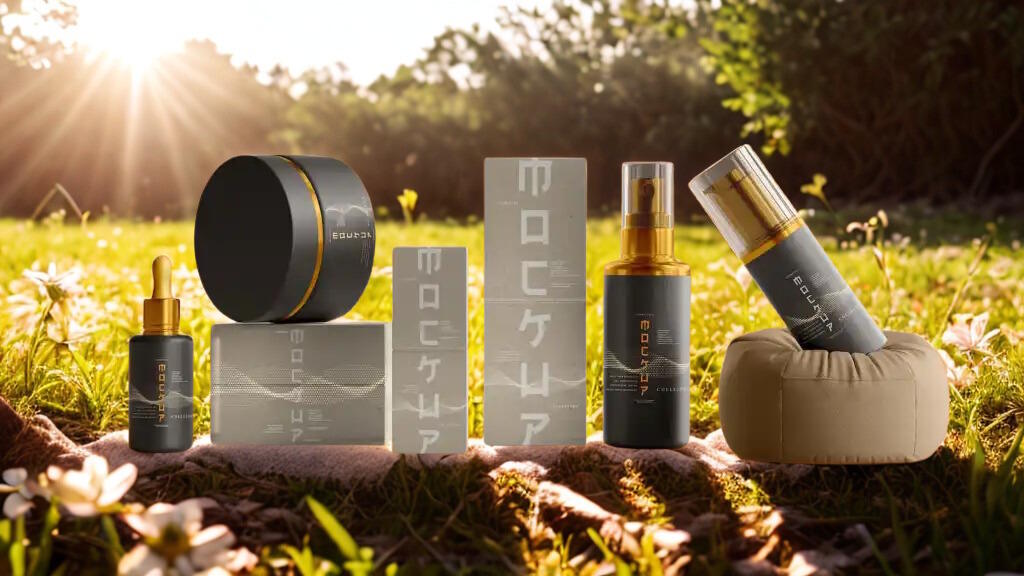
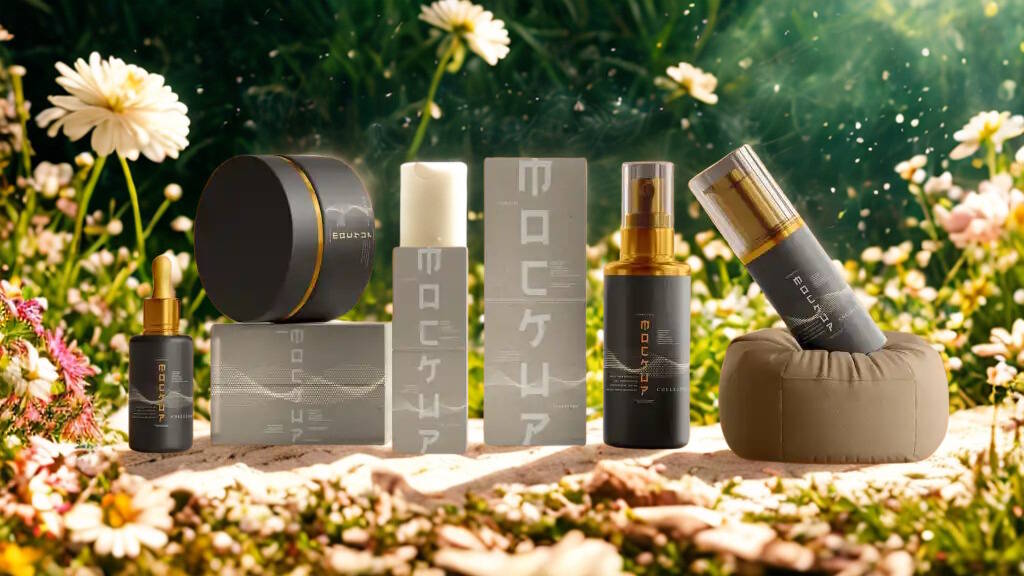
The following image shows the source photo before its background was replaced.

The examples below show generated backgrounds based on different descriptions. Zoom in before exporting and look for rough cutout edges, inconsistent shadows, duplicated objects, distorted text, or a background that does not match the subject’s perspective.
Tips for a more convincing background
- Start with a sharp photo in which the subject is clearly separated from the existing background.
- Describe lighting and camera angle consistently with the original subject.
- Use a simpler scene when generated details look cluttered or distorted.
- Regenerate after changing one important prompt detail at a time so you can see what improved.
- Keep the original file; generated replacements can alter edges and fine details.
Related Articles
 How to Change the Background of an Image in Canva: Step-by-Step Guide4 minutes read
 How to Separate the Background in Canva Quickly and Simply: Complete Guide7 minutes read
 Changing the Design Colors in Canva Is Very Simple4 minutes read
 Guide to Creating 3D Designs Using AI in Canva4 minutes read
 How to Split Photos Using Canva Are Very Simple3 minutes read
 How Do I Convert Between Different Design Formats in Canva: Explained4 minutes read
Reader Comments 0
Sign in with email or Google to join the discussion.