Table of Contents
Windows 10 Creators Update is version 1703, an obsolete 2017 release. The procedures below are retained as an archive of the in-place upgrade methods available at the time. They should not be used to put an unsupported version on an everyday PC.
No operating-system upgrade can guarantee that data will never be lost. “Keep personal files and apps” describes the planned migration, not a backup. Copy important files to a separate drive or trusted cloud service and verify the copy before starting.

Before an in-place Windows upgrade
- Confirm the current Windows installation is activated.
- Install pending quality updates and restart.
- Check free space, firmware, drivers, and application compatibility.
- Save BitLocker or device-encryption recovery keys.
- Disconnect nonessential external drives and peripherals.
- Make a verified backup and create recovery media.
For a supported release, use the current Windows 10 update guide rather than searching for a Creators Update ISO.
Method 1: Windows Update
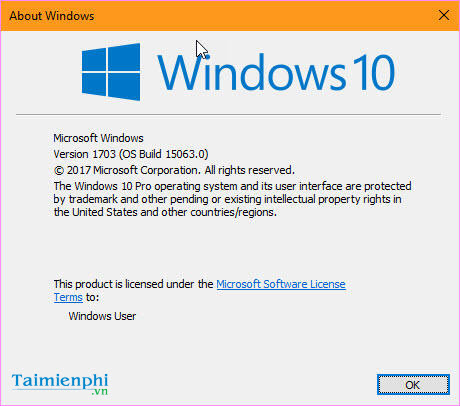
Windows Update was the safest route when Microsoft offered version 1703 to a compatible PC. The staged rollout meant different devices received it at different times.
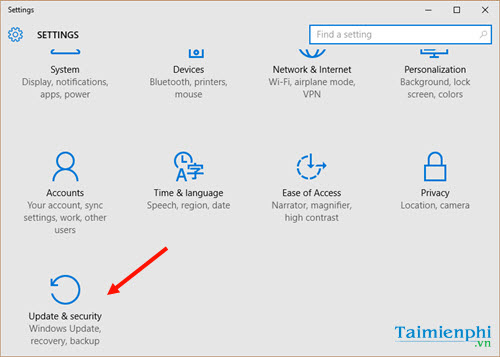
Step 1: Press Windows + I and open Update & Security.
Step 2: Select Windows Update and check for updates. When version 1703 was current, eligible devices could download it from this page.
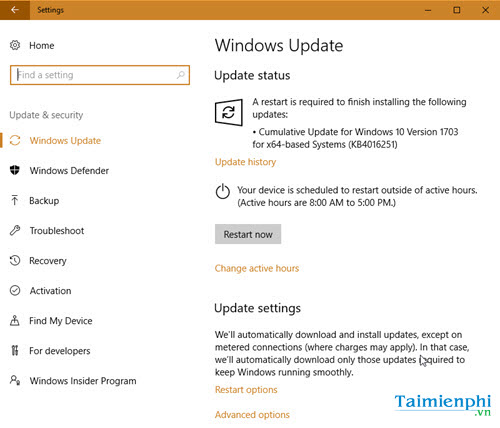
Save work before the requested restart and keep the PC connected to power.
Method 2: Windows 10 Update Assistant
Update Assistant was Microsoft’s manual upgrade utility. A current copy no longer targets Creators Update, and it should not be used to bypass a compatibility hold.
Step 1: Download the tool from Microsoft and run it as an administrator.
Step 2: Select Update now only after making a backup.
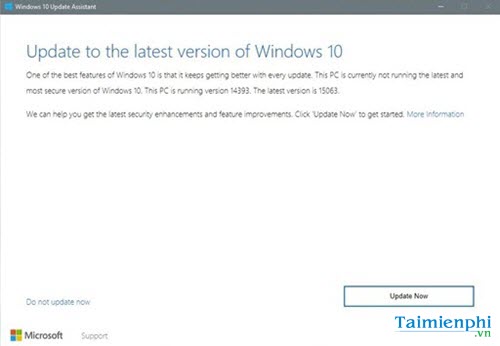
Step 3: Review the processor, memory, and disk-space checks. Passing these basic checks did not guarantee driver or application compatibility.
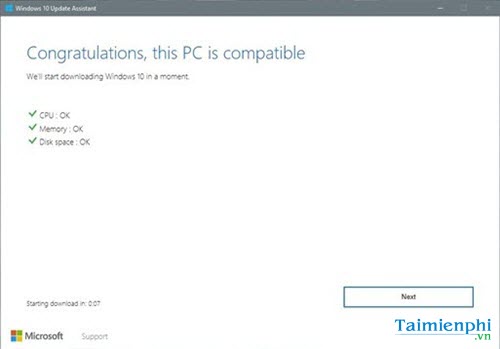
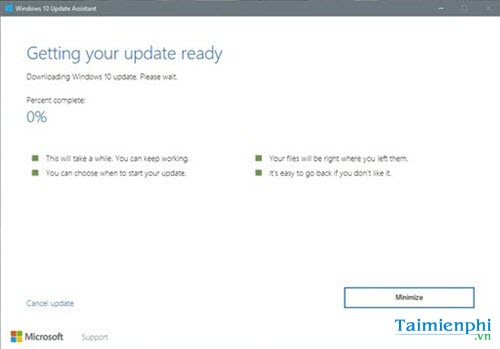
Step 4: Allow the download to finish, save open work, and restart when prompted.
Method 3: Upgrade from a mounted ISO
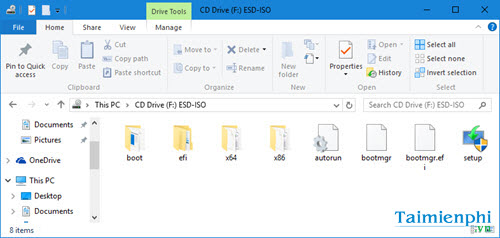
An in-place ISO upgrade must be launched by mounting the ISO and running setup.exe from the existing Windows desktop. Booting from the same media starts a different workflow and does not provide the same “keep apps” path.
Step 1: Use a trusted ISO whose edition, language, and architecture match the installed Windows system.
Step 2: Mount the ISO and run setup.exe.
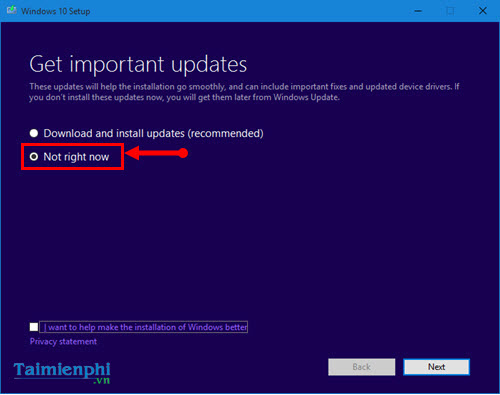
Step 3: Choose whether Setup should download updates now. If you continue without updates, run Windows Update immediately after installation.
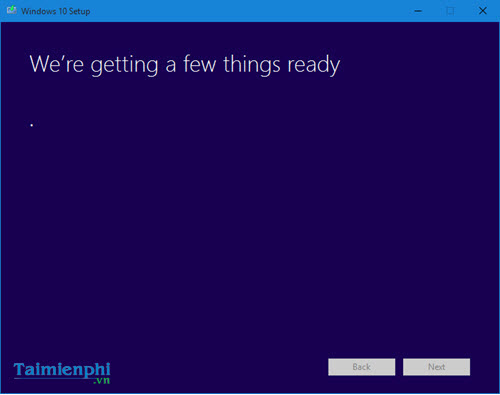
Step 4: Wait while Setup checks the PC. Stop if it reports an incompatible driver, application, firmware, or lack of space.
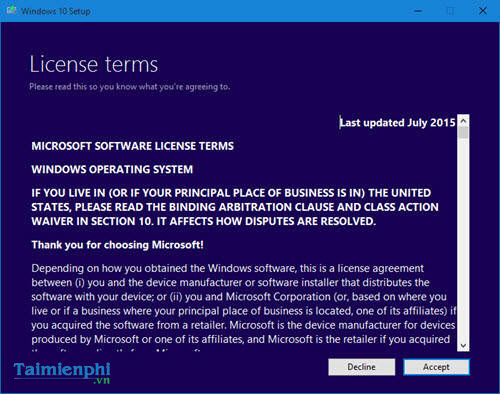
Step 5: Read the license terms and select Accept only if you agree.
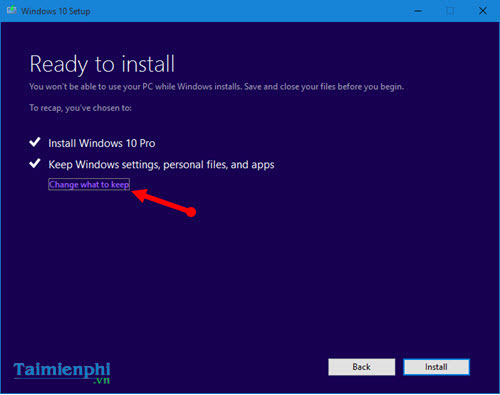
Step 6: On the Ready to install page, select Change what to keep.
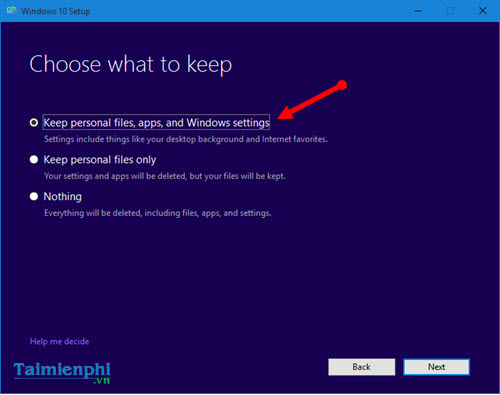
Step 7: Choose Keep personal files and apps to preserve installed applications and user data. If that option is missing, do not continue until you identify why; a language, edition, architecture, or upgrade-path mismatch may be responsible.
Step 8: Confirm that the summary explicitly says personal files and apps will be kept, then select Install.
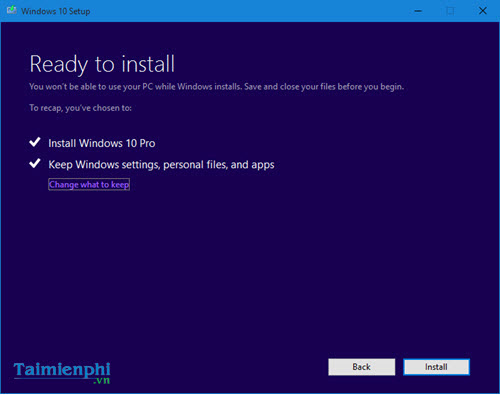
The PC restarts several times. Do not interrupt power.

After the upgrade
Check personal files, activation, network access, security software, Device Manager, printers, and essential applications before deleting rollback files or the pre-upgrade backup.
For backup images, recovery media, and clean-install preparation, consult the Windows installation and recovery guides.
If a legacy system specifically needs version 1703
Use verified organizational media in an isolated environment. Do not use the unsupported system for personal credentials or sensitive browsing, and plan a migration to a maintained operating system.
Related Articles
 How to Disable Windows 10 Creators Update Ads7 minutes read
 Instructions for Delaying Updating Windows 10 Spring Creators5 minutes read
 How to Enable Dynamic Lock in Windows 10 Creators Update6 minutes read
 Finally Windows 10 Autumn Creators Update Will Be Named Windows 10 Fall Creators Update3 minutes read
 How to Install Windows 10 Creators Update Using a USB Drive4 minutes read
 Windows 10 Creators Update Is Now Available for All Compatible3 minutes read
Reader Comments 0
Sign in with email or Google to join the discussion.