Table of Contents
Prepare to Remove Your iPhone
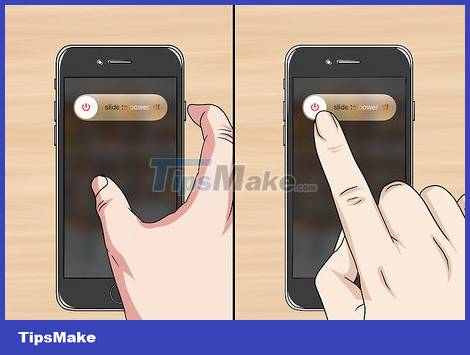
This practical guide explains how to unlock iphone 6s and iphone 7 with clear steps and useful context. It also covers common requirements, potential problems, and the details that can help you get better results.
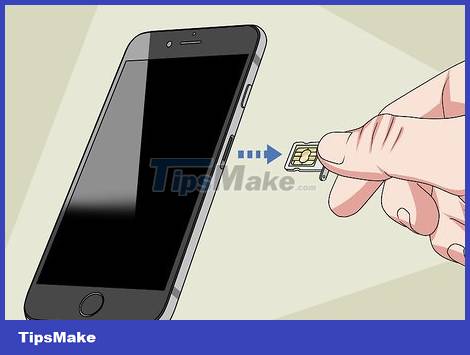
Remove the iPhone's SIM card. On the right side, slightly below the Power button, is a small hole: use a thin object, such as a straightened paper clip or a thumbtack, into this hole to eject the SIM tray. When the SIM tray has popped out, you just need to take the SIM out of the tray and then push it back in.
Don't forget to store the SIM in a clean, dry place. Ideally, you should keep it in a box or small plastic bag, if available.

Prepare the work surface. You should remove the iPhone screen in a flat, well-lit and clean place. It would also be nice to have something soft, such as a microfiber towel, to lay down the iPhone screen.
Consider cleaning thoroughly with a damp cloth and letting work surfaces dry before handling iPhone to remove dust and other tiny debris.
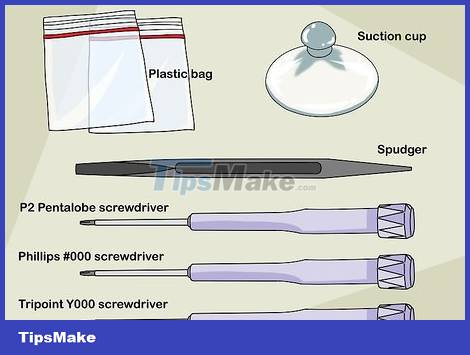
Collect tools. To unlock iPhone 7 and iPhone 6S, you need the following items:
Pentalobe P2 screwdriver – Almost every iPhone repair or disassembly you use this screwdriver.
Phillips #000 screwdriver (iPhone 6 only) – Make sure this is a + head screwdriver and not a flat head.
Tripoint Y000 screwdriver (iPhone 7 only) – For some iPhone 7 exclusive screws.
Spudger Latch – Replace this thin, soft lever used to pry the display and connector. You can use a similar item, such as a guitar pick.
Heat Source – This is a sand or gel bag that will be heated in a microwave and placed near the iPhone to loosen the screen glue. There are different versions of this generic product.
Vacuum Rubber Cushion – You'll need it to pull the screen off your iPhone.
Plastic Bag – For all screws and parts to be removed. You can also use bowls or food containers if needed.
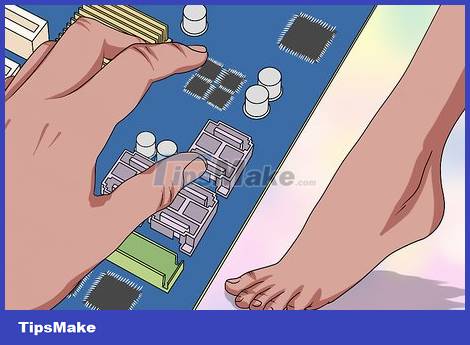
Insulate yourself. Static electricity can completely damage any of the countless unshielded circuits in an iPhone case. Therefore, insulate yourself before starting with the first screw. Once you have properly insulated and prepared, you can start disassembling your iPhone 7 or iPhone 6S.
Remove iPhone 7
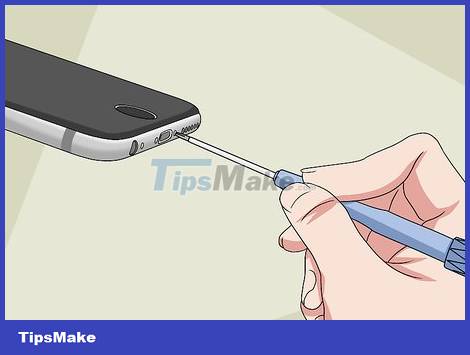
Remove the two pentalobe screws located on the bottom of the iPhone. They are located on either side of the charging port. As with any other screws removed during this process, don't forget to put them in a bowl or bag when you're done removing them.
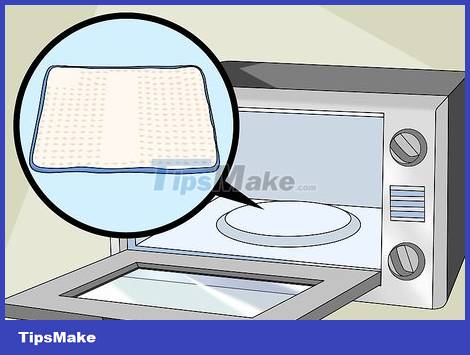
Prepare your heat source. If using a gel bag or similar, heat in the microwave as directed.
Do not use a hair dryer when opening and closing your iPhone.
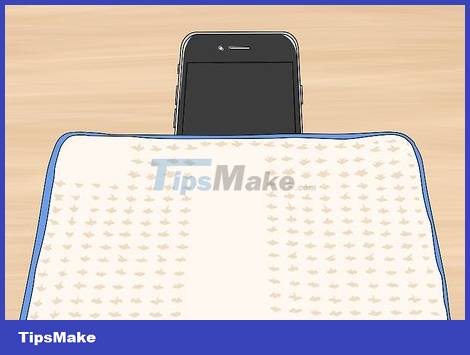
Place the heat source on the bottom of the iPhone, covering the Home button and part of the lower part of the screen.
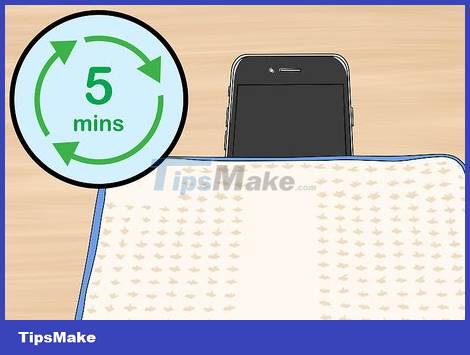
Wait at least five minutes. The heat source will soften the adhesive used to secure the display, allowing you to lift it slightly.
Glue to fix iPhone 7 screen very firmly. So you'll probably have to heat up several times.
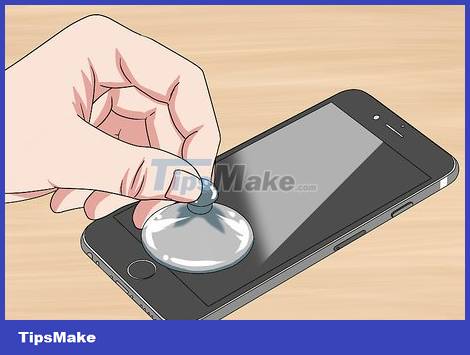
Attach the vacuum rubber pad to the base of the monitor. Make sure the mattress is firmly pressed flat before continuing.
The rubber pad is not covered on the Home button.
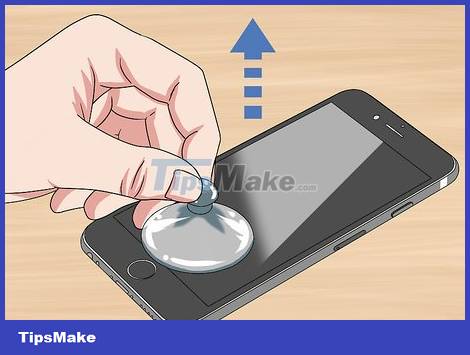
Pull up the screen. Only raise the screen high enough to create a gap between the screen and the iPhone case.
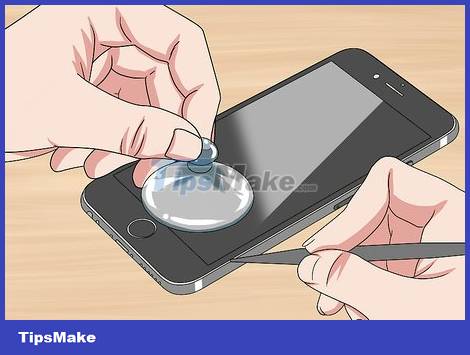
Insert the lever into that gap. If using another tool, use it.
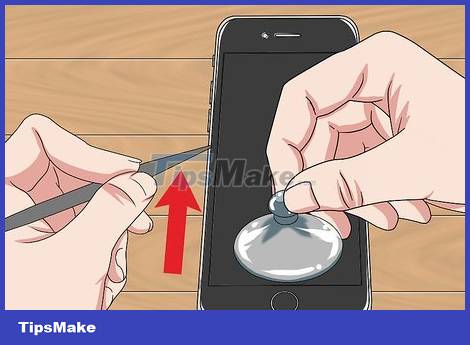
On the left side of the iPhone, move the slider up. For good results, move the lever from left to right when lifting it to separate the display from the case.
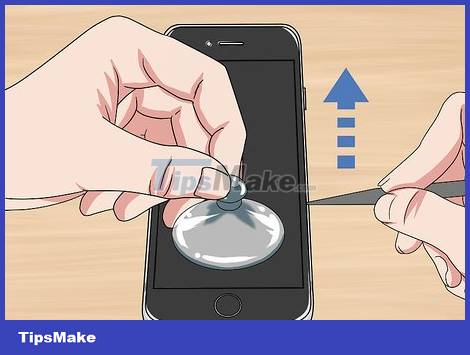
On the right side of the iPhone, move the slider up. Be careful in handling because there are some wires on this side of the phone.
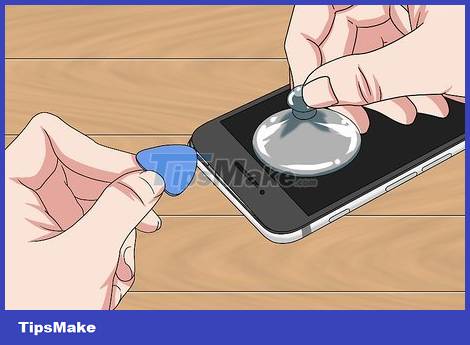
Use a credit card or similar to separate the top of the screen. The top of the screen is fixed with plastic pins. Make sure you only insert your credit card or similar item deep enough to loosen these pins.
Do not pry up the top of the screen.
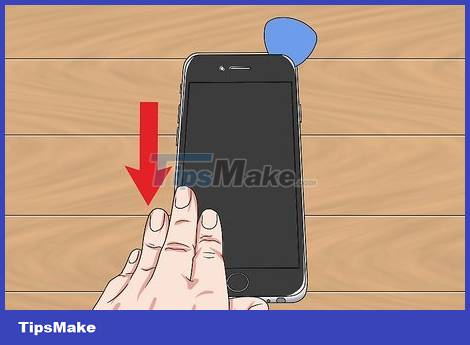
Drag the screen down a bit. Pull the monitor down about 1 cm or less to remove the clip at the top of the monitor.
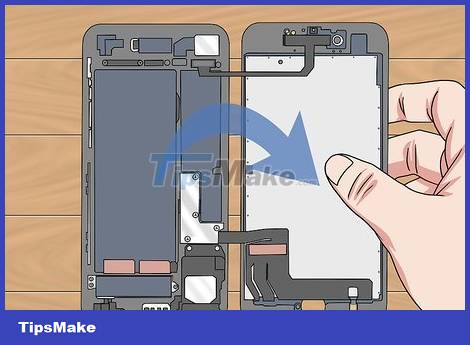
Flip the iPhone screen to the right. Here, we will open the iPhone screen like opening a book. This is to ensure that the connecting cable on the right part of the phone is not damaged.
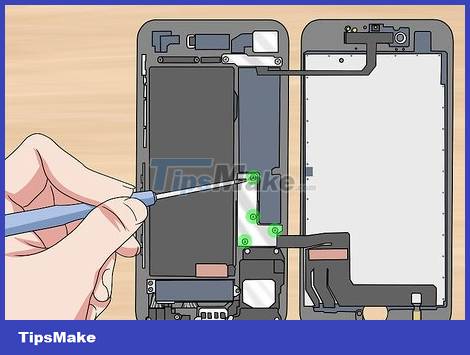
Remove the L-shaped connector. This bracket is located low to the right of the iPhone's internals. Here, you need to remove the four Y-head screws.
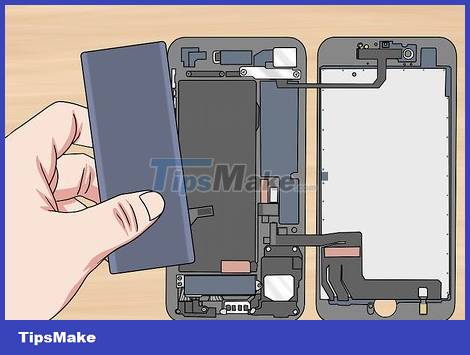
Bounce the display connector and battery. In the area covered by the splicing frame, three rectangular boxes are attached to the ribbon: you need to use the lever to bounce them up in order to continue.
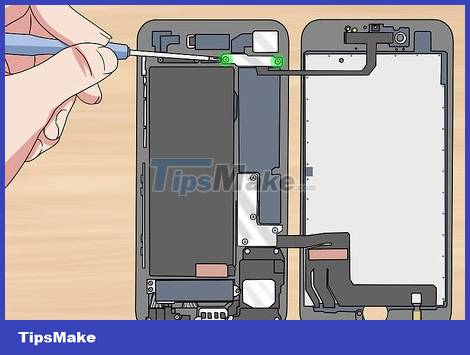
Remove the wide, thin frame located in the upper right corner of the phone. This frame shields the final connector that holds the display in place. To do so, you need to remove the two Y-head screws.
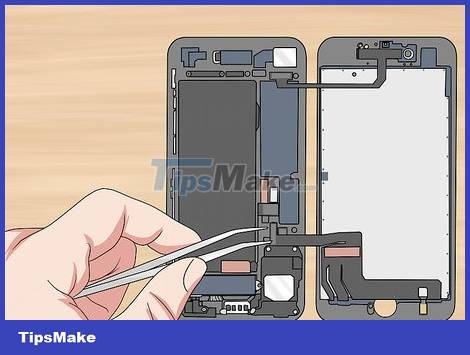
Bounce the last pin connector. It's underneath the frame you just removed.
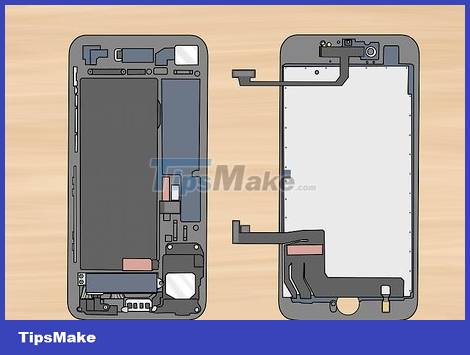
Take out the screen. At this point, the screen is no longer connected to the phone: you can remove it easily. iPhone 7 is now open and ready for you to explore!
Dismantle iPhone 6S
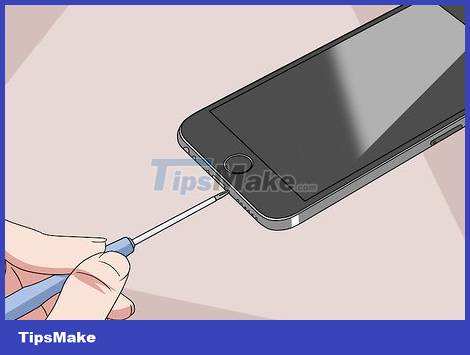
Remove the two pentalobe screws on the bottom edge of the iPhone. They are located on either side of the charging port. As with any screws removed during this process, you'll need to store them in a bowl or bag when you're done removing them.
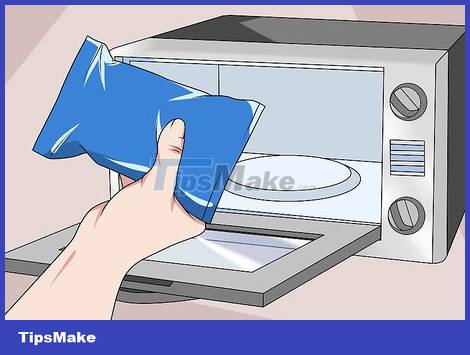
Prepare the heat source. If using a gel bag or similar, heat in the microwave according to the instructions for use.
Do not use a hair dryer when opening and closing your iPhone.
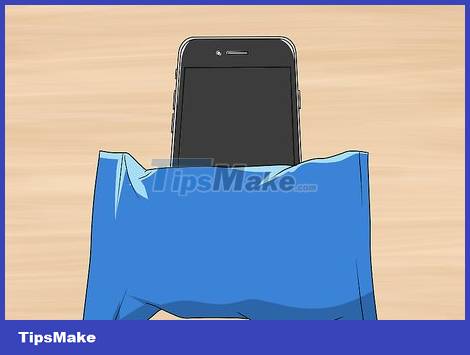
Place the heat source on the base of the iPhone. It will overlay the Home button and part of the lower area of the screen.
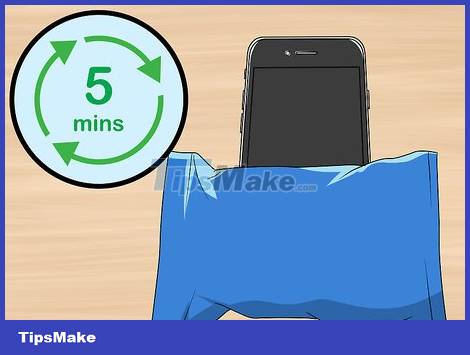
Wait at least five minutes. The heat source will soften the adhesive that holds the screen in place, helping you lift the screen away from the phone.
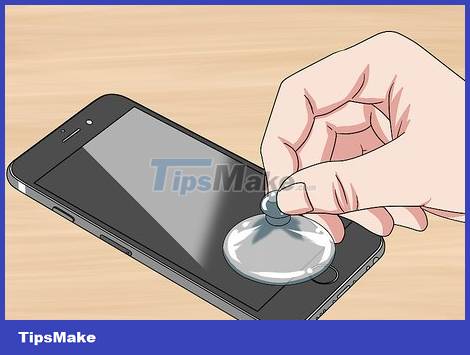
Attach the vacuum rubber pad to the base of the monitor. Make sure the mattress is firmly flat before continuing.
The vacuum rubber pad is not covered on the Home button.
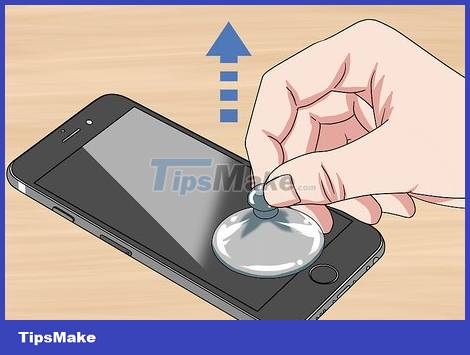
Pull up the screen. Only raise the screen high enough to create a gap between the screen and the iPhone case.
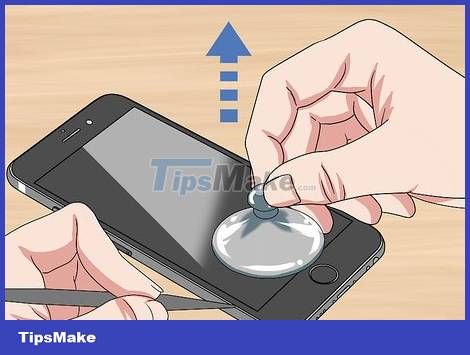
Insert the lever into this gap. If using another tool, use it.
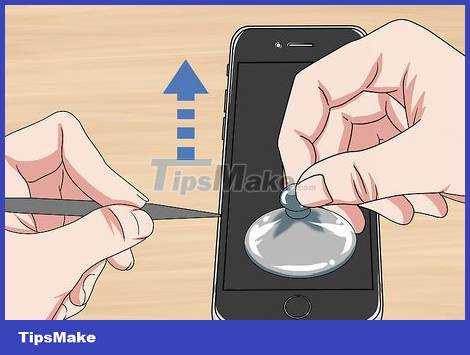
On the left side of the iPhone, move the slider up. For best results, move the lever from left to right when moving up to separate the screen and phone case.
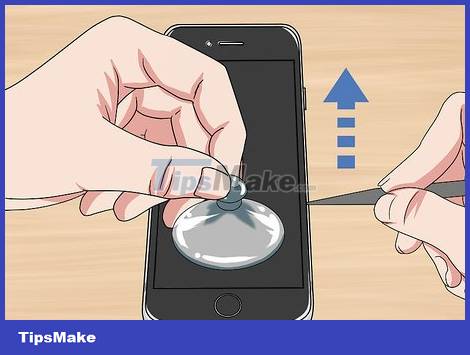
On the right side of the iPhone, move the slider up. When you do, you'll hear the pins snap.
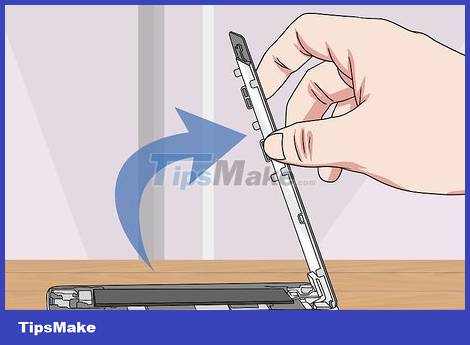
Flip the screen up. Here, the top of the screen is the hinge. Make sure you don't push the head more than a 90 degree angle.
If there is a book or other sturdy object like it, secure the screen to it with duct tape or rubber band, forming a 90-degree angle before continuing.
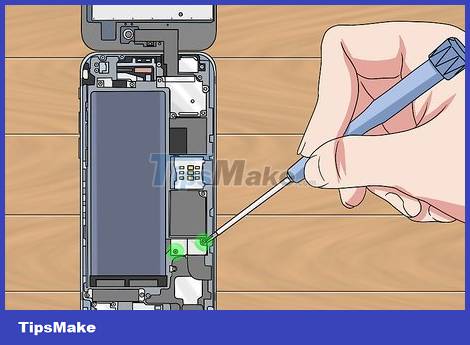
Remove the battery connector bracket. Remove the two Phillips screws on the gray bracket near the bottom right corner of the battery, and then pull the frame up.
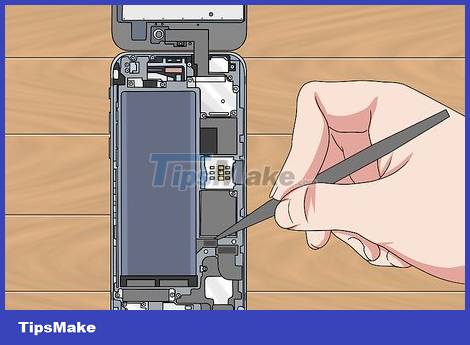
Disconnect the battery connector. This is a rectangular box next to the battery arranged in an area covered by a support frame. Use your pry bar or pry tool to pry the battery connector.
To prevent the battery from accidentally being connected, you need to make sure the battery connector is as perpendicular to the battery as possible.
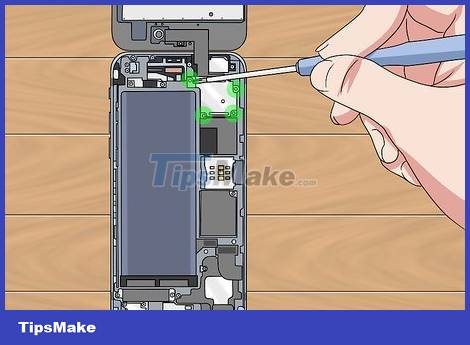
Remove the display cable bracket. This silver frame is located in the upper right corner of the iPhone case. To do so, you need to remove four Phillips screws.
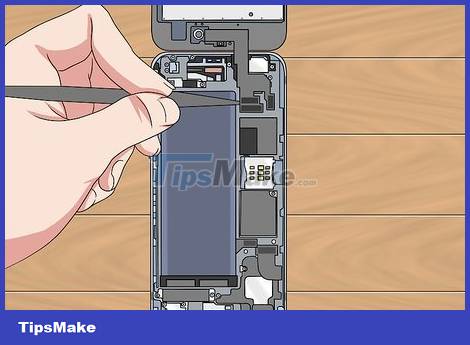
Disconnect the camera and monitor connectors. Under the silver frame there are three ribbons: one for the camera and two for the display. They connect to the iPhone case using the same connectors you worked with the battery. Use the toggle bar to disconnect these connectors.
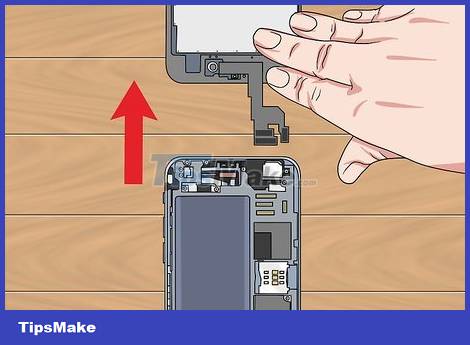
Remove the screen. Now that the monitor is no longer connected, simply remove it and put it in a safe place. iPhone 6S is ready for you to discover!
Conclusion
Understanding iPhone 6S makes it easier to compare options, avoid common mistakes, and apply the information in this guide more effectively. Review the relevant requirements before making changes or choosing a solution.
FAQ
How do you unlock iphone 6s and iphone 7?
Follow the steps in this guide in order, confirm the required settings or tools, and verify the result before making additional changes.
Is it safe to unlock iphone 6s and iphone 7?
It is generally safe when you follow the recommended instructions, use trusted tools, and avoid changing settings you do not understand.
What should you do if the process does not work?
Recheck the requirements, restart the device or application when appropriate, and review each step for missed settings or compatibility issues.
Related Articles
 6 Ways to Unlock iPhone Without Password8 minutes read
 US Police Scramble to Buy Tools to Unlock All IPhones Despite the Price of up to $30,0004 minutes read
 How to Unlock iPhone If You Forgot Your Password: Step-by-Step Guide5 minutes read
 How to Adjust the iPhone X Unlock Icon5 minutes read
 How to Unlock Disabled iPhone9 minutes read
 An Easy Guide on How to Unlock Your iPhone 76 minutes read
Reader Comments 0
Sign in with email or Google to join the discussion.