Table of Contents
This practical guide explains how to Turn Off Search Personalization on Google through clear, ordered steps. It also covers useful settings, common mistakes, and checks that can improve the final result.
Google uses data from your searches to tailor future search results when you use it to look up information. However, you can turn this feature off if you are concerned about your privacy. With a recent update, Google makes it super easy to turn off personalized search. Here's how to turn off personalized search on Google
Instructions to Turn Off Personalization from Google Search Page
First, you Enter the keyword or content you want to search on Google As usual.

To display search results, scroll down to the bottom of the results interface and Click Try without personalization .
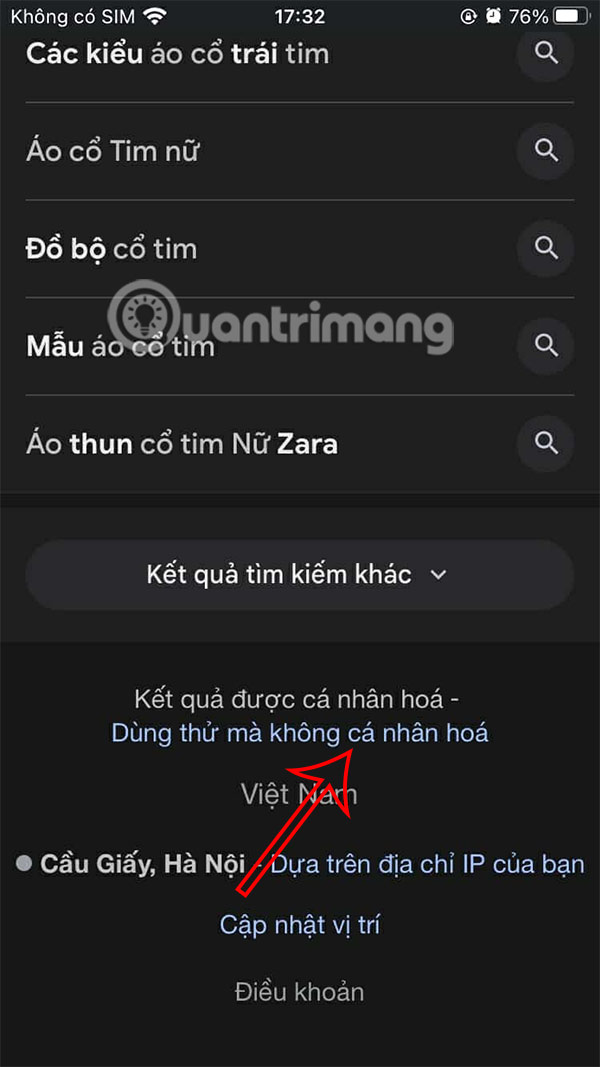
Immediately the Google search results interface is reloaded and you see the message Results are not personalized as shown below.

If you want to turn off personalized search results on multiple devices, you'll have to do it manually for each device using this method.
How to Turn Off Google Search Personalization from Settings
Step 1:
We click on the account Avatar And then select Personalize search feature In the list displayed for the account.
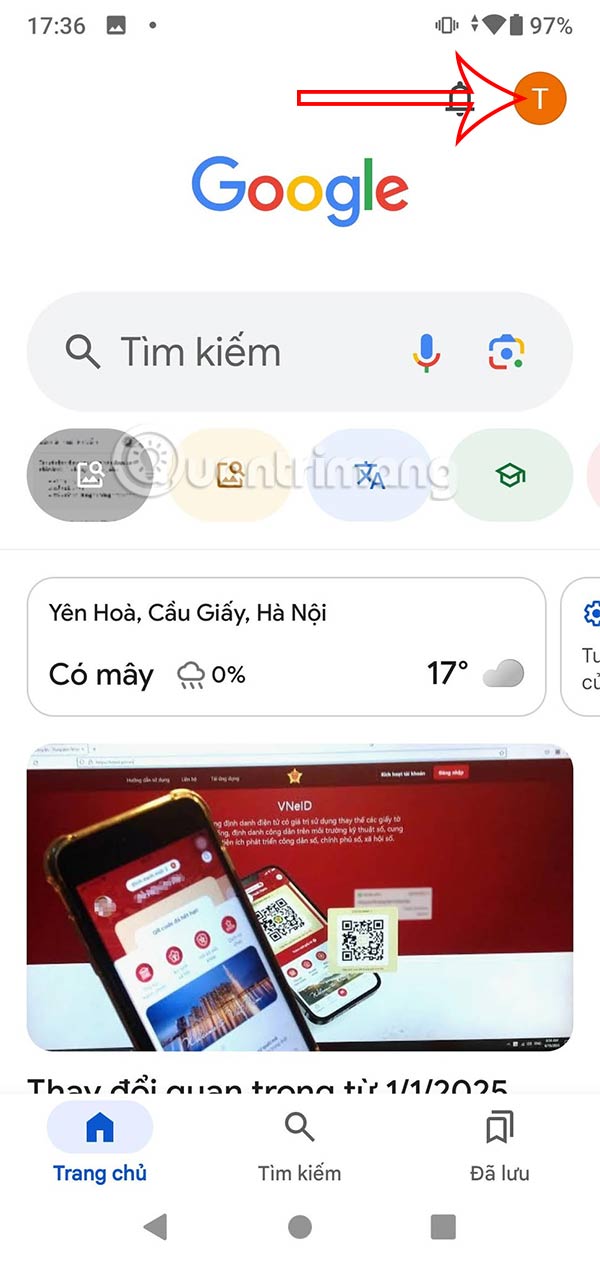
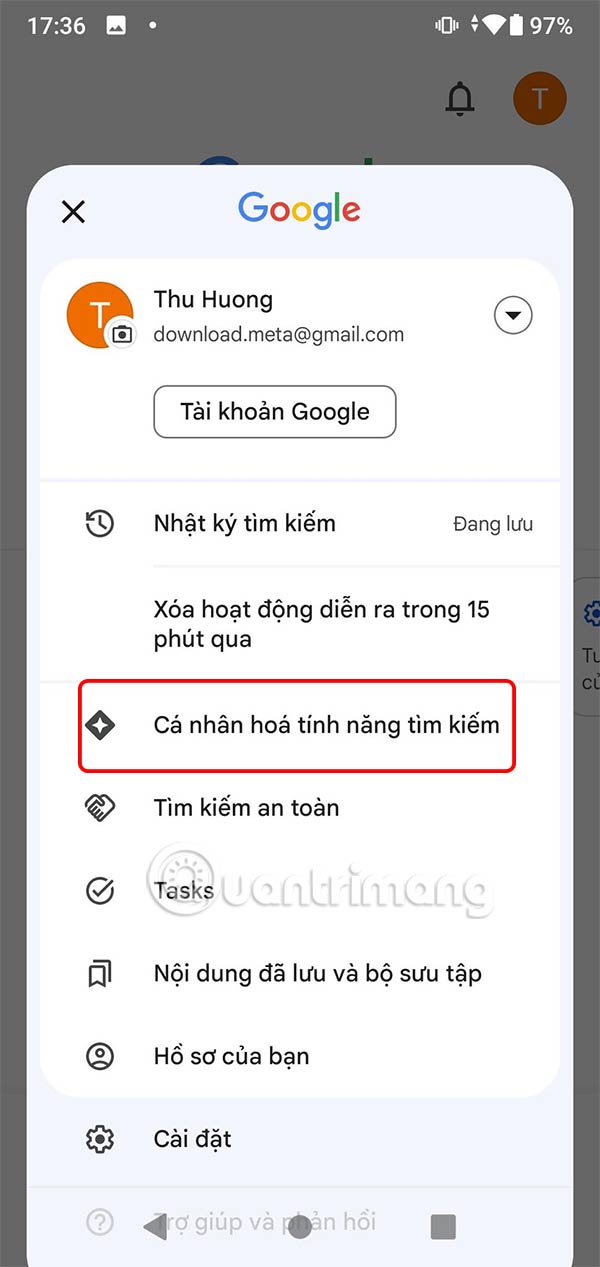
Step 2:
Go to the settings interface for your Google account. Here you scroll down and see The Search Personalization setting Is enabled by default.
Slide The circle button to the left To turn off personalization of Google search and you're done.
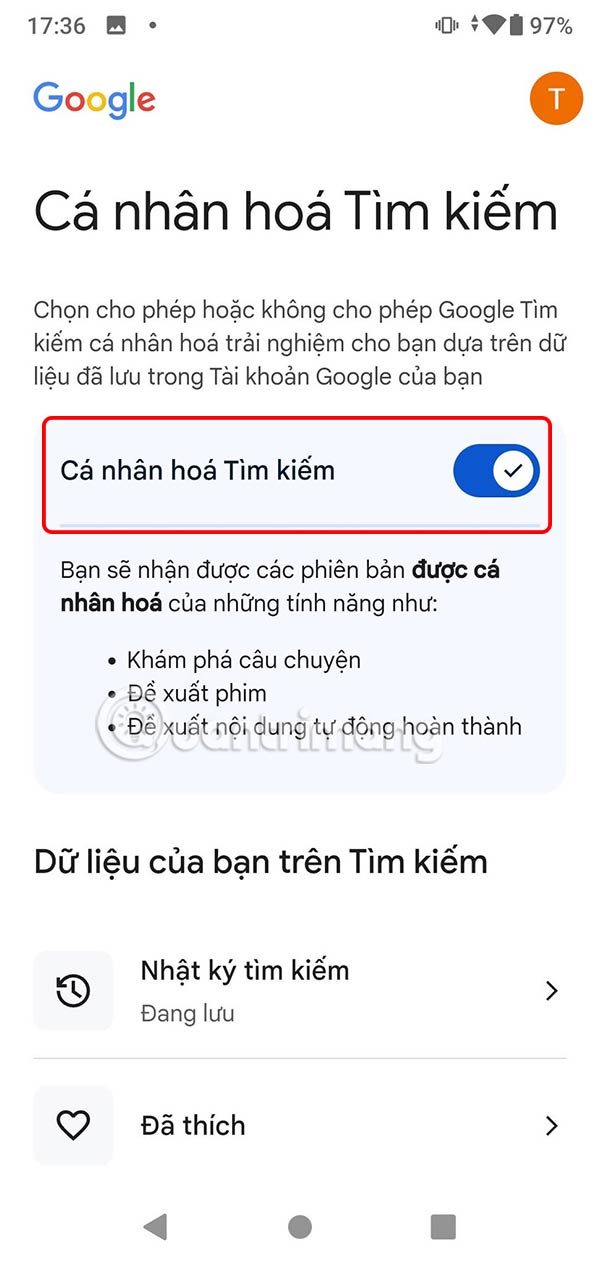

So when you search on Google, the entire search content and results are not saved.
FAQ
How do I Turn Off Search Personalization on Google?
Follow the steps in this guide in order, verify each setting before continuing, and check the result after every major change.
What should I prepare before I Turn Off Search Personalization on Google?
Confirm compatibility, install current updates, save important work, and back up data before changing system or application settings.
What can I do if turn Off Search Personalization on Google does not work?
Review permissions and requirements, restart the relevant device or app, repeat the steps carefully, and use official support resources when the issue continues.
Related Articles
 minutes read
 How to Open Personalization the Old Interface on Windows 103 minutes read
 How to Turn Off Google's AI Features to Avoid Being Bothered5 minutes read
 The Fast Google Search Tips You Should Know16 minutes read
 Search for What When Google 'Sudden Death'?3 minutes read
 Google Improves Search to Provide More In-depth Results for Questions3 minutes read
Reader Comments 0
Sign in with email or Google to join the discussion.