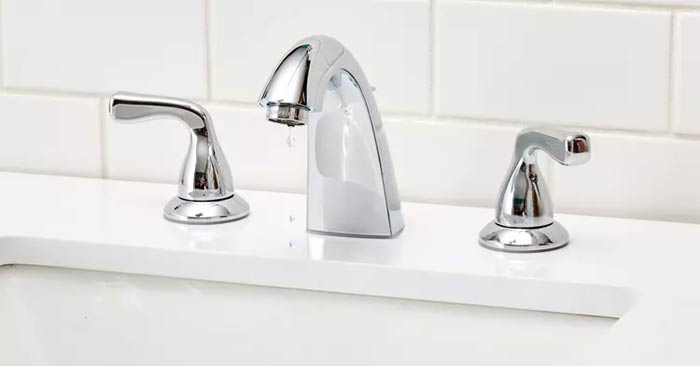
How to fix a leaky two-handle faucet
If you have a leaking two-handle faucet, feel the water flow to determine whether the problem is coming from the cold side or the hot side. You only need to replace the filter on the side that is leaking. However, the problem can sometimes come from both sides.
Table of Contents
Most two-handle bathroom faucets are cartridge faucets. Each faucet handle (hot and cold) has its own cartridge, a rotating valve and handle that control the flow of water into the faucet. If you have a very old two-handle faucet, it may be a compression type rather than a cartridge. You will notice this when you remove the faucet handle, as cartridges are usually made of plastic and held in place with a metal nut, while compression faucets usually have a metal valve with a flat rubber washer on the bottom.
If you have a leaking two-handle faucet, feel the water flow to determine whether the problem is coming from the cold side or the hot side. You only need to replace the filter on the side that is leaking. However, the problem can sometimes come from both sides.
Before you begin
Look under the sink to find the shut-off valve on the faucet's water supply line. Most shut-off valves have a small, oval-shaped handle or a rotating lever. Close the valve on the faucet you are repairing by turning the handle clockwise until it stops. If the shut-off valve has a lever instead of a knob, turn the lever until it is perpendicular to the water line (the direction of water flow).
If you do not have a shut-off valve under the sink, turn off the water supply to the house at the main shut-off valve. Once the water is turned off, open the faucet fully to release the pressure in the pipes and let the water flow out.
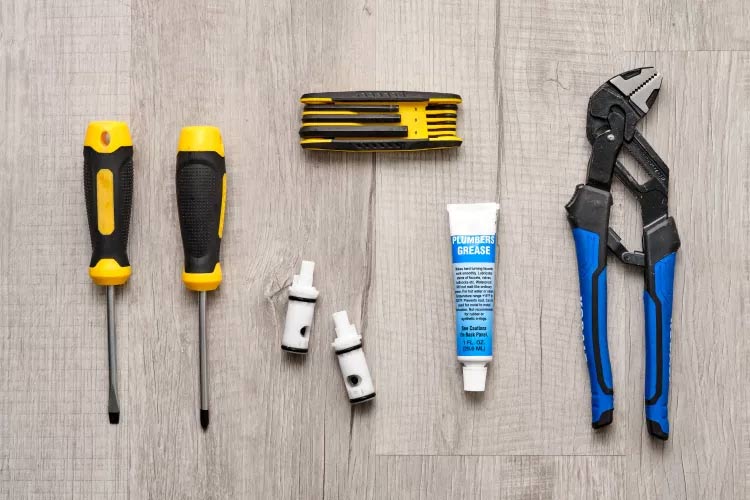
Tools to prepare
- Flat head and Phillips head screwdrivers
- Hex wrench
- Pipe wrench or tongue and groove pliers
- Replacement nozzle
- Pipeline lubricant
Instructions for implementation
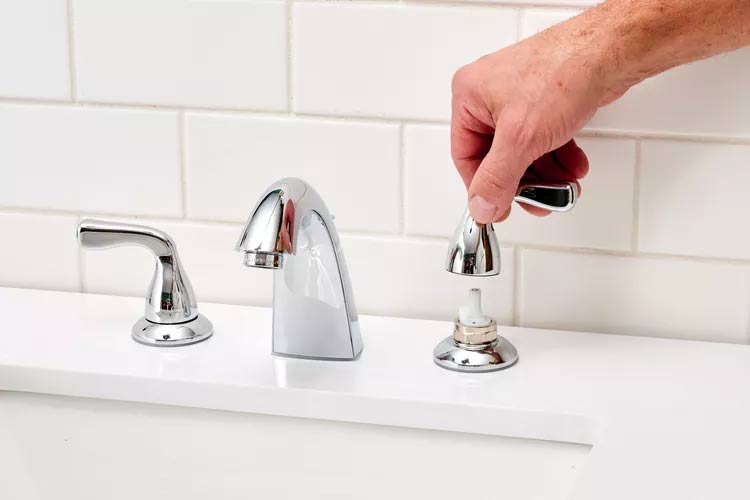
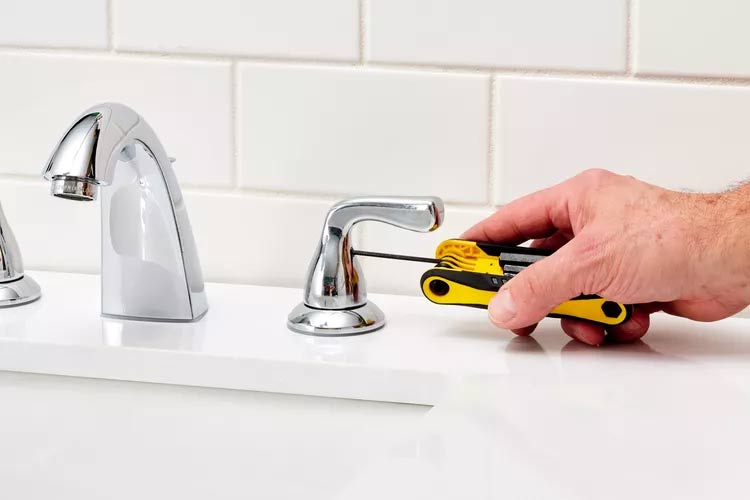
Step 1: Remove the faucet handle
Examine the faucet handle to determine how it is installed. Some handles have a screw that secures the handle on the side or back. Others have a decorative cap (usually plastic) that covers one of the screws that secures the handle. Your faucet may also have a removable lever that makes it easy to remove the screw that secures the handle from the base of the handle.
If the faucet has a decorative cap, pry off the cap with a small flathead screwdriver, then remove the screw holding the handle in place with a Phillips screwdriver. If the faucet has a set screw, remove the set screw with a hex wrench.
Pull the handle straight up to remove it from the faucet body.
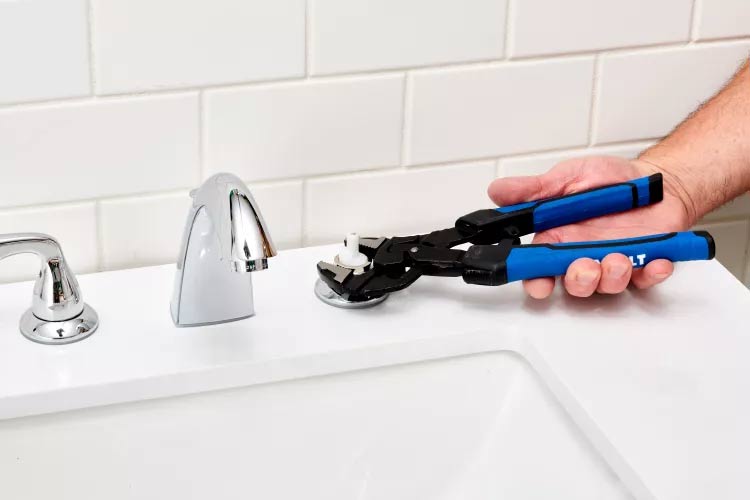
Step 2: Remove the Retaining Nut
Loosen the cartridge holder nut using a pipe wrench or tongue and groove pliers. Unscrew the nut completely and remove it from the faucet body.
Note the brass screw on the faucet end, if present. Its purpose is to reinforce the cartridge shaft when the faucet body screw is tightened onto the shaft. You may need to remove this old screw and reinstall it onto the new cartridge, as not all replacement cartridges come with a new screw.
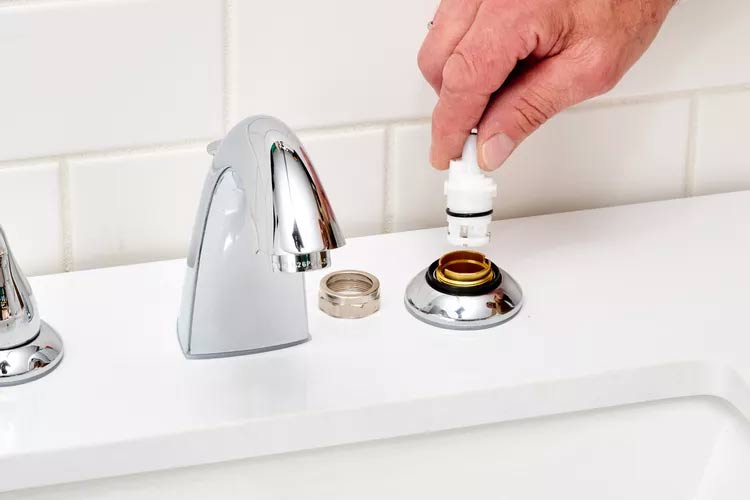
Step 3: Remove the old filter
Note the orientation of the faucet filter cartridge. You must reinstall the new cartridge correctly. Most cartridges have one or two tabs that fit into grooves on the faucet body.
Pull the filter cartridge straight up to remove it from the faucet body. If necessary, use pliers to grip the shaft at the end of the cartridge to pull the cartridge out.
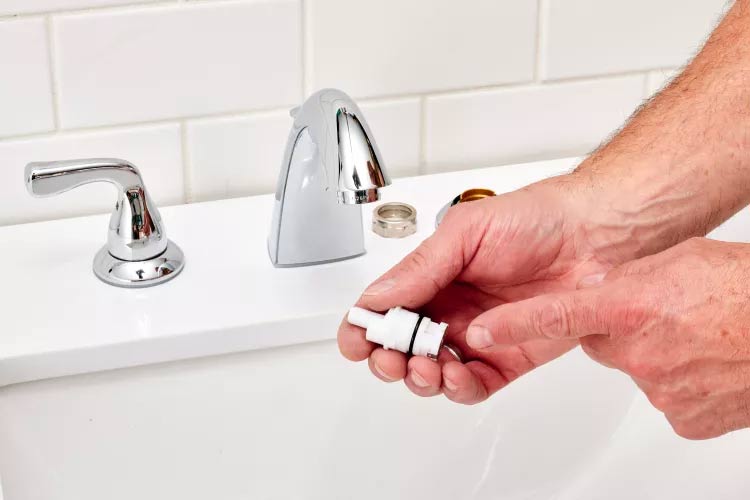
Step 4: Buy a new filter
Take your old cartridge to a hardware store or home center to find a suitable replacement cartridge. New cartridges usually include a new rubber gasket for the cartridge. If desired, you can also purchase additional lubricant for the gaskets. This makes it easier to install the cartridge on the faucet body and is especially helpful if the old faucet was difficult to remove.
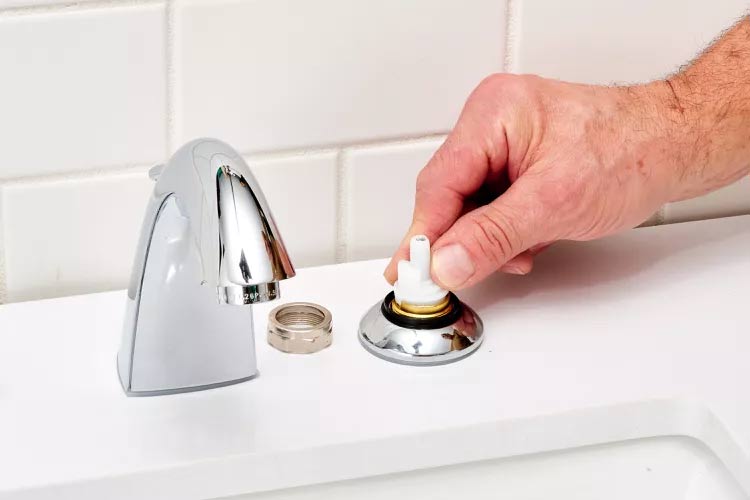
Step 5: Install new faucet
If necessary, re-tighten the small brass screw at the end of the faucet shaft. If lubricating oil is available, use your finger to apply a small amount of oil to the faucet's O-ring.
Insert the new faucet into the faucet body in the same orientation as the original faucet, aligning the top tabs of the faucet with the notches on the faucet body. Push the faucet all the way in.
Step 6: Complete the installation
Secure the cartridge with the retaining nut, tightening the nut carefully with a wrench or pliers. Do not overtighten. Replace the faucet handle and setscrew or Phillips screw as well as the decorative cap, if present.
Open the water supply valve to the faucet by turning the faucet all the way counterclockwise. Check that the faucet operates properly.
Was this article helpful?
Your feedback helps us improve.
Related Articles
 What is Bitcoin faucet? What is Bitcoin faucet?5 minutes read
 How to clean faucet heads5 minutes read
 Which type of sink and faucet is good and cheap?6 minutes read
 How to fix a leaky screen at home4 minutes read
 This way you can remove all deposits from the sink and faucet2 minutes read
 New protein discovered that could treat depression via the gut.4 minutes read
Reader Comments 0
Sign in with email or Google to join the discussion.