Table of Contents
This updated guide explains how to Open an IGS File on iPhone or iPad: Step-by-Step through clear steps, practical examples, and important checks that help prevent common errors.
Method 1 of 3:
Using Onshape
-
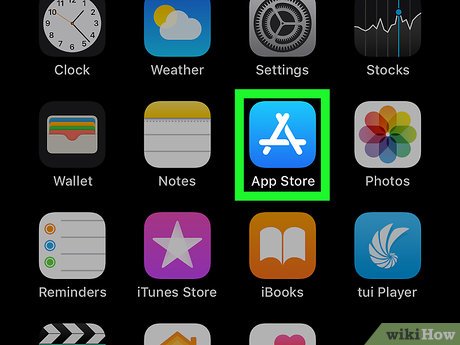 Open the App Store. The App Store is where you purchase, download, and install apps. It has a blue icon with a white capital "A". You can open the App Store by tapping the icon on your homescreen.
-
 Tap the Search tab. The Search tab is in the lower-right corner. It's below an icon that resembles a magnifying glass. This displays a page with a search bar.
 -
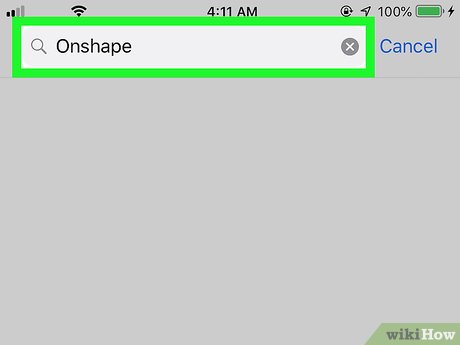 Type Onshape in the search bar. The search bar is the grey bar in the center of the screen. Typing in the search bar displays a list of search results that match your text.
 -
 Tap Onshape. When Onshape displays in the list of search results, tap it to display Onshape and similar apps in the App Store.
 -
 Tap GET next to Onshape. This downloads and installs Onshape on your iPhone or iPad. Onshape has a blue icon that says "On" in white letters.
- You may need to type your Apple ID password in order to download new apps from the App Store.
-
 Open Onshape. You can open Onshape by tapping the icon on your homescreen, or by tapping OPEN next to Onshape in the App Store.
 -
 Create a Onshape account. To create a free account, tap Create an account and then fill out the form. Provide your first and last name, company name and company email, and phone number. Check the box below the form and tap Create a free account and follow the instructions to create an account.
 -
 Sign in to Onshape. Enter the email address and password associated with your Onshape account, and tap Sign In .
 -
 Tap the icon with a bar and up-arrow. The icon with the bar and an arrow pointing up above the bar is the Import icon. It's in the lower-right corner. Tap this icon to browse files on your iPhone or iPad.
 -
 Tap Browse.... This option displays when you tap the Import button. This opens the file browser.
 -
 Tap the Browse tab. The Browse tab is the second tab at the bottom of the screen. This displays the Locations menu in a bar to the left.
 -
 Tap the location the IGS file is saved to. If the file is saved to your iPhone or iPad Storage, tap On my iPhone/iPad . If the file is saved to your iCloud drive, tap iCloud Drive . If it is saved to a different cloud-based storage service, such as Dropbox or Google Drive, tap that location.
- If the cloud-based storage service the file is saved to isn't appearing in the Locations menu, make sure you have downloaded the cloud service app from the App Store and your are signed in to the app. Then tap Edit above the Locations menu. Then tap the toggle switch next to the cloud-based service you may need to appear in the Locations menu.
-
 Navigate to the IGS file. If the IGS file is saved to a specific folder, tap the folder to view its contents. Otherwise, scroll up and down to view all files in the storage or drive location.
 -
 Tap the IGS file. This displays an import pop-up menu with two checkboxes. Check or uncheck the boxes as desired. The checkboxes are as follows.
- Import with Y axis Up (not checked by default). If the file was created in a program that has the Y axis as the up axis, check this option to keep the orientation consistent.
- Allow import of parts with faults (checked by default). If parts do not pass Onshape validation, they can still be imported with this option checked. Parts with faults are shown in red text in the features and parts list. [2]XResearch source
-
 Tap Import. It's in the lower-right corner of the Import pop-up. This imports the IGS file to your Onshape directory. Allow a few minutes for the file to import.
 -
 Tap My Onshape. It's the first option at the top of the list in the center of the screen. This displays a list of files and projects you have uploaded and saved using Onshape.
 -
 Tap the IGS file you imported. This opens the IGS file in Onshape. There are basic drawing and shape design tools in the upper-left corner of the screen.
Method 2 of 3:
Using A360
-
 Open the App Store. The App Store is where you purchase, download, and install apps. It has a blue icon with a white capital "A". You can open the App Store by tapping the icon on your homescreen.
-
 Tap the Search tab. The Search tab is in the lower-right corner. It's below an icon that resembles a magnifying glass. This displays a page with a search bar.
 -
 Type A360 in the search bar. Typing in the search bar displays a list of search results that match your text.
 -
 Tap A360. When you see A360 appear in the list of search results, tap it to display A360 and similar programs in the App Store.
 -
 Tap GET next to A360. This downloads and installs A360. A360 has an icon with a blue 3D spiral shape. A360 is a 3D file viewing app developed by Autodesk.
- You may need to type your Apple ID password in order to download new apps from the App Store.
-
 Open A360. After A360 is done downloading and installing, you can open it by tapping its icon on your homescreen, or by tapping OPEN next to A360 in the App Store.
 -
 Tap Log In. It's the blue button at the bottom of the screen. You must log in with your Autodesk account to use A360
- If you do not have an Autodesk account, click or tap here and fill out the form to create a free Autodesk account.
-
 Log in with your Autodesk account. Type the email address and password associated with your Autodesk account in the boxes on the screen.
 -
 Tap Log In. It's the white button below the log in boxes. This logs you into A360 with your Autodesk credentials.
- If you see a welcome pop-up when you log in to A360, you can swipe left on it to read the slides, or tap the X button in the upper-left corner of the pop-up to close it.
-
 Tap +. The Add button is the icon with a plus sign (+) in the upper-right corner of the app. This displays a drop-down menu for opening new files.
 -
 Tap Browse. It's the last button in the drop-down menu. It has a button with three dots (...) across from it. This opens the file browser app which you can use to browse for IGS files.
 -
 Tap the Browse tab. The Browse tap is the second tab at the bottom of the screen. It has an icon that resembles a blue folder. This displays the Locations menu in a bar to the left.
 -
 Tap the location the IGS file is saved to. If the IGS file is saved to your iPhone or iPad storage, tap On my iPhone/iPad . If the IGS file is saved to your iCloud drive, tap iCloud Drive . If the file is saved to a different cloud-based service drive, such as Google Drive or Dropbox, tap that location.
- If the cloud-based storage service the file is saved to isn't appearing in the Locations menu, make sure you have downloaded the cloud service app from the App Store and your are signed in to the app. Then tap Edit above the Locations menu. Then tap the toggle switch next to the cloud-based service you may need to appear in the Locations menu.
-
 Navigate to the IGS file. If the IGS file is saved to a specific folder, tap the folder to view its contents. Otherwise, scroll up and down to view all files in the storage location.
 -
 Tap the IGS file. This displays an import menu that allows you to import the file to your Autodesk cloud storage.
 -
 Tap a folder to save the file to. By default, there are three folders for A360. There is an "A360 Drive" folder, a folder called "Demo Project" and another folder for your first project. Tap the folder you wish to save the file to.
 -
 Tap Save. It's in the lower-right corner of the folder window. This saves the IGS file to the Autodesk cloud folder.
 -
 Tap the folder you saved the file to. Folders for A360 are displayed on the opening screen of A360. Tap the folder that you just saved the IGS file to.
 -
 Tap the IGS file. Allow a few minutes for the IGS file to load. This opens the IGS file in A360. You may have to tap the file a couple times before it loads correctly. You can use A360 to view, add comments, and add mark-ups to IGS files, but you cannot edit or add new shapes to them.
Method 3 of 3:
Using Shapr
-
 Open the App Store. The App Store is where you purchase, download, and install apps. It has a blue icon with a white capital "A". You can open the App Store by tapping the icon on your homescreen.
-
 Tap the Search tab. The Search tab is in the lower-right corner. It's below an icon that resembles a magnifying glass. This displays a page with a search bar.
 -
 Type Shapr3D in the search bar. The Search bar is the grey bar in the middle of the screen. Typing in the search bar displays a list of search results that match the text you type.
 -
 Tap shapr3d. As soon as Shapr3D appears in the list of search results, tap it to display Shapr and similar apps in the App Store.
 -
 Tap GET next to Shapr 3D. This downloads and installs the app on your iPad. Shapr: 3D Modeling CAD has an icon with two blue 3D blocks. Shapr 3D is only available for iPad.
- You may need to type your Apple ID password in order to download new apps from the App Store.
-
 Open Shapr. You can open Shapr 3D by tapping its icon on your homescreen, or by tapping OPEN next to Shapr: 3D Modeling CAD in the App Store once it is finished downloading and installing.
 -
 Tap Start designing. It's in the upper-right corner next to an icon that resembles a pencil. This opens a blank 3D canvas.
 -
 Tap the icon with a down-arrow inside of a rectangle. The Import icon is in the upper-left corner. It has an icon that resembles an arrow pointing down inside of a box. This opens the Import menu.
 -
 Tap the Filesbutton. The Files button is the first button on the left. It has an image that resembles a blue folder. This opens the File browser on iPad.
-
 Tap the Browse tab. The Browse tap is the second tab at the bottom of the screen. This displays the Locations menu in a bar to the left.
 -
 Tap the location the IGS file is saved to. If the file is saved to your iPad Storage, tap On my iPhone/iPad . If the file is saved to your iCloud drive, tap iCloud Drive . If it is saved to a different cloud-based storage service, such as Dropbox or Google Drive, tap that location.
- If the cloud-based storage service the file is saved to isn't appearing in the Locations menu, make sure you have downloaded the cloud service app from the App Store and your are signed in to the app. Then tap Edit above the Locations menu. Then tap the toggle switch next to the cloud-based service you may need to appear in the Locations menu.
-
 Navigate to the IGS file. If the IGS file is saved to a specific folder, tap the folder to view its contents. Otherwise, scroll up and down to view all files in the storage or drive location.
 -
 Tap the IGS file. This imports the file into Shapr 3D. Allow a few minutes for the file to upload. If you have an Apple Pencil, you can edit the IGS file. If you do not have an Apple Pencil, you can still view the file.
- You can have up to three design projects with a free account. A Pro account is required to open more than three files or projects. A free 14-day trial of Pro is available. Pro costs $239.99 a year, or $20 a month.
FAQ
What is the easiest way to Open an IGS File on iPhone or iPad: Step-by-Step?
Start with the requirements in this guide, then follow each step in order. Check the result after every major change so problems are easier to identify.
Can beginners follow these instructions?
Yes. The process is organized into practical steps, and you can repeat any step before moving forward.
What should I check if the method does not work?
Confirm your software or device version, permissions, settings, file format, and internet connection when the task depends on online services.
Related Articles
 How to Save Zip File to iPhone or iPad5 minutes read
 Tap: How to Open a Pptx File on Iphone or Ipad12 minutes read
 How to Add Gif on Telegram on Iphone or Ipad3 minutes read
 How to Open Mobi Files on iPhone or iPad: Step-by-Step Guide4 minutes read
 How to Search in Google Sheets on Iphone or Ipad4 minutes read
 How to Open HEIC File on Windows4 minutes read
Reader Comments 0
Sign in with email or Google to join the discussion.