How to Make a Mummy Costume
Want to scare everyone as a Mummy this Halloween? It is really easy to make a great costume from simple items that you might have lying around the house, or purchase one cheaply from a thrift store. Follow this easy how-to to find out how...
Table of Contents
Creating and Aging the Mummy Wrap
-
 Get some white fabric. Old sheets work great, but you can also purchase some cheap material at fabric stores. If you don't already have something usable, try thrift stores for bargain-priced items.
- You'll be cutting these up, obviously -- so if you need more than one, that's not a problem (as long as you have it!).
-
 Lay out the sheet of fabric. Using scissors, cut 2" to 3" (5 to 7.5 cm) slits down the side of the sheet. Don't feel the need to bust out the ruler -- if they're uneven, that's fine. Mummies look better when they're asymmetrical and full of imperfections.
 -
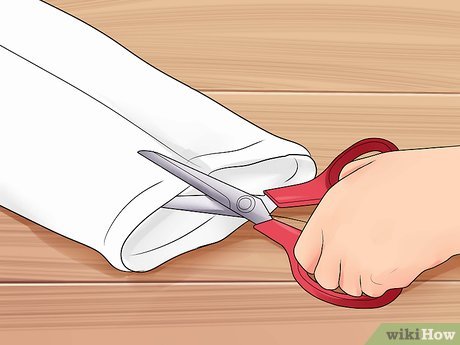
 Tear the strips from the slits along the length of the sheet. They will have a perfect mummy-style frayed edge. These become your mummy bandages.
- Again, if they don't rip perfectly, don't freak out. If you absolutely must, grab a pair of scissors and start "redirecting" the rip; then, resume tearing as normal.
-
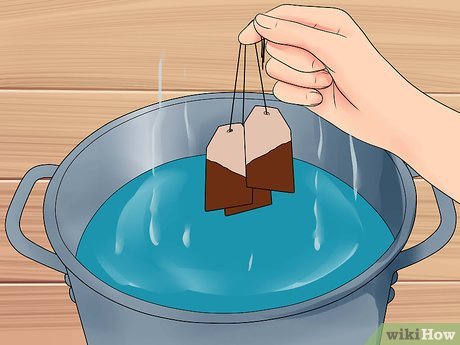 Dye the material. The look that you are aiming to achieve is the dirty, off-white, centuries-old mummy look. To get this look you'll be dying your fabric with teabags!
- Get out a large pot. Fill it 2/3 full with water and bring it to a boil.
- Add in a handful of teabags. Presumably, the larger the costume wearer, the more fabric you'll be using, and the more teabags you'll need. For a child, a few is good. For an adult, kick it up to a handful.
- If you don't have teabags, use watered down coffee.[1]
- Stir in the material and steep for about 30 minutes to an hour.
- Take the material out and let it dry. If you'd like, take some black face paint and haphazardly brush some on at random intervals. To speed up the process, throw it all in a pillowcase, tie it up, and toss it in the dryer.
- The pillowcase is necessary to avoid getting a mess all over your dryer. Don't skip this part if you choose to do it!
0 / 0
Method 1 Quiz
Why do you need to turn your shirt inside out when you're re-sewing the sleeves?
Not quite! You'll be turning the shirt right-side-out again when you wear it. As long as you sewed your mummy wrap to what would normally be the outside of the sleeve, the wrap will be visible when you put on the finished costume. Try another answer...
Yup! You want as little of the shirt as possible to be visible under your mummy wrap. If there are neat sleeve seams running perpendicular to the direction of the wrap, it breaks the illusion of the costume. Read on for another quiz question.
Close! You've got the right idea because, in general, uneven seams just add to the decrepit style of the costume. The sleeve seams are for function, not aesthetics, though, so you want them to be straighter than your wrap. Guess again!
Want more quizzes?
Keep testing yourself!Using a Sewing Machine
-
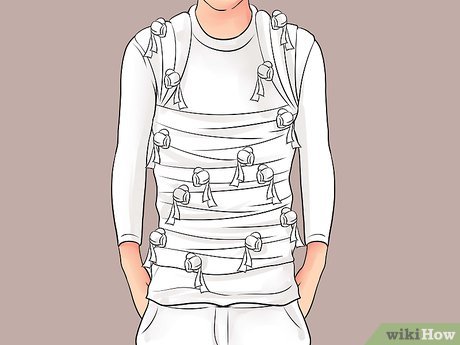
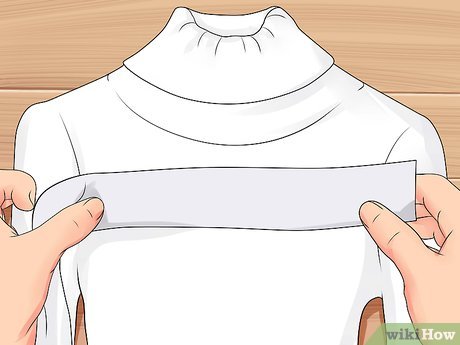 Place the bandages around the front of your white turtleneck or long-sleeved shirt. While you don't need to wrap them (they wouldn't stay in place anyway), make sure they're long enough to go around the entire shirt. Place them nonchalantly; you probably don't want to be the most well-manicured at the party. Work from the bottom up, stopping when you get to the chest area.
- Thermal underwear is probably preferable to your shirt and pants combo, looks-wise, at least. But if you don't have it around, don't want to spend the extra money, and want a two-piece outfit, this is the way to go.
-
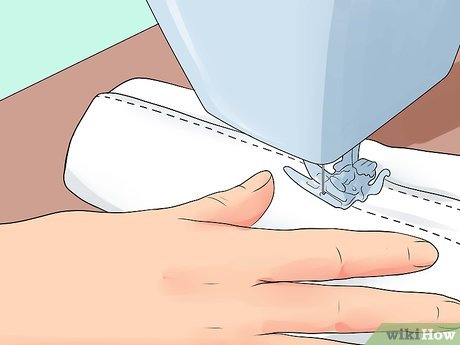
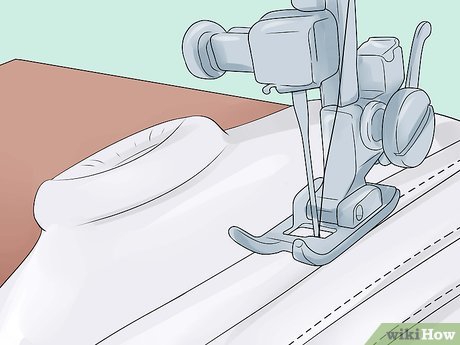 Sew the strips around all sides of your shirt. This is the most time-consuming part of making the costume. The good news is, the sloppier and less conformed that the strips are sewn on, the better. Leave some strips open, some longer. It's a mummy costume--you seriously cannot muck it up!
 -
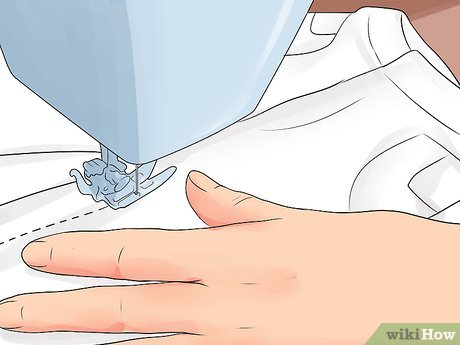
 Cut along the inner seam of each of the sleeves. This should open it up, allowing you to lay the shirt down and see the entirety of the sleeve. That way, you'll be able to sew the strips on without worrying about rotating and curving.
- So do just that! Lay the t-shirt down flat. Cut some pieces of the bandage material to make them the appropriate length for the sleeves and sew them on, layer by layer by layer. Continue sewing the rest of the strips once you have completed both sleeves.
-
 Turn the t-shirt inside out and sew the sleeves back up. It's important to sew from the inside to avoid any visible seams. You want people wondering if you raided a pyramid for this thing. (Who's to say you didn't?)
 -
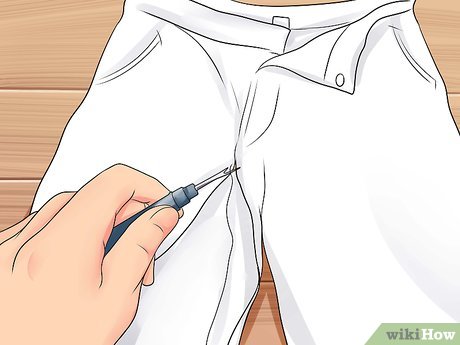 Rip up the inner seam of your pants all the way up to the crotch. Lay them flat and cut your strips out to cover them. Employ the same I'm-in-a-rush mentality you had for the shirt.
 -
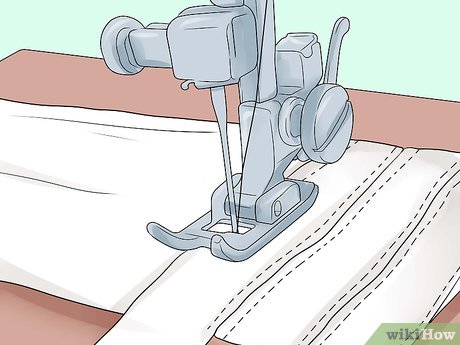 Start from the bottom and begin sewing your strips on both legs. You can stop when you get to the crotch because your shirt should cover the rest. However, a little extra mummy wrap is a good idea if you have it. A stiff breeze or a limbo contest could present itself, after all.
 -
 Turn the pants inside out and sew up the legs. If the seam isn't perfect, great! Leave it. Who's gonna see it anyway?
 -
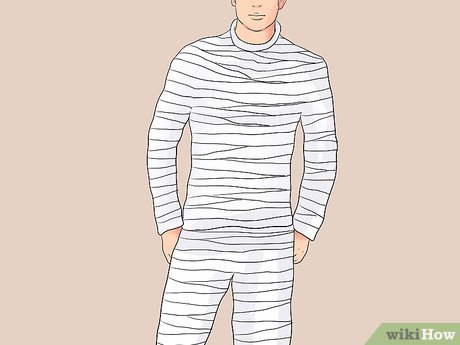 Put on your outfit. Ahh! Oh, that's just you in the mirror. Phew. Now what to do with your hands and feet? A few more strips here, a few more strips there (around a pair of gloves and socks or two) and you're set! Scroll to the bottom for tips on what to do with your noggin.
Using Knots
-
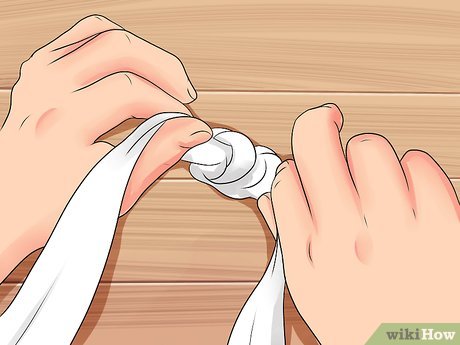 Tie four or five strips together. The knots in the end will actually add texture to your mummy and look purposeful -- not like you took the easy way out!
 -
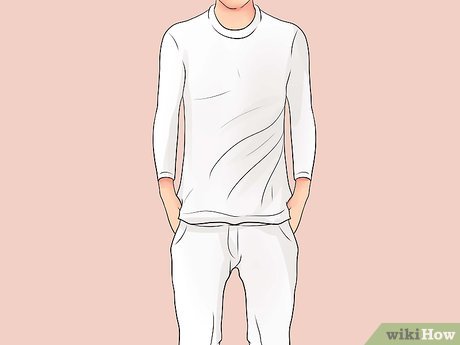 Put on your long underwear or white base outfit. Any combination of white long-sleeved something and white pair of pants will suit this costume. However, something bulky (like cargo pants) isn't ideal for your mummy silhouette.
- Don't forget those thick wool socks!
-
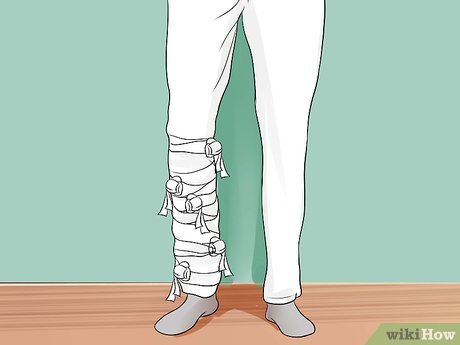 Start wrapping up a leg. You can either use overlapping to secure the end, or just add another tie (since you already have loads, it'll blend right in). Go in straight lines, criss-cross, and however else you need to cover every inch. Repeat for the other leg and hips. When you hit the end of your strip, either tie on another one, tie it to an already-wrapped section, or just tuck it in.
- With material from one leg, wrap around the pelvis. This can be your first or second leg. But don't wrap above the waistline of the pants -- those glasses of Halloween punch will be no match for even the steeliest of bladders. What a nightmare.
-
 Wrap up from the waist and over the shoulders. This is easiest if you form an X over the sternum and wrap strap-like strips over the shoulders. A fair amount of overlap will be needed to cover every inch. Again, if you run out, just tie on another strip or tie off the one you're using and start anew.
 -
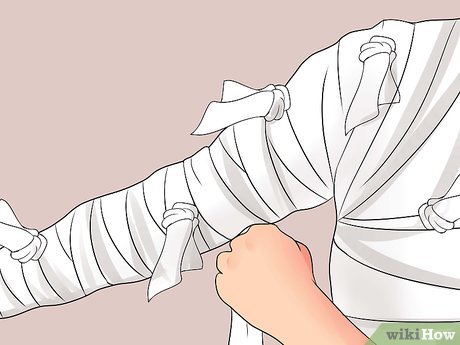 Wrap up the arms. If you've ever wrapped a wrist for boxing or other sport, use the same artful weaving between the fingers. If you haven't...well, weave the material between the fingers, around the base of the thumb, and onto the wrist, over and over. In case you run out, start at the fingers and work your way up to the shoulder.
0 / 0
Method 3 Quiz
True or False: When you're wrapping the bottom half of your costume, you should wrap above the waistband of your pants.
Nope! Leaving no gap between the top and bottom of your mummy costume will definitely make it more authentic-looking. However, that will also make it super-difficult to remove your pants. You don't want to prevent yourself from using the bathroom all night. Try again...
Yes! You should only wrap the bottom half of your costume up to the waistband of your pants. If you don't, you'll make it very hard for you to pull your pants down to use the restroom, and that will make your Halloween a lot less fun. Read on for another quiz question.
Want more quizzes?
Keep testing yourself!Adding the Final Touches
-
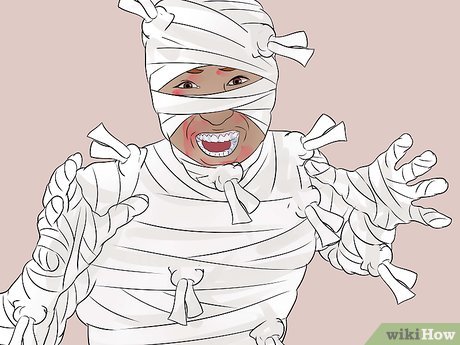
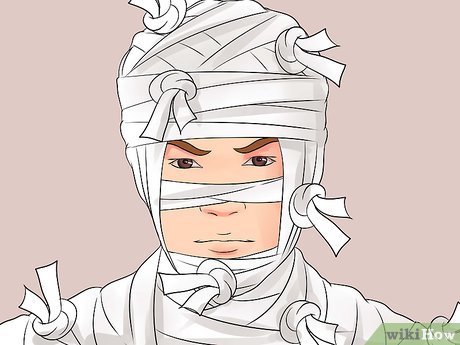 Cover your face with excess bandage material. The freakier you want to be, the more your face should be covered. If you're going for the cute, innocuous, smiling kind of mummy, just wrap from your chin, over your head, and a bit on your forehead. If your aim is to scare all the neighbors, only leave space to see and breathe.
- Rope a friend into doing this part for you. You'll be able to get it on, but tying it securely will prove a task, especially if you have limited vision.
- If you have a ski mask and want your entire face covered, you can use it as a base for your head wrap.
- A safety pin, bobby pin, or other securing device may prove useful. Just tuck it into a different layer to keep it from being exposed.
-
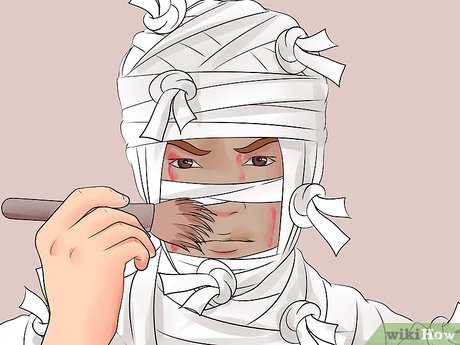 If your face is visible, add some makeup. You want sunken eyes and hollow cheeks. A bit of white as a base and black around your cheekbones and under your eyes will give you a more ghastly feel. Add some baby powder on your body for the ancient mummy effect and you're ready!
- Use gel around a stain or on your face to make your mummy globby and rotting-looking. Pull some hair out from a place or two and mess it up to look truly nightmarish.[2]
-
 Go trick or treating in your new disguise. Or sit on your porch as the kiddies come up, be very still, and jump at them when they're least expecting it! Ha HA!
0 / 0
Method 4 Quiz
If you want to cover your entire face efficiently, it's a good idea to...
Close! It'll definitely be easier to have someone else tie mummy wrap around your head than it would be to do it yourself. They'll have a better range of both vision and movement. This isn't the optimal way to cover your whole face, though. There's a better option out there!
Almost! Because you can't sew strips of wrap directly to your head, a safety pin can prove invaluable - just make sure it's not visible from the outside! Even then, though, there's a better way to make sure your whole face is wrapped up. Try another answer...
Right! You can wrap and sew a ski mask just like you can other articles of clothing. That will give you a headpiece that covers your whole face except for your mouth and eyes (which you can darken with makeup), and is a cinch to take on and off! Read on for another quiz question.
Want more quizzes?
Keep testing yourself!Was this article helpful?
Your feedback helps us improve.
Related Articles
 How to Make a Costume9 minutes read
 How to Make a Halloween Costume9 minutes read
 How to Make a Nun Costume11 minutes read
 7 horrifying facts about ancient mummies3 minutes read
 The mystery of the dead bodies for thousands of years remains intact4 minutes read
 How to Make a Quick Greek Goddess Costume8 minutes read
Reader Comments 0
Sign in with email or Google to join the discussion.