How to Add Water to Your Map in Hammer Editor
So you've made your map, but you feel like it's a little dry? Water can add some visual flair to your map as well as interesting gameplay possibilities. Here's how you can add water to your hammer maps. Simple bodies of water include...
Table of Contents
Method 1 of 2:
Simple Bodies of Water
Simple bodies of water include things such as pools, things with simple geometric shapes.
-
 Select the block tool (located by default on the left-hand side of your hammer window).
 -
 Make sure in your objects toolbar is configured appropriately (categories is set to primitives and object is set to an appropriate shape), and your texture is set to tools/nodraw.
 -
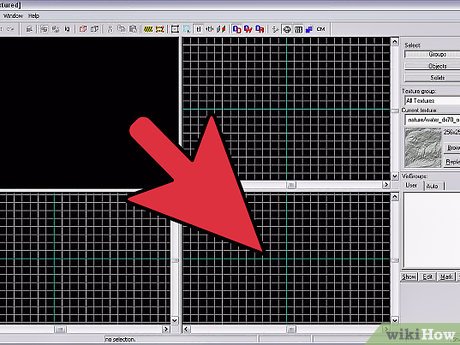 In one of the three 2D grid views, click and drag a box. Make sure it is the right size for your body of water in the other two 2D views, then press enter to create your block.
 -
 Now to turn this block into water, select the toggle texture application tool, located in the left-hand toolbar directly under the block tool and the face edit sheet window should appear.
 -
 Hit browse and filter for water, select the water texture you want, then right click the top face of the newly created block to apply the water texture to it.
 -
 Now you have to tie a cubemap to your water, which will create the textures that the water reflects. Select the entity tool and in the objects toolbar set the category to entities and the object to env_cubemap.
 -
 In the 3D view, left click somewhere in the middle of your body of water to create the cubemap entity.
 -
 With the env_cubemap selected, press alt+enter to open the object properties dialogue. From here select brush faces then press pick and left-click the top face of your water in the 3D view. Your cubemap is now tied to the surface of the water.
 -
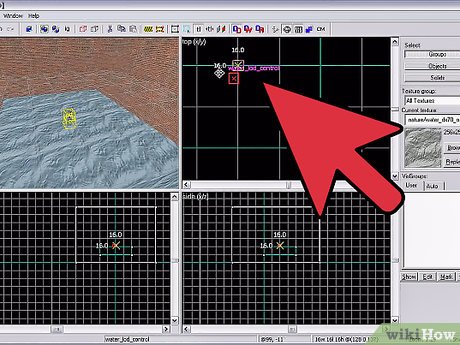
 Finally, you need to create a "water_lod_control". This entity controls when the water in your map becomes replaced with "cheaper" water depending on how far you are from the water. The process is the same as steps 6 and 7, but instead of env_cubemap, select water_lod_control in the objects menu.
 -
 Now press F9 to compile and run your map and enjoy your fancy new water!
Method 2 of 2:
Complex, or Natural Bodies of Water
Creating more natural looking bodies of water in hammer requires a few different steps, and a few of the same. You would use this tutorial in for things like streams, ponds, puddles, and lakes.
-
 This time start by selecting the texture application tool, and left clicking the surface of the dirt. Then switch from the materials tab, to the displacement tab in the face edit sheet window.
 -
 Click the create button and the displacement create window will pop up. Select a power of 4 and click OK.
 -
 Next select paint geometry and the displacement paint geometry window will open. This tool lets you create bumps and dips in the face of your object. Distance relates to how deep or high these bumps and dips will be and the radius relates to the size of your brush.
 -
 In the 3D view, "paint" dips and bumps onto your surface. Right click lowers the height of the vertex you are on and left click raises it. Keep digging and raising your ground until you have what looks like a natural pit.
 -
 Like in the first steps of creating a simple body of water, select the block tool, set the texture to nodraw, and we will select block in the objects menu of the object toolbar. Then click and drag a box onto one of the 2D planes and make sure it is the right size to completely cover the pit on all three planes, then press enter to create the new block.
 -
 Now select the toggle texture application tool, select a water texture in the face edit sheet window, and right click the top face of your new block to apply the water texture.
 -
 Select the entity tool and set the object to env_cubemap. Left click on the surface of the water to place your cubemap in the water's surface. Then press alt+enter to open the object properties dialogue and tie the cubemap to the water's surface.
 -
 If you don't already have one, create an water_lod_control entity by selecting the object section of the object toolbar to water_lod_control and placing it over the water. Remember, you only need one of these in your maps, creating more than one will cause errors.
 - Now press F9 to compile and run your map and admire your puddle.
4 ★ | 3 Vote
- Should a battery drill be used with a hammer mode?
- Instructions for using water swab machine
- Download Photo! Editor 1.1: Multifunctional photo editor
- Top 4 best selling hot and cold water plants today
- Top 5 best water toothpick machines today
- Water will become 'poison' if taken at 5 times later
- Get water into your ear after swimming properly according to expert's instructions
- Block access to Registry Editor on Windows 10/8/7
- What is the best RO water purifier?
- Should I use a water cleaner?
MORE LIKE THIS
- Detailed instructions on how to connect a printer to a Windows laptop and MacBook.
- How to Improve Video Quality
- How to Upload an HD Video to YouTube
- How to Block Yahoo!
- How to Recover Data from Memory Cards
- How to Install a Network Printer
- How to Record Text to Speech on PC or Mac
- How to Print a Webpage
- How to Reset Your Computer
- How to Adjust Colors on an LCD Monitor
-
 What is IP54? A detailed explanation of its dust and water resistance capabilities.
-
What is the IP water resistance standard? A guide to finding the correct information.
-
How much electricity and water do AI data centers consume? The truth behind the controversies.
-
Why do clothes shrink when washed? How can this be resolved?
-
The world's most terrifying lakes.
-
Drinks that effectively detoxify the liver.
 What is IP54? A detailed explanation of its dust and water resistance capabilities.
 What is the IP water resistance standard? A guide to finding the correct information.
 How much electricity and water do AI data centers consume? The truth behind the controversies.
 Why do clothes shrink when washed? How can this be resolved?
 The world's most terrifying lakes.
 Drinks that effectively detoxify the liver.
-
 Free Tools
-
Application
-
Web Email
-
Website - Blog
-
Web browser
-
Support Download - Upload
-
Software conversion
-
Social Network
-
Simulator software
-
Online payment
-
Office information
-
Music Software
-
Map and Positioning
-
Installation - Uninstall
-
Graphic design
-
Free - Discount
-
Email reader
-
Edit video
-
Edit photo
-
Compress and Decompress
-
Chat, Text, Call
-
Archive - Share
-
-
System
-
Mac OS X
-
Hardware
-
Game
-
Tech info
-
Technology
-
Science
-
Life
-
Electric
-
Program
-
Mobile