GeForce Experience has problems finding games on Windows: Here's how to fix it
If you like PC gaming, you might know about GeForce Experience. It is an all-in-one tool for NVIDIA graphics card users. This software allows you to optimize all your games with one click from its control panel.
If for some reason you can't find your game in GeForce Experience, don't worry. Keep reading to learn how to fix failed GeForce Experience scanning on Windows.
What causes GeForce Experience scanning problems?
There are many reasons why your game may not show up in GeForce Experience. Some main causes of this error include outdated NVIDIA graphics card drivers, corrupted game files, insufficient permissions, etc.
Regardless of the reason, this problem will prevent you from exploiting the full potential of your graphics card! So, the article recommends that you try the fixes mentioned below immediately.
How to fix GeForce Experience error when finding games on Windows
1. Add games or apps manually
The program relies on a database of games supported by NVIDIA GeForce Experience for scanning. GeForce Experience can only optimize officially supported games.
When the application cannot find a currently installed game in the database, the application will return a "Scanning Failed" error. Luckily, you can manually add games or apps to GeForce Experience to solve this problem.
Follow these steps to manually add a game or app for optimization:
1. Click the toggle button next to your account name and select Account .
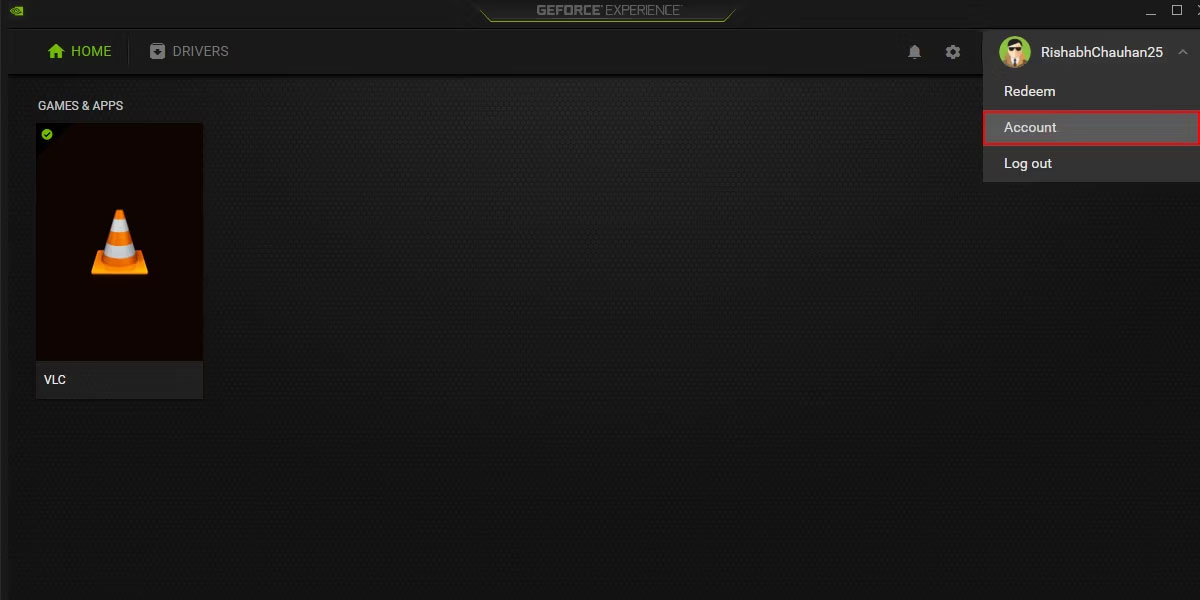
2. Click GAMES & APPS > ADD to open Windows File Explorer.
3. Select the folder where you installed the game or application and click Select Folder .
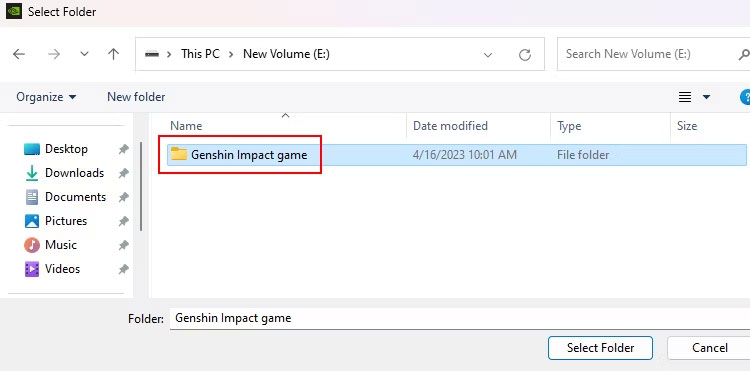
4. Click SCAN NOW to have GeForce Experience add your selected game to the dashboard.
This is a simple and quick way to manually add your games to GeForce Experience. If this method doesn't work, consider the advanced solutions below.
2. Restart the NVIDIA service
You can understand the GeForce Experience service as an essential process (or task) that helps the program run correctly. When this service fails or is disabled, you may not be able to use most of its features.
To fix this, you can restart services related to GeForce Experience. This will allow the related services to start again and resolve any issues that may have caused the error.
Here are some steps to help you restart GeForce Experience Service on Windows:
1. Press the Win + R key combination to open the Run dialog box.
2. Type services.msc into the dialog box and press Enter. This will open the Services app, where you can restart/enable/disable services and do more.
3. Find the NVIDIA Display Container LS service in the service list.
4. Right-click on it and select the Restart option from the context menu.
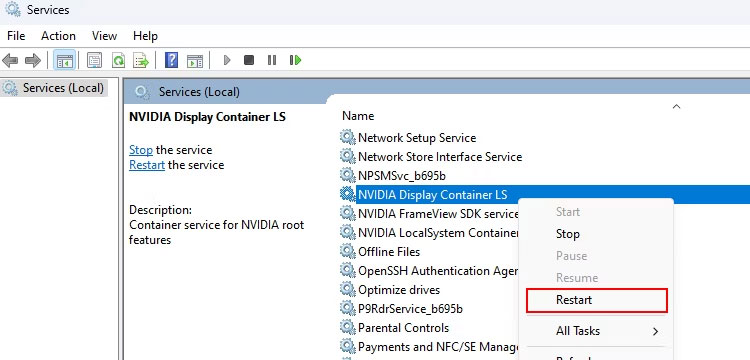
5. Perform the same procedure, i.e. restart the service with NVIDIA LocalSystem Container and Cryptographic Services .
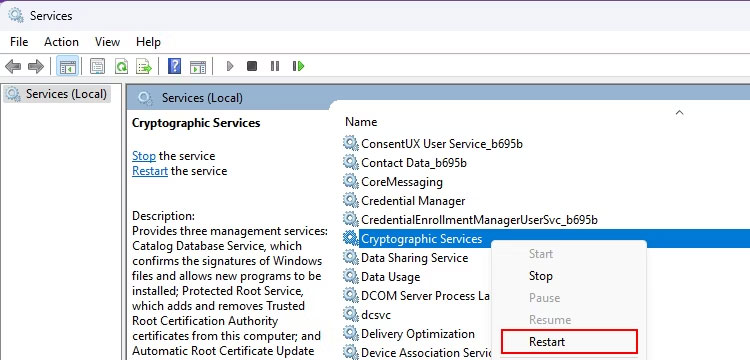
6. Once done, make sure to restart your PC once.
This will force all necessary services to restart and fix runtime errors.
Please note that restarting Windows services is not the only fix! If you're still having trouble scanning your game, move on to trying some advanced troubleshooting.
3. Run GeForce Experience with admin rights
Running GeForce Experience with admin rights can help you troubleshoot scanning-related issues. Running an application in admin mode allows the program to run with system-level permissions and access necessary system resources without restriction.
Find the GeForce Experience shortcut on the desktop and right-click on it. Click on the Run as administrator option from the context menu to launch it with admin rights.
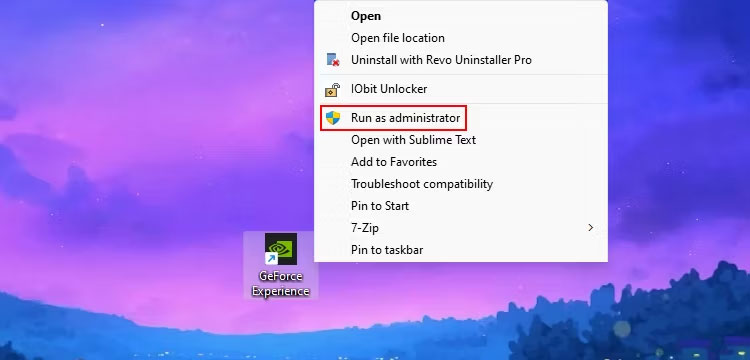
Note that you must be careful when running programs with admin rights. This can cause security issues if the program is affected by any malware.
Note : The article never recommends running all programs in admin mode! This is to avoid granting administrative privileges to programs that could misuse permissions and affect your system.
4. Repair missing or damaged registry entries
In some cases, missing registry entries can also cause GeForce Experience scans to fail.
If you have never heard of registry entries before, editing them can be quite risky. As a precaution, you should create a restore point on Windows before attempting any registry modifications. Restore points are useful if you want to revert modifications you made to the system.
Now that you have set up a restore point, let's see how to fix corrupted Windows registry entries. Remember to follow the instructions provided carefully and always double check what you do to avoid any problems.
5. Delete the NVIDIA AppData folder
On Windows, there is a folder named AppData that stores your specific data related to applications, such as settings, temporary files, and cache.
If any Windows program is causing the problem, deleting that program's AppData folder may help. This is because outdated or corrupt data in the folder can disrupt the regular operation of the application.
Here's how you can delete NVIDIA's AppData folder on Windows:
1. Press the keyboard shortcut Win + E to display Windows File Explorer.
2. Type %LocalAppData% on its navigation bar and press Enter.
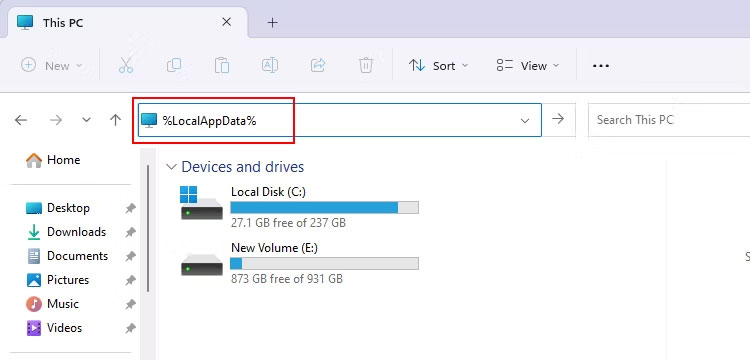
3. Search for the NVIDIA Corporation folder and delete it. You can select NVIDIA Corporation and press Shift + Del to delete the folder permanently.
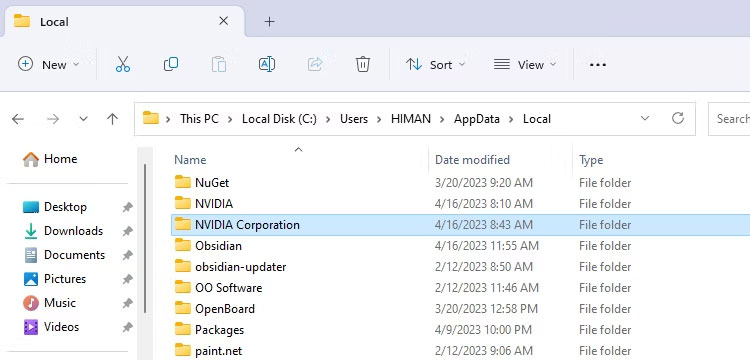
4. After you delete the folder, open GeForce Experience and recheck the scanning problem.
Note : The article recommends that you be very careful when deleting files from the AppData folder. Deleting the wrong file can lead to other problems that can get you into more serious trouble.
6. Reinstall GeForce Experience on the desktop
No matter how big the Windows problem is, reinstalling the affected program will help in most cases.
You can try reinstalling GeForce Experience and check for scanning issues on it. Reinstalling the program will replace any damaged or missing files with a new copy, which can often resolve scanning problems.
Here are the steps you need to take to reinstall GeForce Experience:
1. Before reinstalling, you should uninstall GeForce Experience properly. You can use one of the ways to remove software on Windows.
2. Visit the official NVIDIA GeForce Experience website and click the Download Now button .
3. Double-click the installer file you just downloaded.
4. On the NVIDIA Installer window , click AGREE AND INSTALL .
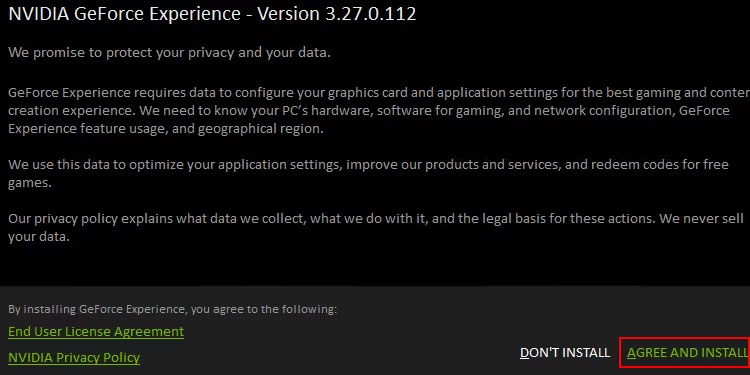
5. Follow the on-screen instructions to set up the program on your desktop.
6. Once the setup process is finished, you can click on the three-dot menu, then click Scan for games & apps . This will scan your entire Windows system for installed games or applications to optimize.
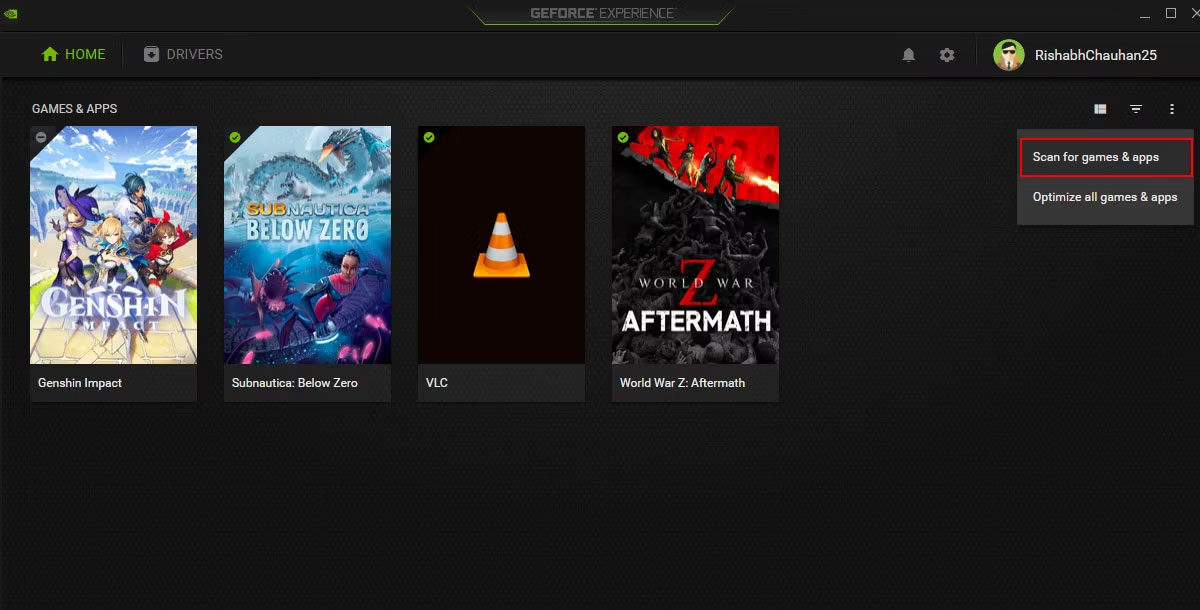
If the scanning problem is related to corrupt software files, this reinstallation process will resolve the problem.
You should read it
- ★ How to turn off the GeForce Experience notification when playing a game
- ★ Fix NVIDIA GeForce Experience 0x0003 error on Windows 10
- ★ GeForce NOW cloud gaming service is out of beta, experience it now!
- ★ How to automatically overclock Nvidia GPU with GeForce Experience Performance Tuning tool
- ★ Nvidia will release a new software solution, replacing Nvidia Control Panel and GeForce Experience