Table of Contents
This article provides a clear overview of DNS Goolge — Switch Google DNS 8.8.8.8 8.8.4.4 to Get Into, with the main facts, useful context, and practical details organized for easy reading.

DNS Google is one of the best DNS today and is used by many people with high speed and stability, in case of fiber optic breaks or errors related to google services. Especially when using Google DNS you can also access blocked websites, so how to use Google DNS? Please follow the instructions below.
1. How to Change DNS on Windows 10
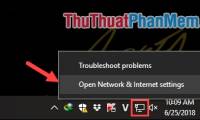
Step 1: Right-click the internet connection icon and then select Open Network & Internet settings

Step 2: The setting window appears, scroll down and select Network and Sharing Center

Step 3 : click the name of the Connections .
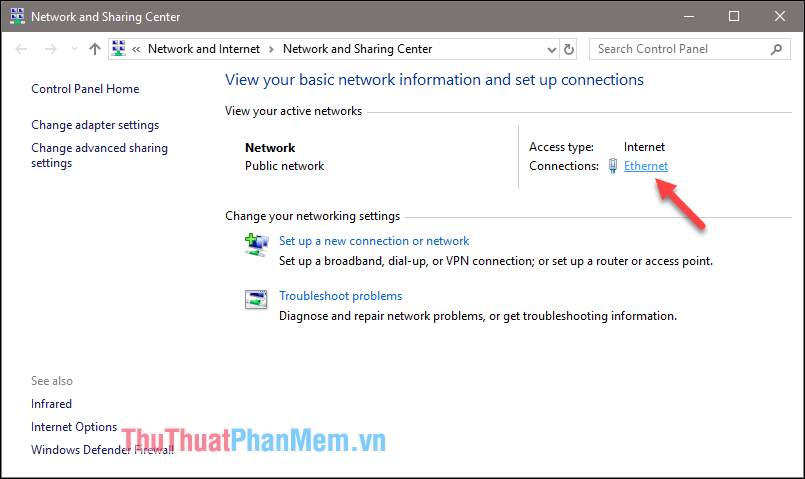
Step 4 : A new window appears, select Properties
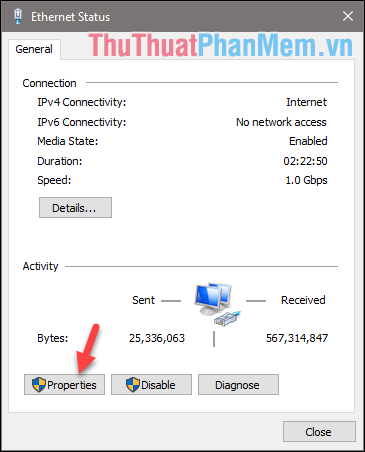
Step 5 : Double click Internet Protocol Version 4 (TCP / Ipv4)
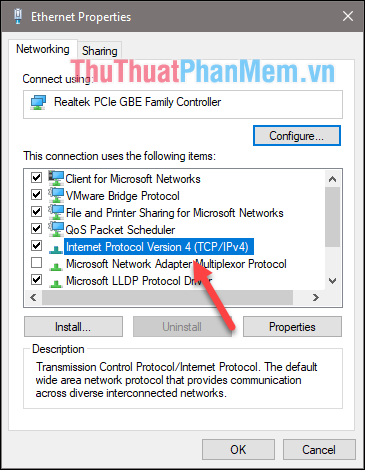
Step 6 : Click the box Use the following DNS server addresses
Then enter Google DNS:
8. 8. 8. 8
8. 8. 4. 4
Finally click OK to save is finished.

2. How to Change DNS on Windows 7
Step 1 : Right-click the network connection icon and select Open Network and Sharing Center
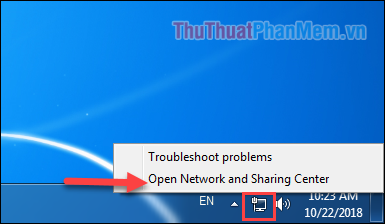
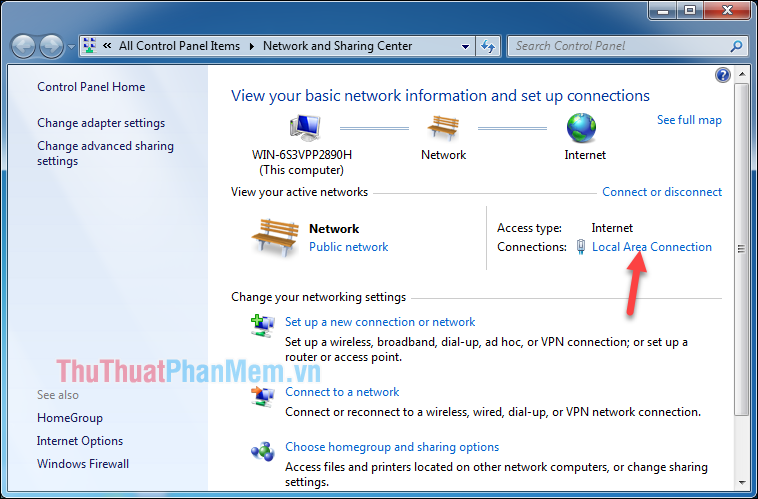
Step 2 : A new window appears, select the name of the section Connections
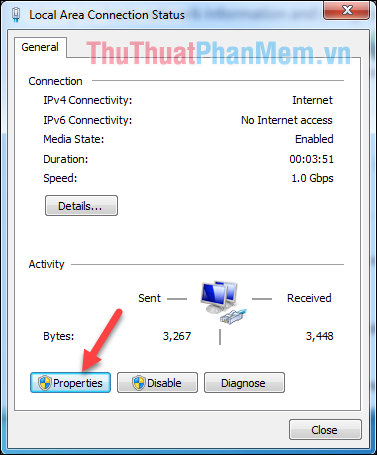
Step 3 : In the next window select Properties
Step 4 : Double click Internet Protocol Version 4 (TCP / Ipv4)

Step 5 : click the box Use the following DNS server addresses
Then enter Google DNS:
8. 8. 8. 8
8. 8. 4. 4
Finally click OK to save is finished.

So we have successfully changed Google DNS with just a few simple steps, hoping this method will help to increase the surfing speed for you. Good luck!
FAQ
What is the main focus of DNS Goolge — Switch Google DNS 8.8.8.8 8.8.4.4 to Get Into?
The article explains the most important facts, context, and practical details related to DNS Goolge — Switch Google DNS 8.8.8.8 8.8.4.4 to Get Into.
Who may find this information useful?
It is useful for readers who want a clear overview, practical context, and a better understanding of the subject.
What should readers verify before taking action?
Check current product versions, official requirements, regional availability, and any details that may have changed since the original publication.
Related Articles
 8 Power Boosting Tools for Google+5 minutes read
 Google DNS — Change Google DNS 8.8.8.8 8.8.4.4 to Access the2 minutes read
 Google Instructs iOS Users to Switch to Android 5.03 minutes read
 Fees and How to Switch Networks Keep the Number of the Network5 minutes read
 How to Turn an Old Router into a Switch5 minutes read
 Why Should You Switch from Chrome to Chromium to Make Your PC Run: Key Facts6 minutes read
Reader Comments 0
Sign in with email or Google to join the discussion.