Using a digital camera for beginners
Using a digital camera for the first time is probably a bit confusing because you don't know where to start and what to do with this brand new camera. The first thing you should do is review the manual to explore the digital camera's functions and become familiar with how to use the included accessories.
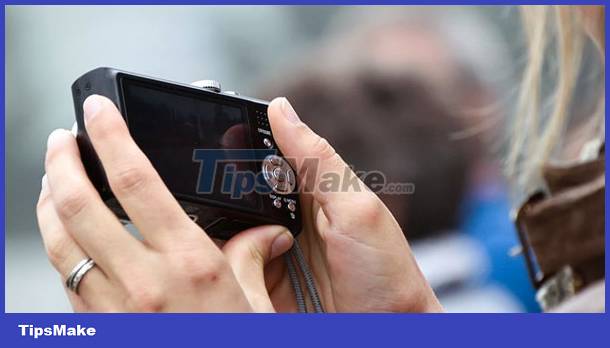 Using a digital camera for beginners
Here are some basic guidelines for newbies to digital cameras
first
See the manual for the digital camera
First, you need to check that there are enough accessories included with the digital camera, a list of these accessories is printed on the box or in the manual that comes with it. The usual accessories that come with the machine are a strap, battery and battery charger, a USB cord for connecting to a computer, an AV cord for connecting to a TV, a CD/DVD containing a program to support the transfer. images into the computer and image processing, manuals, .
 See the manual and check the accessories that came with the digital camera
Next, see the manual for more information about the machine, the location and function of the buttons, etc. If you don't have the manual, you should search the Internet for the keyword name and number of the device. camera.
2
Preparing the Batteries and Charging the Digital Cameras
 Insert the Battery into the charger to charge the Digital Camera Battery
You can now insert the Battery into the charger to charge it if the digital camera uses a Rechargeable Battery, if a Li-ion Battery is used, the charging time may take about 2 to 3 hours, while the Ni-MH Rechargeable Battery type will Charging time may be longer. If the camera uses a regular primary battery, no charging is required.
Some cameras allow charging the battery directly on the camera, please see the accompanying manual for instructions on how to use it.
3
Attach the wrist strap to the digital camera
 Attach the wrist strap to the digital camera
If you want, you can attach the strap to the camera by inserting the small end of the strap into the hole on the camera and then threading the larger end through the small loop to form a noose.
4
Insert a memory card into the digital camera
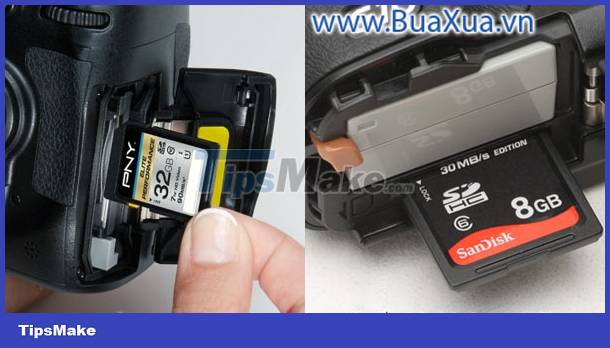 Insert a memory card into the digital camera
Now find the location of the memory card slot to insert it. The location of the memory card slot is usually on the side or below and has a cover with a memory card symbol. Some cameras have a memory card slot located in the same place as the Battery slot. Insert the memory card into the slot in the correct direction and then gently press the memory card in.
- If you insert it in the wrong direction, you will not be able to push the memory card in. If inserted correctly, the memory card will be retained.
- When you want to remove the memory card from the slot, you just need to gently press the memory card, it will pop out automatically.
5
Insert the Battery into the Digital Camera
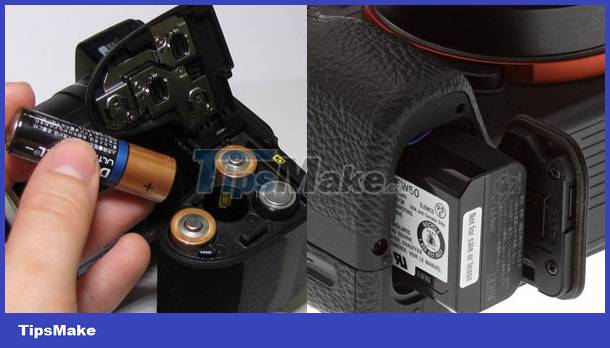 Insert the Battery into the Digital Camera
Once the Battery has been charged, insert it into the camera in the correct direction. If using a Li-ion battery, when it is not in the right direction, you will not be able to install it. If using a primary battery, you must pay attention to the polarity +and - the pole -of the battery will be at the top of the spring.
Basic operations of using digital cameras
first
How to turn a digital camera on and off
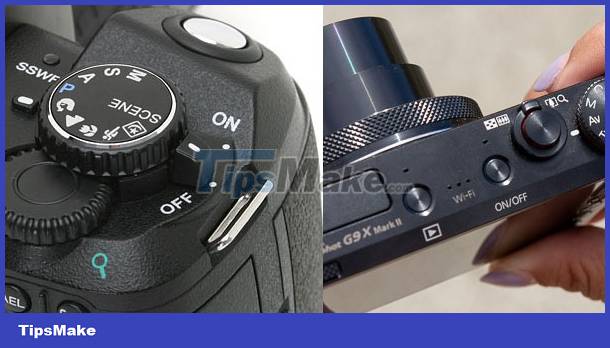 How to turn a digital camera on and off
On digital cameras, there will be a button used to turn the camera on or off. This button can be a push button or a rotary button, switch and have the symbol On/Off
When you want to turn on the device, press this button or rotate it to the position Onif the machine uses a rotary button. When the camera is turned on, an indicator light will appear, the lens hood will open and the lens will be exposed.
When you want to turn off the camera, press the button On/Offone more time or rotate it to the position Off if the camera uses the rotate button. When the camera is turned off, the indicator light will turn off, the lens will retract, and the lens hood will close.
Usually digital cameras will have a function to automatically turn off temporarily if you do not use them after a period of time. When you want to use it again, just press the shutter button, the camera will work again.
Note that you should not touch the camera lens with your hands to avoid contaminating the glass.
2
Setting the date and time for digital cameras
 Setting the date and time for digital cameras
The first time you turn on the digital camera, a screen will appear asking you to set the date and time for the camera. Please use the navigation keys on the camera to change the date and time and then press the button Ok/Enterto agree.
If your camera is equipped with a touch screen, you can touch the buttons on the screen to make adjustments.
3
How to hold a digital camera
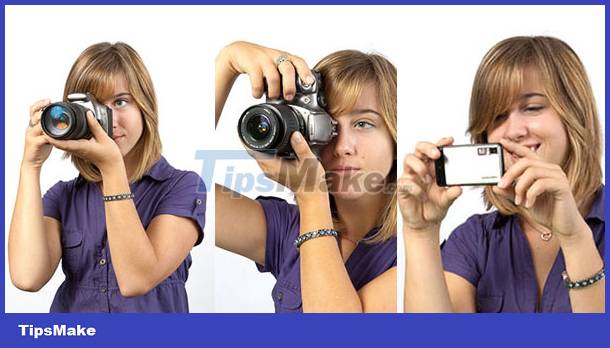 How to hold a digital camera
Depending on the size of the device, you will have different ways of holding the device, but the most standard way is to hold the device with your right hand, palm close to the body on the side of the machine, fingers holding the front of the device, fingers The pointer is on the shutter button and the thumb is in the Zoom button - the zoom in and out button and is used to press the controls on the back of the camera.
The left hand is mainly used to support the machine and use some buttons on the left. If the camera has a function to rotate the lens to Zoom or focus, you also use your left hand to control.
Be careful not to cover the flash or lens with your hand.
4
How to shoot with a digital camera
Once you've turned on the camera, check to make sure the status button is in photo or auto shooting mode. Auto We'll start taking pictures with auto mode and you just need to point and shoot.
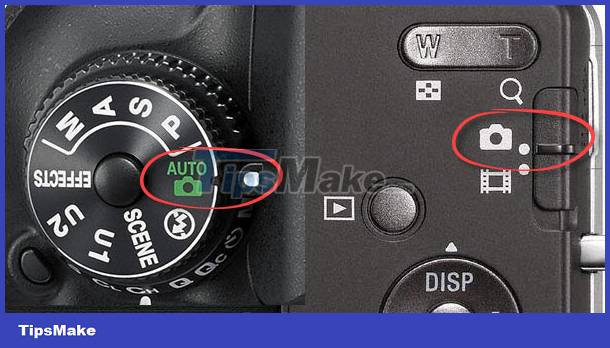 Digital camera self-timer or photo mode
Next, hold the camera in the correct position as instructed above and point it towards the subject you want to capture. Look at the screen to make sure you see everything you want to capture in it.
Use the Zoom function to zoom in or out of the photo instead of moving closer or further away. If the Zoom button is in front, take your index finger off the shutter button to adjust the Zoom button. If the Zoom button is on the back, use your thumb to adjust it. After you are satisfied with the frame of the photo you want to capture, place your index finger back to the position of the shutter button.
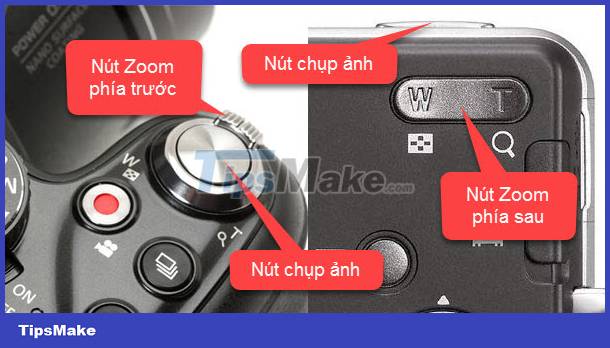 Zoom button and shutter button on digital camera
On the Zoom button with the symbol W - Wide angle means wide angle, the subject being taken will be farther and smaller. The symbol T - Telephoto means that the image is magnified, the subject being taken will be closer and larger.
Photo manipulation always includes two steps that are focus and capture. Now gently press the shutter button about half way down and you will see it is blocked, hold the shutter button in this position for the camera to conduct autofocus - Auto Focus. After focusing is complete, the camera will make a sound and an indicator light or indicator will appear on the screen to let you know. At this point, keep pressing the shutter button all the way down to take a photo.
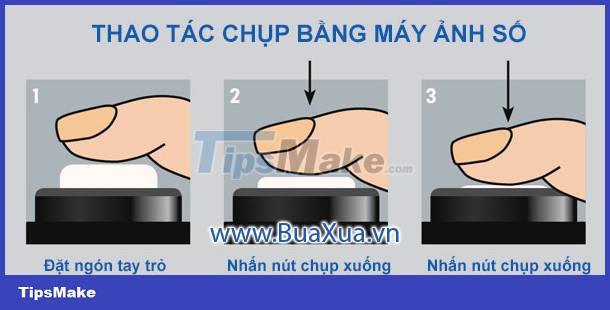 Shooting with a digital camera
After pressing the shutter button you will hear a sound indicating that the photo is being taken, hold the shutter button and the camera still until the captured image is displayed on the screen, then release the shutter button.
- If the camera fails to focus, you must release the shutter button and perform the focus operation again. If you still try to shoot without focusing, the shot will be blurred.
- During the shooting process, if you shake your hand or shake your body, the photo will also be blurred. So practice so that you only move your index finger to press the shutter button while still keeping your other body parts steady.
5
Review photos taken
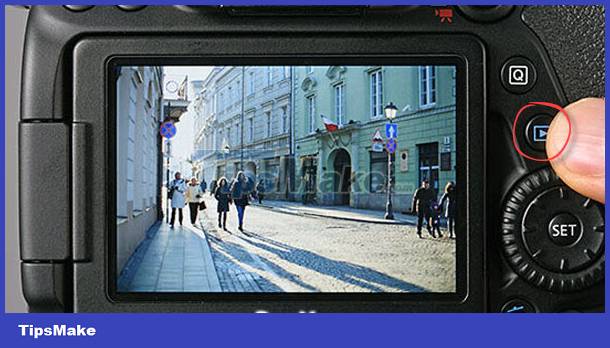 Reviewing photos taken on a digital camera
After taking the picture, the photo will appear on the screen for a few seconds, now you can see to evaluate how the picture is taken. If you can't watch or want to review the photos you've taken, press the button Play/Viewor switch the status button to the image viewing position.
While viewing the image, you can use the left and right arrow buttons to move the image and press the Zoom button to zoom in and out of the image. The button with the trash can icon - Delete is used to delete the image if you want.
Photos after shooting will be saved in the memory card, you can turn off the device and remove the memory card to print photos or copy photos to your computer at will. See instructions on how to transfer photos from a digital camera to a computer
Above are the basic operations of using digital cameras for beginners only, please see that digital cameras have many shooting modes and other functions waiting for you to discover.