Steps to Install Driver for Lenovo ThinkPad Laptop with System Update
Use Lenovo System Update to install drivers for extremely standard ThinkPad laptops. Instructions for installing drivers for Lenovo computers
Table of Contents
In this article, I will share with you how to install the most standard Driver for Lenovo Thinkpad laptops using the System Update tool provided by Lenovo for users.
Yes ! There are many ways to install drivers for computers, but to install the most standard drivers, 100% compatible with computers, only the company's tools can do it.
If you own a Lenovo Thinkpad laptop, this will be a great article for you.
1. What can the Lenovo System Update tool do?
First, I will talk a little bit about this Lenovo System Update tool, the advantages that we can easily see are:
- Reduce time & effort for finding drivers.
- Support to install the most standard driver for Laptop, thereby providing great performance when working.
- Support updating the latest driver for your computer system.
- Support BIOS update, reduce the risk of errors when upgrading. But it is recommended that you do not update the BIOS with other updates.
Lenovo System Update supports system updates of:
- All ThinkPad
- All ThinkCentre
- All ThinkStation
- Lenovo V, B, K, E-Series
2. Download the latest Lenovo System Update tool
Please visit this link or here to download the version suitable for the operating system you are using.
Tips: Note: Before using System Update to update Driver, please install Microsoft .NET Framework 4.0 or higher version so that it supports the update (for Windows 7/8/8.1/10).
If you are using Windows 2000, XP or Vista, please install Microsoft .NET Framework version 1.1 SP1 or Microsoft .NET Framework 2.0 (link above).
In addition, to make it easier to remember, you can go to Google and search with the keyword lenovo system update and choose the first result to download the Lenovo System Update tool. 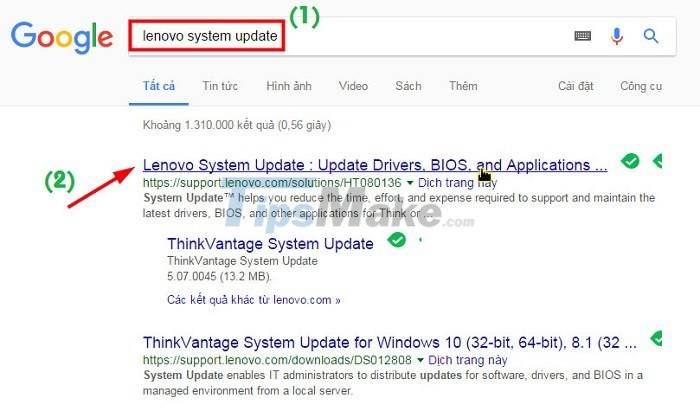
3. Install driver for Lenovo Thinkpad Laptop with Lenovo System Update tool
Step 1: After the software arrives => install it on your computer like other software.
In this article, I will do it on Windows 10 operating system, after the installation is complete, click the Start button => search with the keyword system update => click open the System Update software to start using.

Step 2: In the next window, select Next.

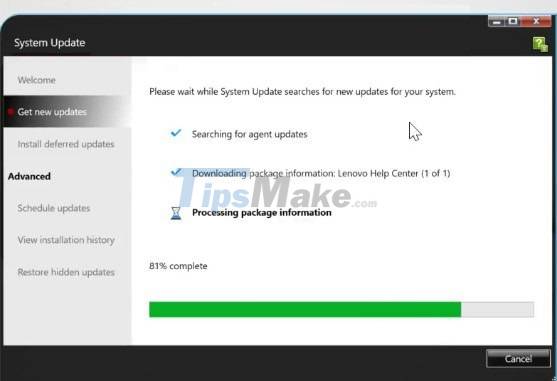
Step 3: At this point, System Update will scan your computer to see which device drivers are running and which drivers are old and need to be upgraded.
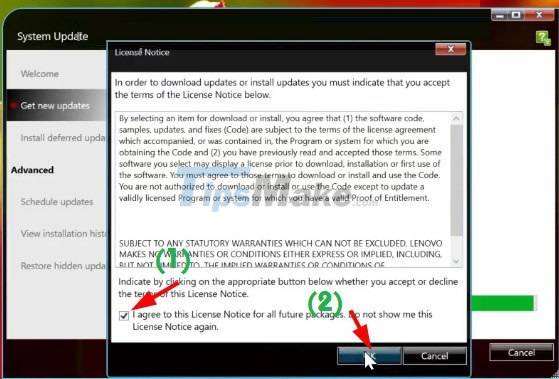
Step 4: Click I agree to this License. to agree to the terms of use => click OK to proceed.
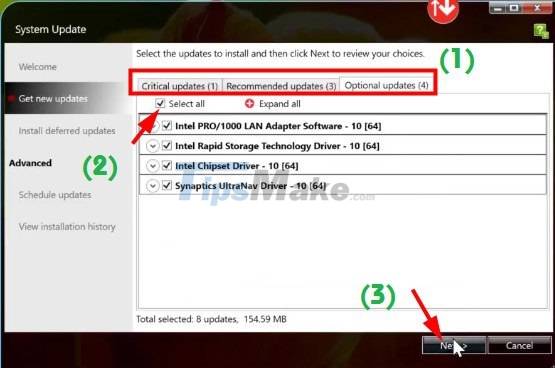
Step 5: There will be 3 tabs here and it will list out the missing drivers and the old drivers.
If you want to upgrade to all, select each tab and click Select All to select all => click Next to install.
Step 6: Click Download to let the software download the necessary Driver packages.

Yes, the download is in progress. Please sit back and wait for it to finish downloading.
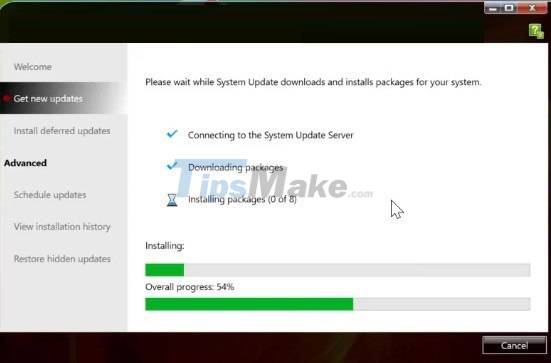
Step 7: After the download is complete, it will automatically install the driver package on your computer.
After the installation is complete, a message will appear asking you to restart your computer for the changes to take effect => click Yes to agree.

Step 8: Check if the computer has enough drivers. If not, you can run the software again and repeat the steps as instructed above. It is according to the manufacturer's recommendations!
4. Conclusion
So I have detailed instructions for you how to install drivers for Lenovo Thinkpad laptops with the Lenovo System Update tool.
With this approach, you can be assured of the computer's performance, it will always work properly with the actual performance of the machine. Hope the article will be useful to you, good luck!
Was this article helpful?
Your feedback helps us improve.
Related Articles
 Instructions to install driver for Lenovo Laptop by downloading from the homepage7 minutes read
 Lenovo ThinkPad T431s launched in April2 minutes read
 Lenovo ThinkPad Helix 2 with Core M Broadwell chip on the shelf2 minutes read
 Lenovo introduces new ThinkPad series, X1 Carbon gen 3, ThinkVision X24 and ThinkPad Stack4 minutes read
 Lenovo launches new ThinkPad X1 Xtreme with 'super speed' mode2 minutes read
 Review Lenovo ThinkPad X390: Excellent business laptop8 minutes read
Reader Comments 0
Sign in with email or Google to join the discussion.