Table of Contents
This practical guide explains how to Changing Folder Icons on Windows through clear, ordered steps. It also covers useful settings, common mistakes, and checks that can improve the final result.
You can approach change the interface of a folder with the familiar yellow folder icon, such as changing the color of the folder on Windows or changing the Windows folder icon through Folder Icon Changer, with any image you like. All you need to do is drag your image into the application window, then select the folder you want to customize. The following are instructions for changing the Windows folder icon.
How to Change Folder Icons on Windows
Step 1:
First, download the Folder Icon Changer application for Windows from the link below.
Step 2:
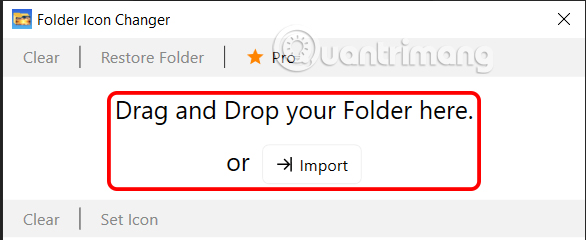
Display the interface of the Folder Icon Changer application, Click Import or drag and drop the folder you want to change the icon toThe Drag and Drop your Folder here Area.
Step 3:
Next, Click the Import button or Drag and drop the icon image for the folder into theDrag and Drop your Image here Area. Folder Icon Changer supports JPG, PNG, BMP, TIFF or ICO formats.

Step 4:
The result is you see the uploaded image and The message Done When changing the folder icon on Windows successfully. If you want to change to another image, click Import to change.

The folder on your computer will also be replaced with the image you selected as shown below. If you want to change the folder or icon image, click Clear and select again. If you want to restore the old icon, click Restore Folder

FAQ
How do I Changing Folder Icons on Windows?
Follow the steps in this guide in order, verify each setting before continuing, and check the result after every major change.
What should I prepare before I Changing Folder Icons on Windows?
Confirm compatibility, install current updates, save important work, and back up data before changing system or application settings.
What can I do if changing Folder Icons on Windows does not work?
Review permissions and requirements, restart the relevant device or app, repeat the steps carefully, and use official support resources when the issue continues.
Related Articles
 How to Block Themes from Changing Icons on Windows 11 Screen3 minutes read
 Prevent Changing Windows Theme: Complete Guide8 minutes read
 Instructions to Change Folder Color - Folder3 minutes read
 Looking Back at Icons in Windows: from Windows 1 to 119 minutes read
 How to Change Icons on Win 10 Screen5 minutes read
 Steps to Resize Application Icons on Windows 115 minutes read
Reader Comments 0
Sign in with email or Google to join the discussion.