Table of Contents
The n8n Form Trigger starts a workflow when someone submits a form created inside n8n. It is useful for simple request forms, approvals, intake workflows, and structured data collection without a separate form service.
Add the Form Trigger node
- Create a workflow and select Add first step.
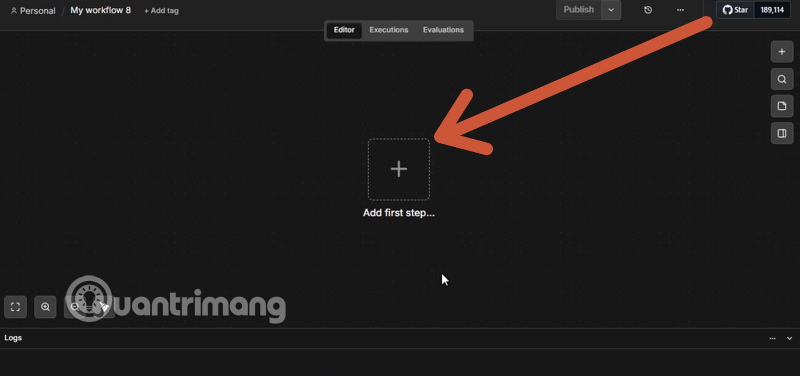
- Search for and select On form submission. This adds the Form Trigger node.
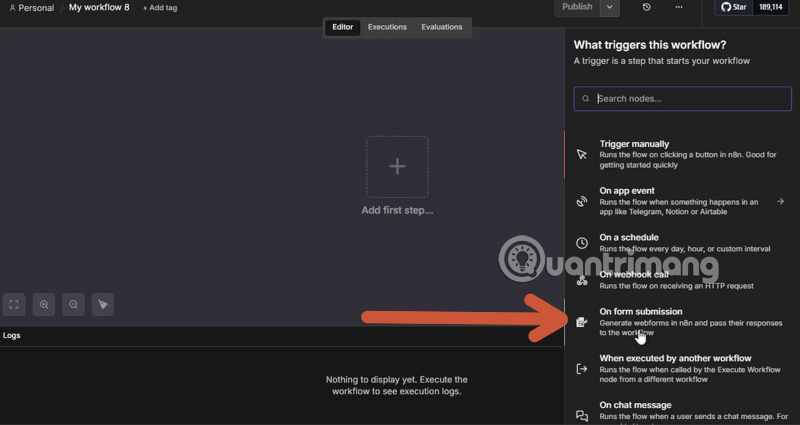
Configure the form
In the Parameters panel, first choose an authentication setting. Leaving authentication as None makes the form accessible to anyone who has its URL, so do not use that setting for sensitive or privileged requests.
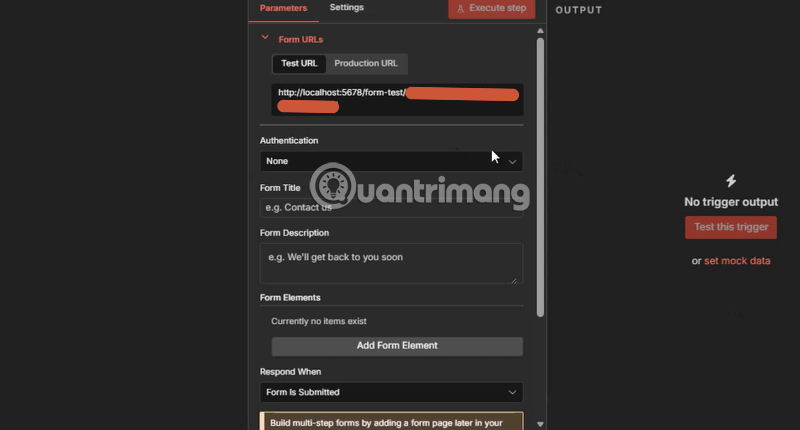
- Enter a short, descriptive Form Title.
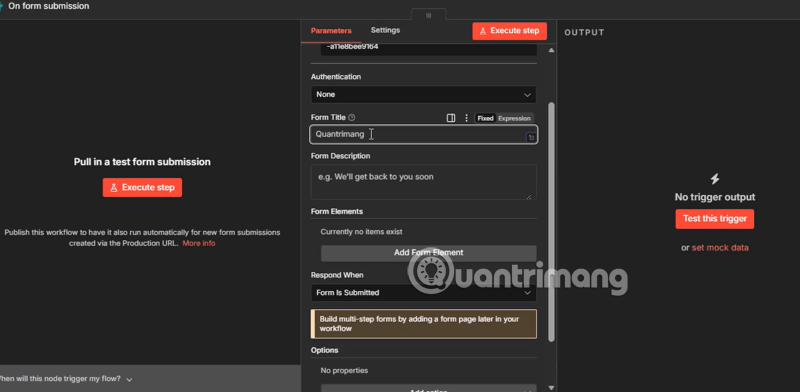
- Add a Form Description that tells people what to submit and how the data will be used.
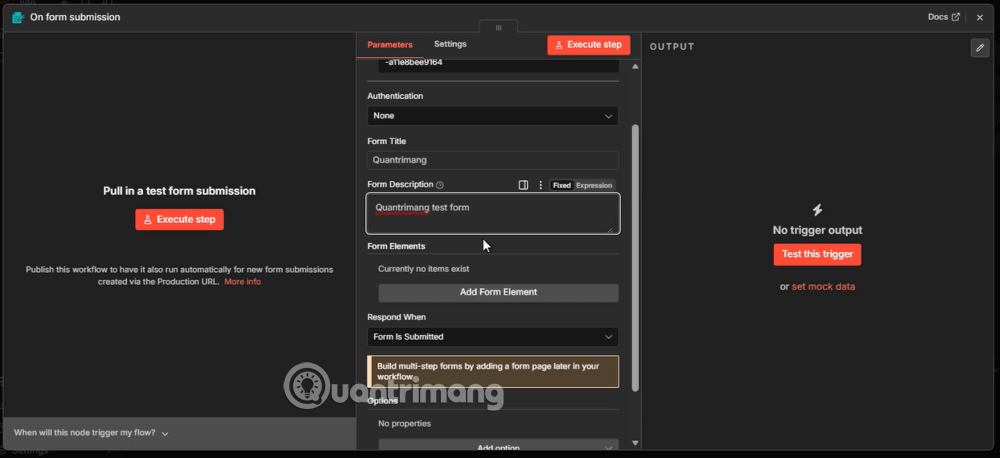
- Select Add Form Element, enter a label, and choose the appropriate element type, such as a text field, email, dropdown, date, checkbox, or supported file input.
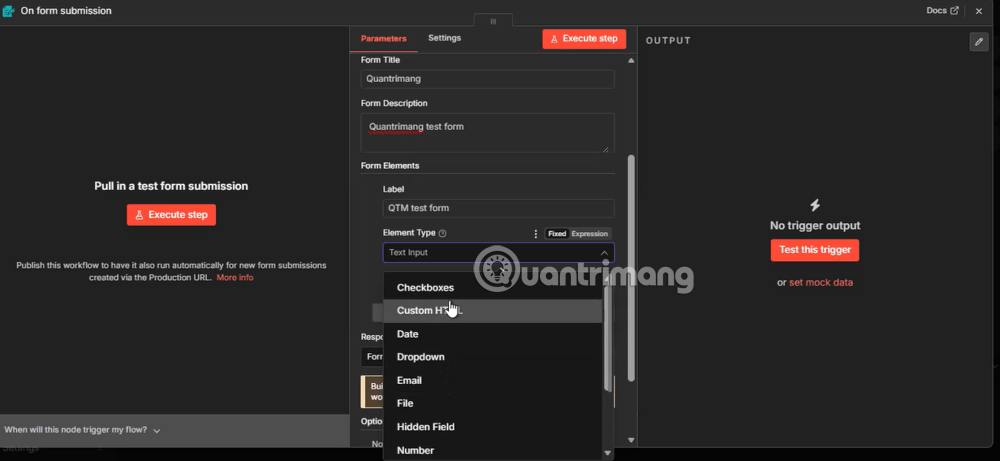
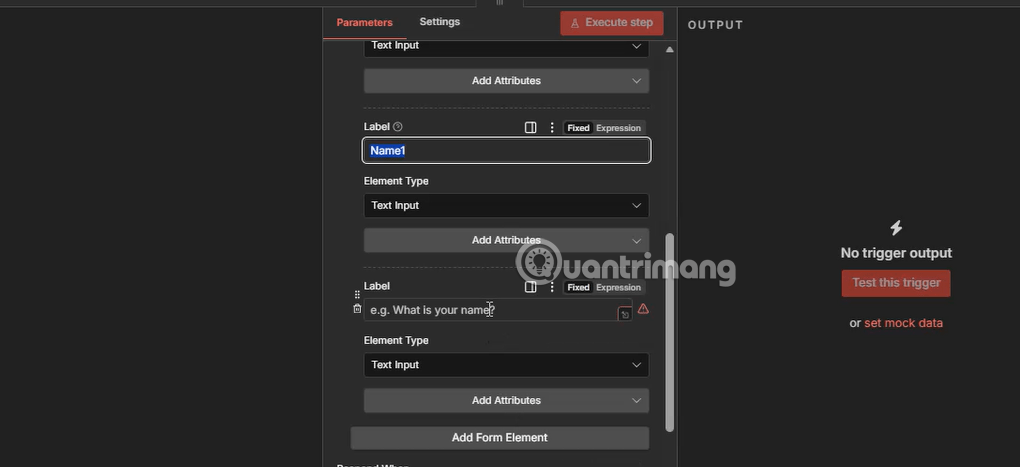
- Add the remaining fields. Use clear labels and collect only the information the workflow needs.
Test the form submission
n8n provides separate Test URL and Production URL values. Use the Test URL while building; it is intended for temporary testing while the node is listening for an event.
- Open the Test URL tab and copy the displayed address. A local installation may show a localhost address that only your machine can reach.
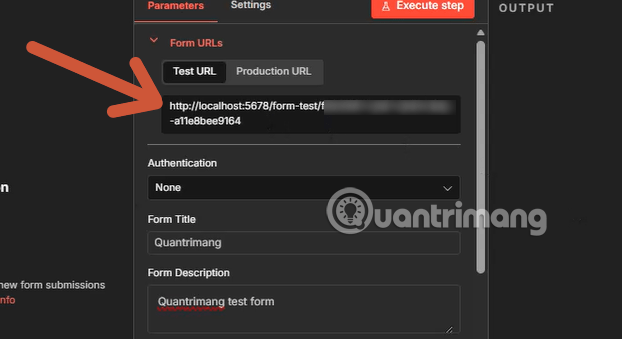
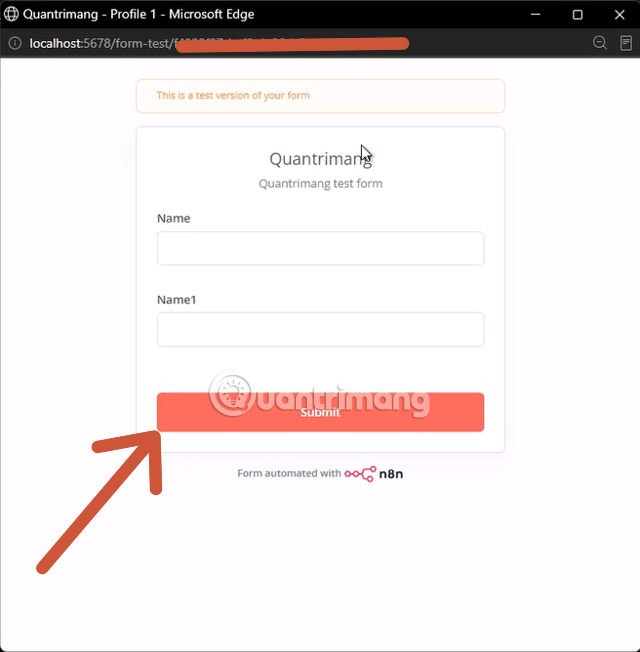
- Select Execute step or the current test-listening control, open the Test URL, complete the form with sample data, and submit it.
- Return to the node and inspect its output. Confirm the field names, values, and submission metadata before connecting downstream nodes.
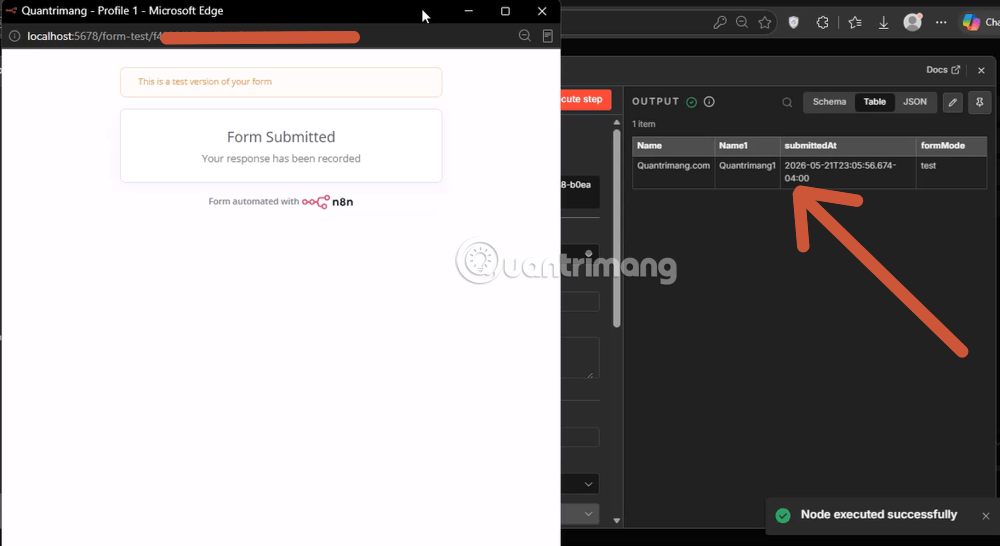
The output becomes input for the next node. You can map those fields into a database, spreadsheet, notification, approval branch, or another service.
Move from testing to production
- Connect and configure all downstream nodes.
- Run tests with valid, missing, and unexpected values.
- Choose suitable authentication and review who can access the form.
- Activate or publish the workflow, then distribute the Production URL, not the Test URL.
The Production URL receives submissions when the workflow is active. For current node options, consult the n8n Form Trigger documentation.
Practical safeguards
- Validate required fields and expected formats before performing consequential actions.
- Do not expose unauthenticated forms that can trigger payments, account changes, or confidential workflows.
- Treat uploaded files and free-text input as untrusted data.
- Add rate limiting or an upstream access control where abuse would be costly.
- Avoid placing credentials or sensitive values directly in form descriptions, URLs, or node fields.
When Form Trigger is a good fit
Use it for straightforward internal requests, lead intake, support routing, content submissions, or human approval steps. A dedicated form platform may be more suitable when you need extensive branding, complex survey logic, advanced analytics, or specialized compliance controls.
Related Articles
 The Essentials and Basic Uses of Apple's New Free App5 minutes read
 TOP AI Tools for Creating the Best Workflows6 minutes read
 TOP best n8n alternatives in 202618 minutes read
 API Trigger: Stripe Webhook for Email Composition3 minutes read
 Detailed Instructions on How to Use Webhook Trigger in N8n7 minutes read
 Build a Claude Dispatch Workflow on Your Mobile Device14 minutes read
Reader Comments 0
Sign in with email or Google to join the discussion.