In the time of exorbitant masks, current face masks will save a lot of costs. Let's refer to how to make a very simple fabric mask that TipsMake.com shares right away.
Instructions on how to make very simple cloth masks:
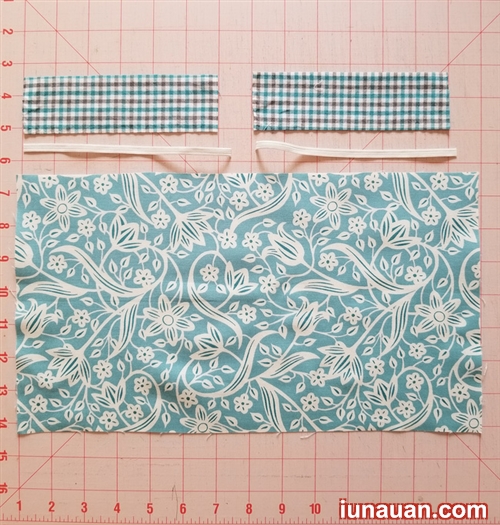
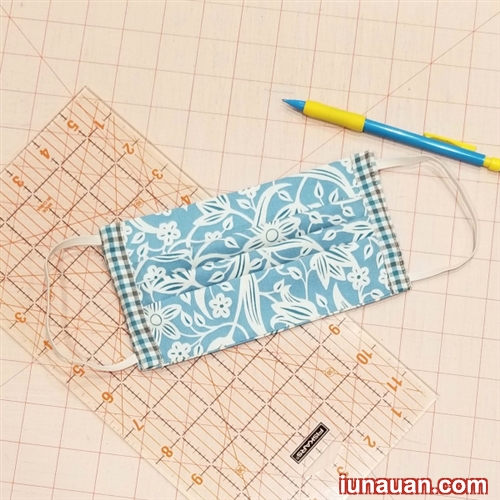
Materials to prepare:
- 1 piece of rectangular cotton fabric with size of 20x35cm as a face mask
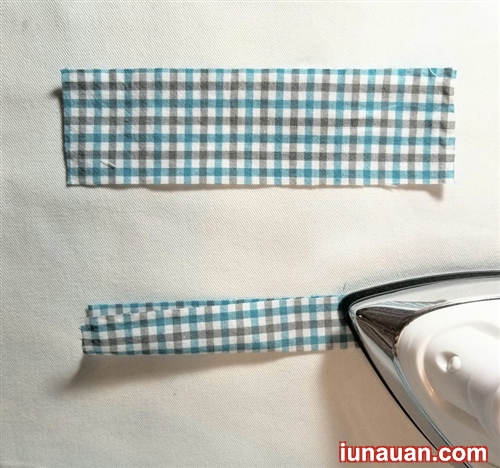
- 2 pieces of rectangular checkerboard fabric measuring 4.5x15cm for making cloth splint
- 2 elastic bands with a width of 0.6cm long and 16.5cm as a strap
- Tools: sewing machine, stapler, sewing needle, ruler, scissors, chalk.
Performance part:
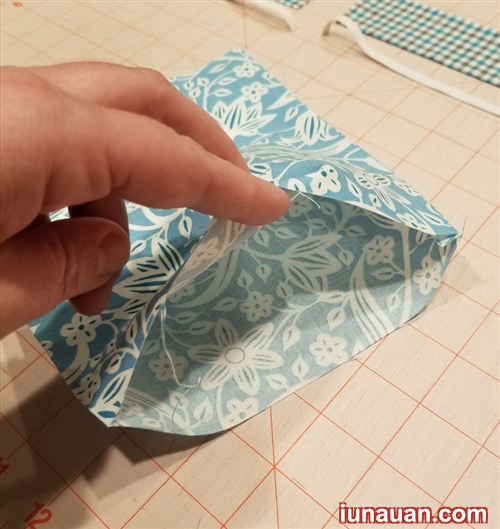
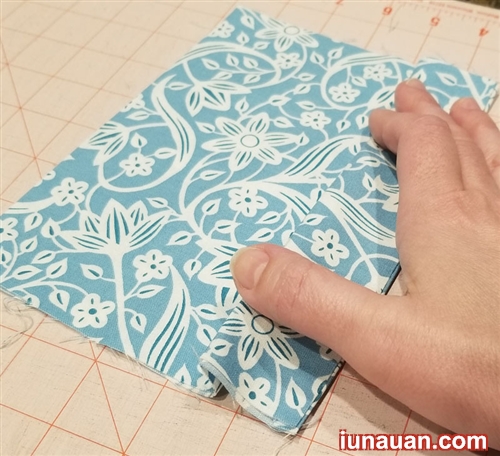
- Step 1: First, you fold the pattern fabric in length, the right side of the fabric inside, the two edges of the width coincide. Sewing thread along the edge length of 0.6cm from the edge of the fabric as shown below

- Step 2: You turn the right side of the cloth out, use a flat iron to remove the sticky cloth.
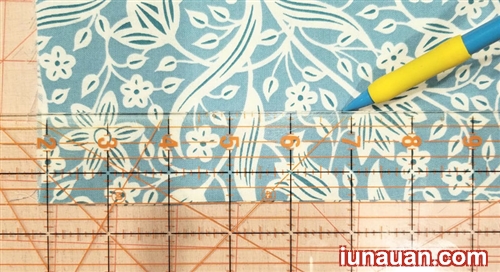
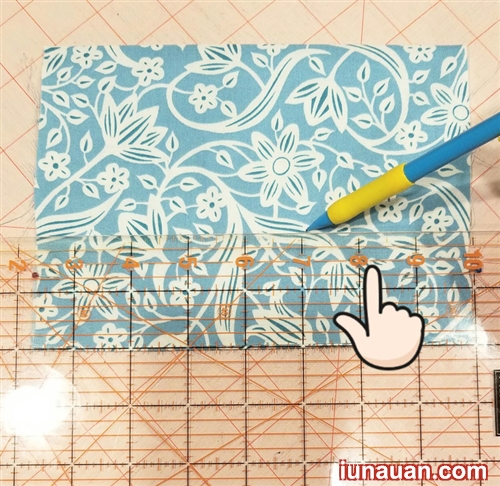
- Step 3: Next, you place the ruler parallel to the folds of the fabric a 3.75cm piece. Using a pencil or chalk, draw a straight line as a crease mark. Similarly, you set the ruler to draw the second parallel line 2.5cm from the first line.
- Step 4: Fold the fabric into the underside according to the first line.
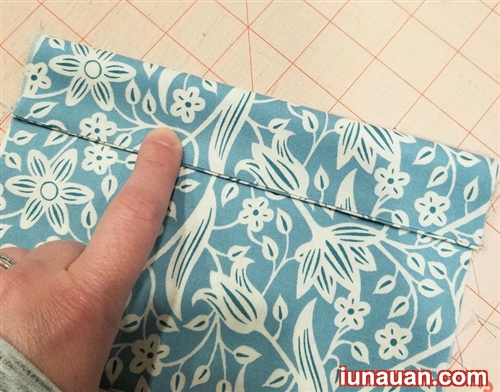
- Step 5: You flip the top of the fabric just folded, fold the first fold up so that the fold coincides with the second line to form the first floating fold. Use the pin to pin the fixed ends of the folds.
- Step 6: Next, draw the third line parallel to the first floating fold 1.2cm. And draw the 4th line parallel to the 3rd line is 2.5cm (at the same time parallel to the first fold 3.7cm).
- Step 7: Similar to step 5, you fold the third line as the second floating fold parallel to the first floating fold. And use the pin to fix the fold.
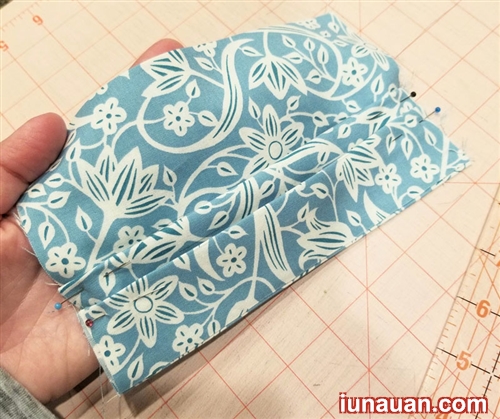
Then, you follow steps 6 and 7 of the 3rd floating fold, parallel 1.2cm away from the 2nd floating fold, fixed pin.

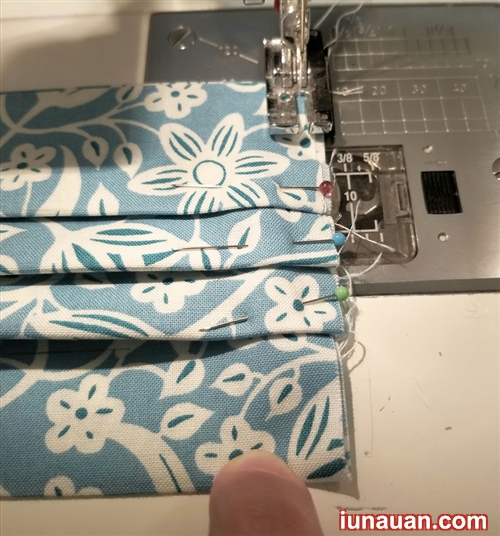
- Step 8: You sew a straight line to fix folds and 0.4cm from the edge of the fabric. Similarly, you sew a straight line to fix the end of the opposite fold.
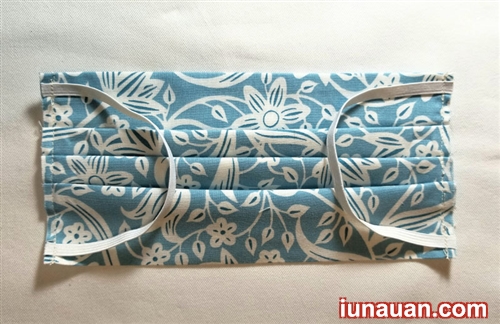
- Step 9: You put two elastic C-shaped elastic bands on both ends of the mask that has been sewn, so that the two ends of the rubber band coincide with the two edges of the fabric. Stitch fixed 4 elastic cord.
- Step 10: Fold the checkerboard sheet in width, right side of the outer fabric, use a flat iron to splint the fabric.
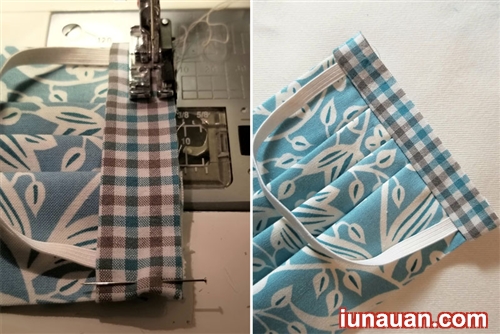
- Step 11: You put the cloth brace on the edge of the mask stitched 2 elastic bands, so that the two edges of the fabric overlap, fold the fabric inward direction. Fold both ends of the excess fabric brace into the back of the mask, pinning firmly.

- Step 12: You sew the line just 0.6cm from the edge of the fabric, then flip the cloth splint on top to be straight along the stitching line.
- Step 13: Turn the back of the page stitch, you fold the edge of the cloth brace inwards, fixed pins.
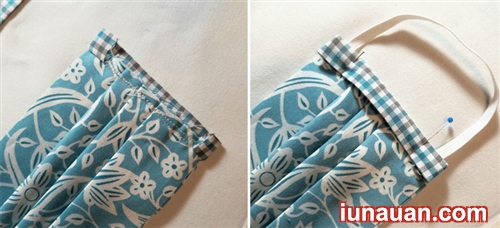
you sew 2 stitches to make sure. Similarly, you sew a canvas splint on the other end of the mask and you're done.
So our cute cloth mask has been completed, so fast and simple, isn't it? If you want to increase the thickness of the mask, you can sew additional lining on the inside. Wish you success!


 How to fold a paper crane, easy paper crane folding.
 Is Galaxy Z Fold 7 worthy of Samsung's foldable screen masterpiece?
 How to make a house model out of cardboard
 Will the Galaxy Fold 3 be an upgrade of the Galaxy Z Fold 7?
 How to Fold Your Laptop and Keep It Running on Windows 10
 3 mistakes that can damage the Samsung S Pen