How to roll back to Windows 11 23H2 update
If after updating Windows 11 24H2, your computer may not have enough configuration to use the new features, causing some lag, you can go back to Windows 11 23H2 update.
Table of Contents
Microsoft has released the 24H2 update for Windows 11, with many improvements and some new features. However, after updating Windows 11 24H2, your computer may not have enough configuration to use the new features, causing some dots, or you are not satisfied with the new features. If so, you can go back to the Windows 11 23H2 update.
Instructions to roll back to Windows 11 23H2 update
It is important to back up all important files, accounts, and login information before proceeding.
Restoring the system software requires booting and installing the previous version from a USB or external drive. To find the ISO for Windows 11 23H2, click the link below.
- Download Windows 11 23H2 ISO
Next, you need to create a bootable USB or DVD (if you have a drive). You can do this through the Diskpart program or the PowerShell utility, with scripts that can be found on the Microsoft website at the link below.
- Create installation USB or DVD
Finally, restart your computer and press the required key (F2, F11, F12 or Del) to enter BIOS and boot from USB or DVD. Select your USB and BIOS will boot and reinstall 23H2 into your computer.
Back to Windows 11 23H2 in 10 days
Microsoft allows Windows users to roll back to the previous version within 10 days.
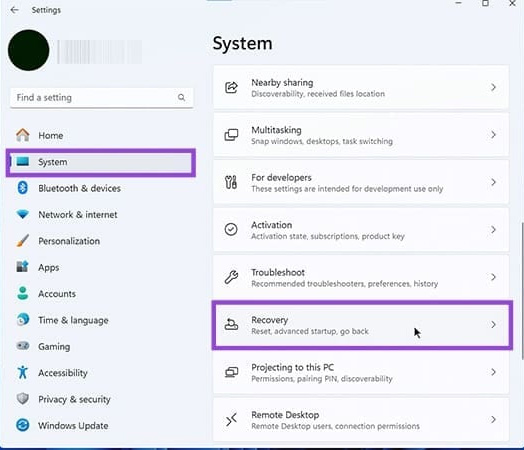
Step 1:
Press Windows + I to open Settings , then select System , then look to the side and click Recovery in the content next to it.
Step 2:
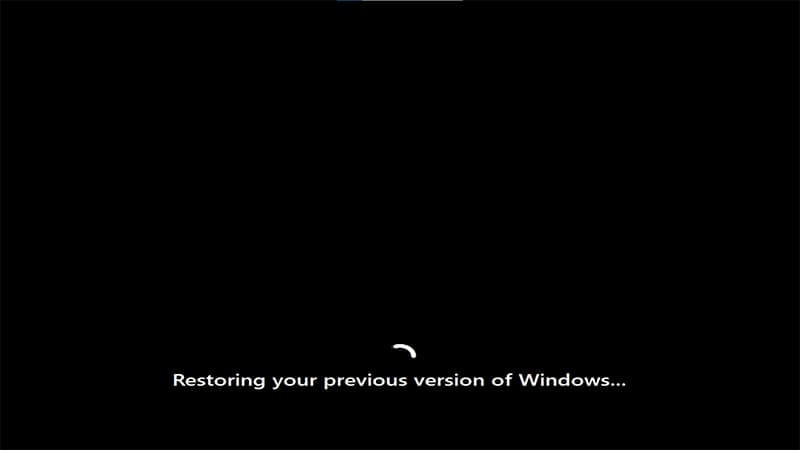
Switch to the new interface, click Go Back to return to the most recent software version, which can be Windows 10 or 23H2. Then enter the reason for wanting to return to the previous version. Confirm your choice one last time and the restore process will begin.
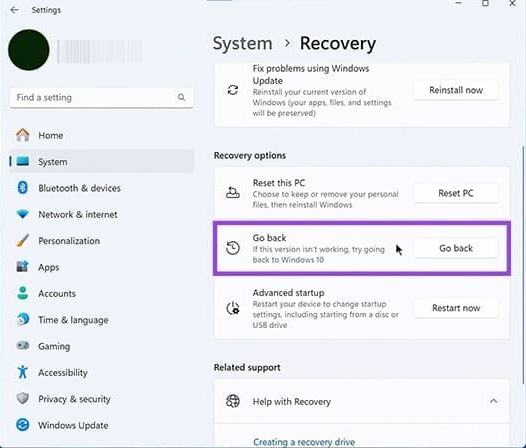
Be careful not to turn off the machine or interrupt the process during this time.
Was this article helpful?
Your feedback helps us improve.
Related Articles
 Ghost Windows 11 23H2 NoSoft and Full Soft, Update November 20232 minutes read
 File Explorer could be the reason you don't want to upgrade to Windows 11 23H23 minutes read
 Download Ghost Windows 11 23H2 update 20242 minutes read
 Microsoft is about to stop supporting Windows 11 version 23H2 (Sun Valley 3)2 minutes read
 How to roll back Windows 11 updates2 minutes read
 The first information about Windows 11 23H2 (Sun Valley 3) appeared2 minutes read
Reader Comments 0
Sign in with email or Google to join the discussion.