How to Live Stream Minecraft on Facebook Using OBS
Do you love Minecraft and want to share your gaming experience with your friends on Facebook? Live streaming is a great way to connect with your community, attract viewers, and interact with other gamers. In this article, let's learn how to live stream Minecraft on Facebook using OBS Studio - free, easy-to-use software optimized for live streaming games.
Learn how to live stream Minecraft on Facebook using OBS Studio. Step-by-step instructions from installing the software to setting up your live streaming configuration.
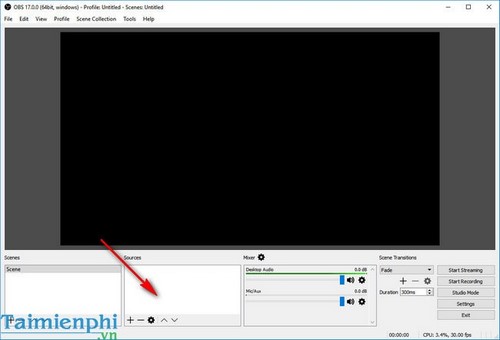
Step 1: At the main interface of OBS. Right-click on the blank space in the Sources box.
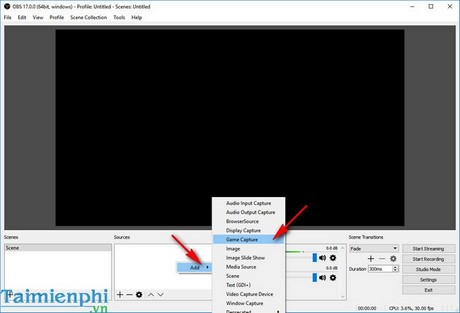
Step 2: The Add tab (add appears) hover over the Add tab and select Game Capture .
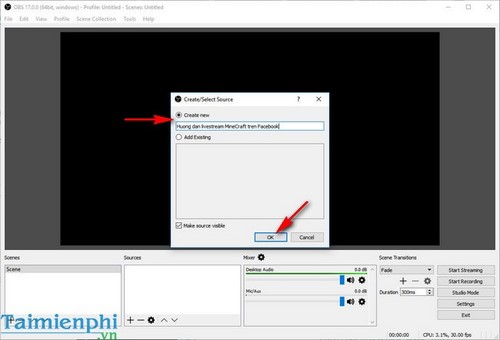
Step 3: On the Creat/Select Source dialog box , select Creat New and name the new source, then click OK.
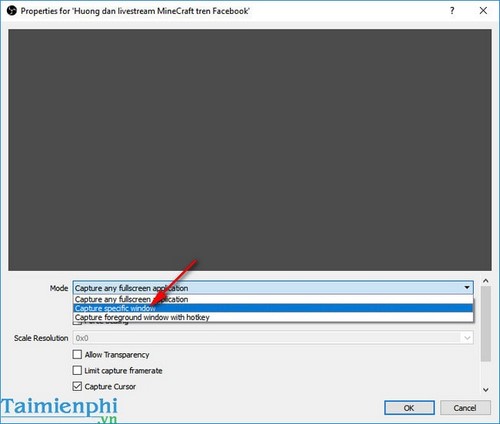
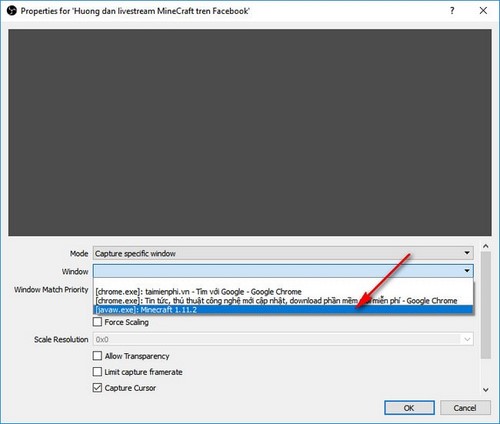
Step 4: After creating a new card, the Properties window of the source you just created will appear. In the Mode option, select Capture specific window, the tool will filter out for you the windows that are currently active on the computer.
Step 5: Continue in the Window option , select the window of [javaw.exe]: MineCraft 1.11.2 to get the live stream window, then press OK.
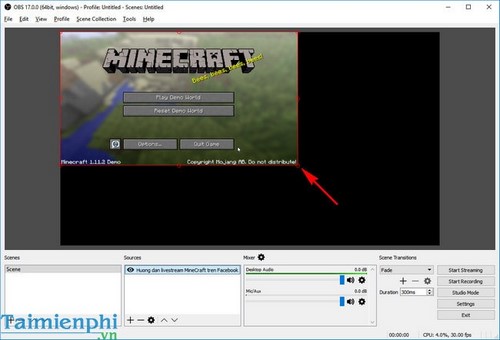
Step 6: Use the mouse to drag the screen to fill the screen.
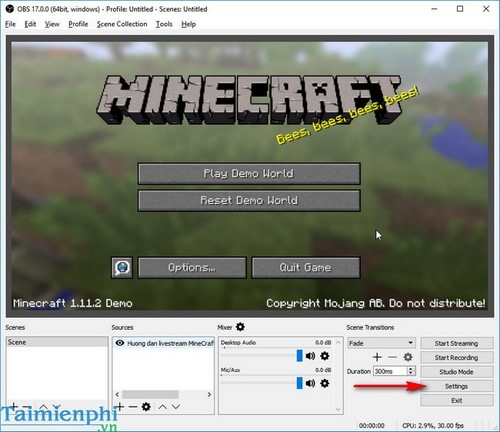
Step 7: Select Settings .
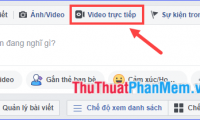
Step 8: Temporarily leave the OBS Settings window there, click CREATE LIVE VIDEO ON FACEBOOK below to start live on Facebook.
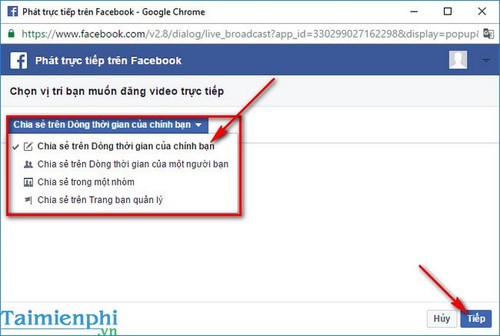
Step 9: Then a small Facebook notification board will appear. You can choose to broadcast the video to friends, to a group, or to a page you are managing,. After selecting, click Next.
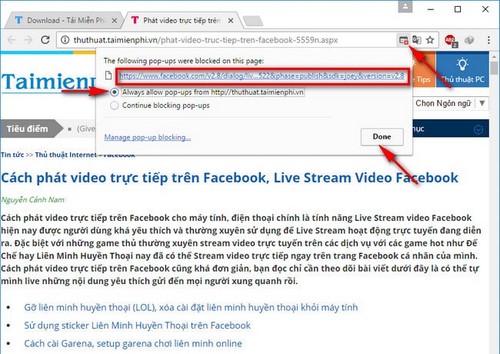
Step 10: In case no notification panel appears, check the icon on the browser's address bar because the notification may be blocked. Click on the icon on the right corner of the browser bar, select Always allow pop-ups, and click on the link in that notification and Done.
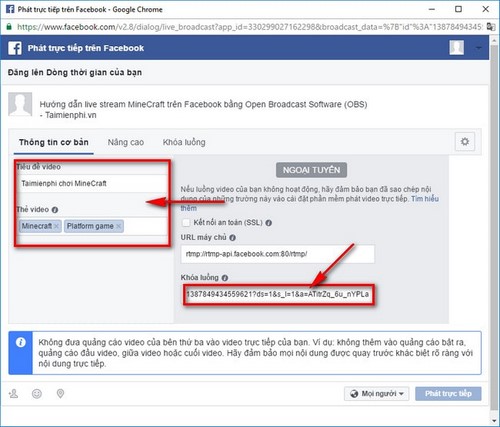
Step 11: In this step, you need to fill in the live video content (like status), Live video title, tags and you are given 2 addresses: Server URL and Stream Key which gives you the link from OBS to your Facebook to live stream MineCraft to Facebook. Copy the entire address in the Stream Key box.
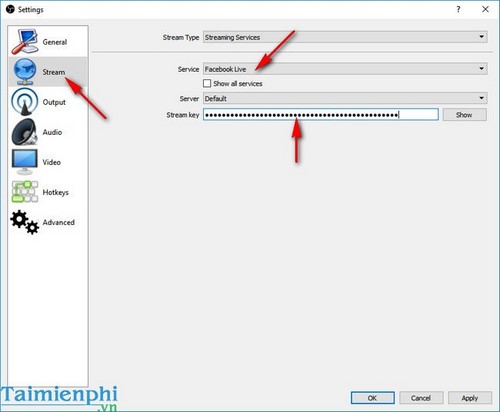
Step 12: Don't close the Facebook window yet, go back to OBS, switch to the Stream tab , change the Services section to Facebook and paste all the content you just copied in the stream key tab into the Stream key box . Then click OK.
Step 13: Return to the OBS main screen, click Start Streaming.

Step 14: Click Go Live to live stream MineCraft on Facebook publicly so everyone can watch your live video.
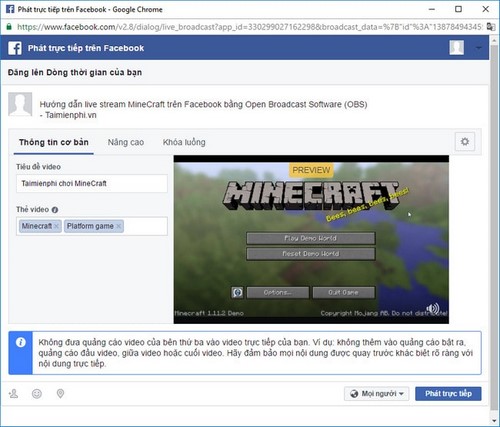
Step 15: You will see a live video stream appear on your Facebook, people can comment and express their feelings about your live video.

You already know how to live stream Minecraft on Facebook using OBS Studio, making it easy to share your gaming experience with the community. If you want to improve the quality of your Facebook live stream, you can optimize OBS settings for smoother images.
Was this article helpful?
Your feedback helps us improve.
Related Articles
 How to fix common errors when live streaming Facebook with OBS5 minutes read
 How to live stream Facebook with OBS Studio software7 minutes read
 This is how Live Stream Facebook Video on PC, Fanpage15 minutes read
 How to turn off Live Stream notifications on Facebook3 minutes read
 What is Live Stream? How to Live Stream on Facebook and YouTube7 minutes read
 Instructions for setting up Live Stream feature Facebook videos on mobile and tablet8 minutes read
Reader Comments 0
Sign in with email or Google to join the discussion.