Table of Contents
This practical guide walks through how to left align the Windows 11 taskbar icon, explains the main requirements, and highlights common issues that may appear along the way.
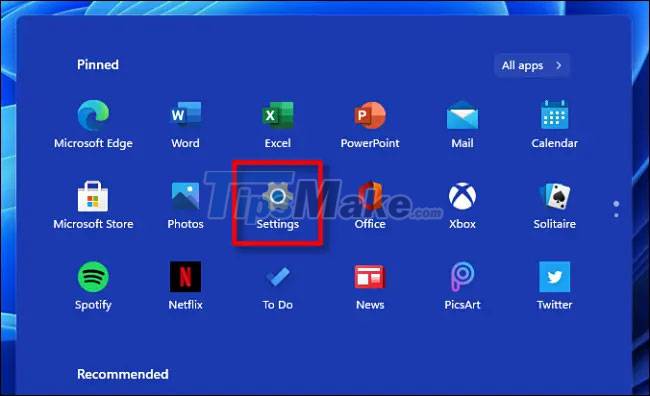
First, open the Settings app by pressing the Windows + i key combination. Or you can also click on the Start menu and select the 'Settings' gear icon, which is pinned at the top of the menu by default.
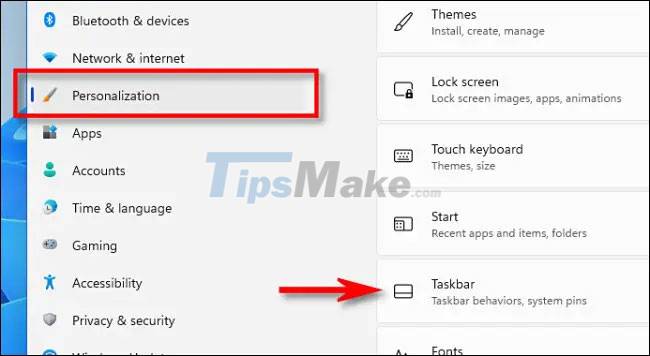
In the Settings window that opens, click the 'Personalization' item in the side list, then select 'Taskbar'.
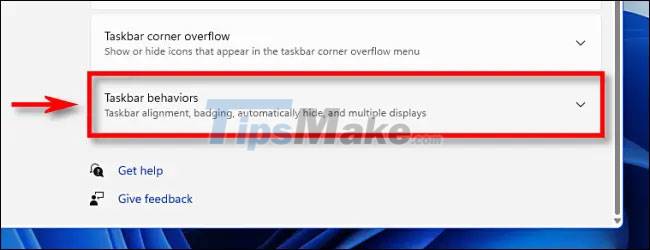
In the taskbar settings screen, click 'Taskbar Behaviors'.
A list of options will appear. Click on the drop-down menu next to 'Taskbar Alignment'.

In the 'Taskbar Alignment' pop-up menu, select the 'Left' option.

Immediately, your taskbar icons will be aligned to the left side of the screen as usual.

You can now close Settings and experience the change you just made. In case you change your mind and want to center the taskbar icons as default, go back to Settings > Personalization > Taskbar, then set the 'Taskbar Alignment' option to 'Center'.
Note that this is basically just an option to change the position of icons on the taskbar. Windows 11 currently does not support the ability to change the position of the entire taskbar like on previous versions of Windows.
Key Takeaways
Use the information above as a practical reference for how to left align the Windows 11 taskbar icon. Review each step carefully, confirm any requirements, and choose the option that best fits your situation.
FAQ
What does this guide explain about Left Align the Windows 11 Taskbar Icon?
It explains the main concepts, practical considerations, and useful steps related to left align the Windows 11 taskbar icon without requiring advanced knowledge.
Who can benefit from learning about Left Align the Windows 11 Taskbar Icon?
This information is useful for readers who want a clear overview, practical guidance, and reliable steps related to left align the Windows 11 taskbar icon.
What should I check before applying this information?
Review the requirements, confirm that your device, software, or situation matches the instructions, and back up important data before making major changes.
Related Articles
 How to Pin the App to the Taskbar to Open It Faster4 minutes read
 Steps to Recover Lost Taskbar Icon on Windows 106 minutes read
 How to Remove the 'Chat' Icon on the Windows 11 Taskbar3 minutes read
 How to Fix Icon Loss, Icon Error on Taskbar Windows 76 minutes read
 How to Center Taskbar Icons in Windows 10: Center Icon Taskbar 104 minutes read
 Wi-Fi Icon Missing on the Taskbar Windows 10, This Is How to Fix4 minutes read
Reader Comments 0
Sign in with email or Google to join the discussion.