How to install Windows XP Service Pack 3 (SP3) easily and quickly.
The Windows XP SP3 update not only provides better security but also improves system performance. Free Download will guide you step-by-step, from preparing a bootable USB to completing the installation, ensuring you succeed on your first try.
Table of Contents
How to install Windows XP SP3
- Preparation:
+ Windows XP SP 3 installation disc (You can buy one from a store or download it online),
+ CD/DVD ROM drive (if you don't have one, you can refer to the article on installing Windows XP from a USB drive).
Step 1 : Configure the BIOS to boot from the CD/DVD-ROM drive, then insert the Windows XP SP3 installation disc into the CD/DVD-ROM drive and wait until theblue Windows Setup screen appears.
First of all, because there are many different computer and laptop models with different ways to access the BIOS, readers need to find out how to access the BIOS specifically for their computer model. Remember that accessing the BIOS on a laptop is the most important step in installing Windows XP, as well as many other versions of Windows later on.
First, readers have the option to adjust the boot settings in the BIOS to prioritize booting from a USB or DVD/CD drive during Windows installation. This is very simple; just follow the instructions in the article on adjusting the BIOS boot settings so the system recognizes the USB or DVD/CD drive when installing Windows.

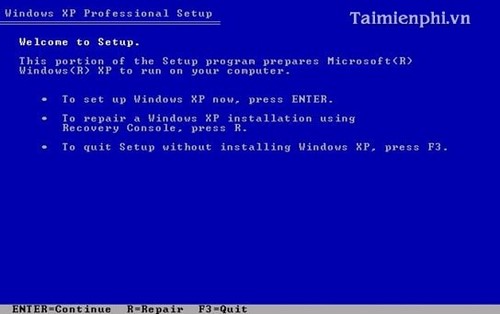
Step 2 : Here you will have 3 options to choose from.
- To set up Windows XP now, press ENTER: Install Windows XP now, press Enter
To repair a Windows XP installation using the Recovery Console, press R: To repair a faulty Windows XP system, press R
To quit Setup without installing Windows XP, press F3: To exit the setup window, press F3.
Here we are performing a fresh installation of the operating system, so press Enter to proceed to the next step.
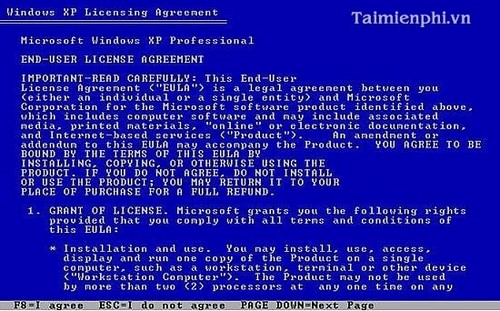
Step 3 : Here, press 'F8' to confirm and proceed to the next step.
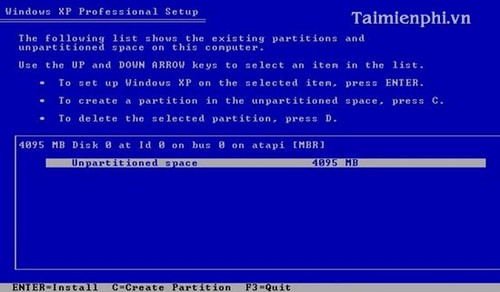
Step 4 : Press Enter hereto install (If your computer has two or more hard drives, the program will give you the option to scrape the partition and install to whichever drive you want).
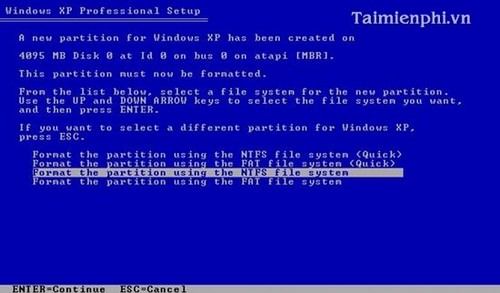
Step 5 : After selecting the hard drive for installation, the program will give you options to reformat the operating system installation partition. You should choose NTFS format and press Enter to begin formatting.
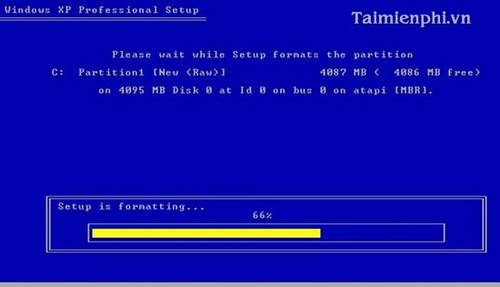
Step 6 : This section displays the partition formatting process.
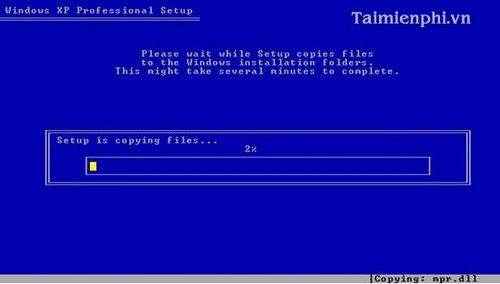
Step 7 : After formatting is complete, copy the files from the CD to your computer.
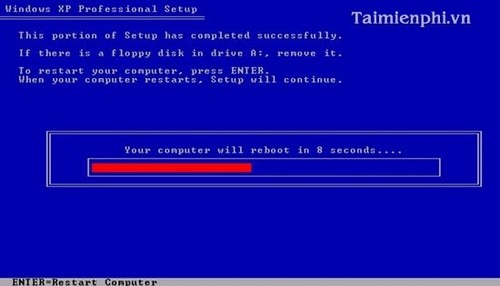
Step 8 : After the copying is complete, the computer will restart after 10 seconds, or press Enter to restart immediately.
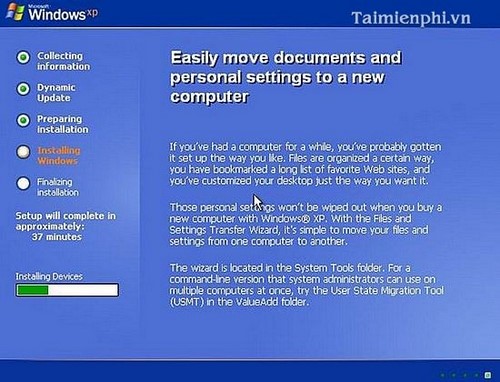
Step 9 : Wait for the next step.
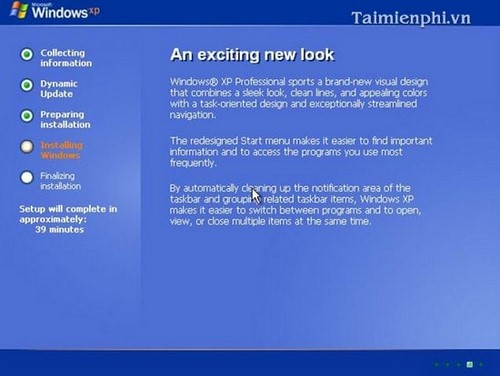
Step 10 : Wait until the next step.
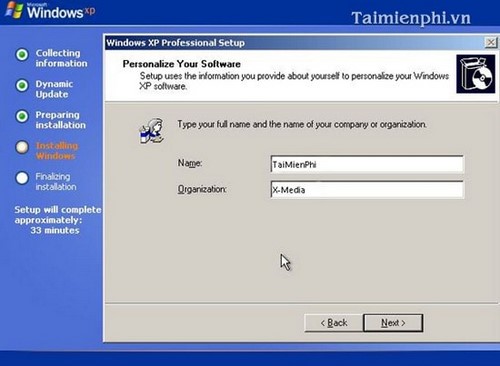
Step 11 : Here, enter your name and organization's name in the Name and Organization fields.
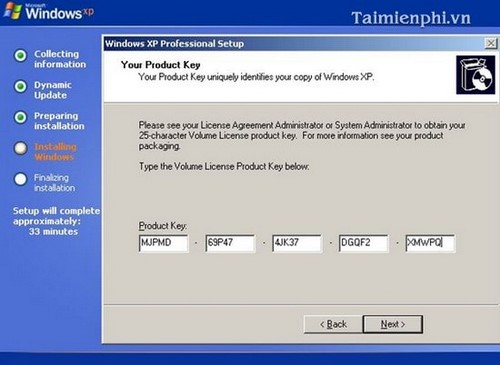
Step 12 : Enter the CD Key that came with the CD into the fields below.
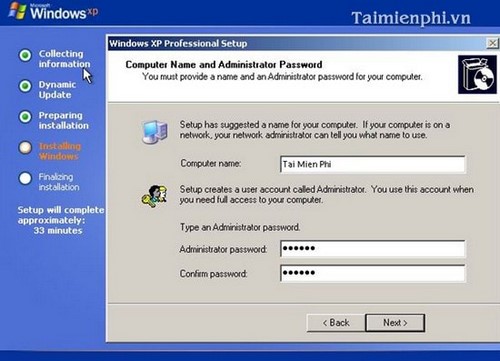
Step 13 : Enter the computer name in the Computer Name field and the Administrator password.
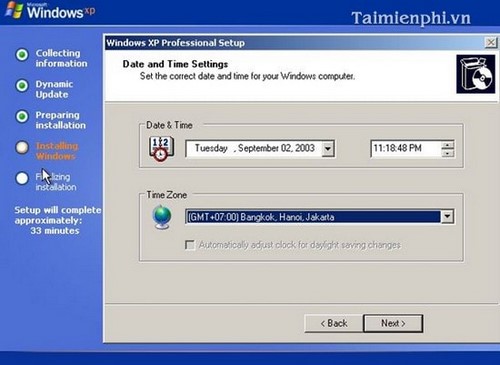
Step 14 : Adjust the date, time, and time zone.
Step 15 : Press 'OK' to proceed to the next step.
Step 16 : Press 'OK'
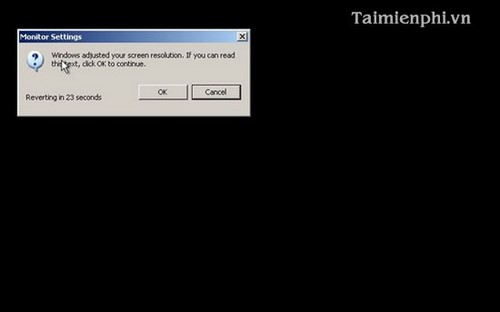
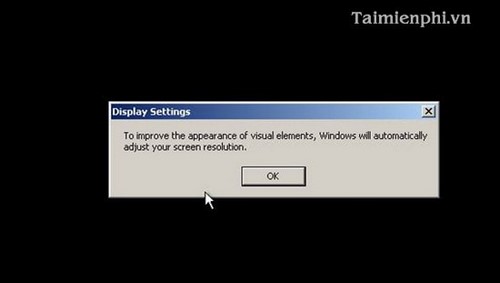
Step 17 : Wait until the system finishes booting up.
Step 18 : Press 'Next' to continue.

Step 19 : Enter your name in the " Your Name" field.
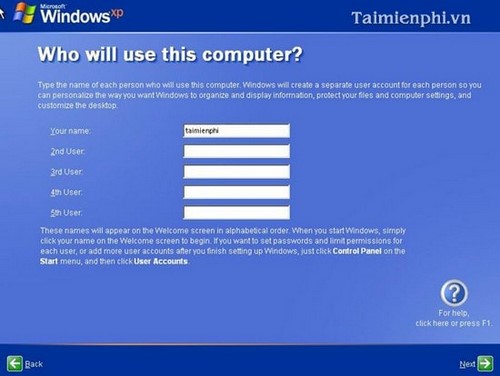
Step 20 : Press 'Next' to finish, and you're done.
Installing Windows XP SP3 makes the system more stable, provides better driver support, and is safer for long-term use. If you're unfamiliar with the process, you can refer to the guide on how to install Windows XP using a USB drive on Tai Mien Phi for easier implementation.
Was this article helpful?
Your feedback helps us improve.
Related Articles
 Install & Uninstall Service Pack 1 on Windows 77 minutes read
 Install Windows XP Service Pack 3 (SP3)6 minutes read
 Overview of Windows XP Service Pack 311 minutes read
 Windows 7 will automatically install Service Pack 1 on March 202 minutes read
 Error handling cannot install updates and program settings20 minutes read
 How to Repair Wi Fi Connection After Windows Service Pack 2 Upgrade1 minutes read
Reader Comments 0
Sign in with email or Google to join the discussion.